Can’t Match Floor Tiles? Don’t Panic! Your Fail-Proof Plan
It’s a moment every homeowner dreads. A heavy pot slips, a piece of furniture is dragged, or a plumbing issue arises, and suddenly you have a cracked, chipped, or missing floor tile. The initial repair seems simple, until you discover the cold, hard truth: your original floor tiles are nowhere to be found.
This frustrating scenario is incredibly common. Tiles are produced in batches, or “dye lots,” and even a slight variation can be noticeable. More often, the style you installed just a few years ago is now discontinued, leaving you in a design dilemma that feels impossible to solve.
But a mismatched tile doesn’t have to mean a design disaster or a full-floor replacement. By shifting your perspective from finding an exact match to creating a deliberate design choice, you can turn a problem into a stunning, intentional feature. This guide will walk you through every option, from clever concealment to bold, beautiful transitions.
You'll Learn About
Why Finding an Exact Match Is So Difficult
Before diving into solutions, it’s helpful to understand why this problem is so pervasive. Tile manufacturing is a complex process, and several factors make it nearly impossible to find a perfect match for older tiles.
Key reasons include discontinued product lines, variations in color and texture between different production batches (dye lots), and subtle changes in sizing standards over the years. Even if you find a tile with the same name, it may not be a perfect replica of the one on your floor.
The First Step: An Exhaustive Search
While the odds may be slim, a thorough search is always the best starting point. Carefully remove a broken piece or a whole tile from an inconspicuous area, like inside a closet or under an appliance. Clean it up and take clear photos in natural light.
With your sample and photos, check with specialty tile retailers, search online replacement tile websites, and post on home improvement forums. You might get lucky and find a contractor or homeowner with leftover stock from a previous job. But if this search turns up empty, it’s time to embrace creative solutions.
Strategy 1: Create a Deliberate, Decorative Accent
The most elegant solution for a mismatched tile is to stop trying to hide it. Instead, make the new tile a purposeful and attractive feature. This approach turns an accident into a custom design element that looks like it was planned from the very beginning.
Think of it as adding a piece of jewelry to your floor. The goal is to make the replacement area so visually interesting that no one would ever suspect it was a repair. This method works especially well for a single damaged tile or a small, contained area.
The Mosaic Medallion
One of the most effective techniques is to remove the damaged tile and several surrounding ones to create a square or rectangular patch. In this space, install a beautiful mosaic pattern. You can buy pre-designed mosaic sheets that are easy to install.
Choose a mosaic that picks up on colors from the existing floor tile and other elements in the room, such as your wall color or cabinet finishes. This creates a cohesive look and makes the medallion feel like an integral part of your home’s design.
The “Tile Rug” Illusion
For larger areas of damage, such as a patch where a wall was removed, you can create a “tile rug.” This involves framing a section of the floor with a border of new tiles and filling the inside with a complementary pattern or color. This works exceptionally well under a dining table, in an entryway, or to define a kitchen workspace.
You can use a bold, patterned tile for the interior of the “rug” and a simple, solid-colored tile for the border. The key is to make it look like a distinct, planned zone. If you need help choosing a durable and stylish tile for this, exploring different options like those in these porcelain tile reviews can provide some great ideas.
Strategy 2: The Art of the Transition
When you need to replace a larger section of flooring or bridge a gap between rooms, a graceful transition is your best friend. Instead of an abrupt change, a transition strip or border creates a visual bridge that helps the two different floors coexist peacefully.
This is far superior to simply laying a different tile next to the old one with a standard grout line. A well-executed transition signals a deliberate design choice and prevents the new floor from looking like a mistake.
Decorative Borders and Thresholds
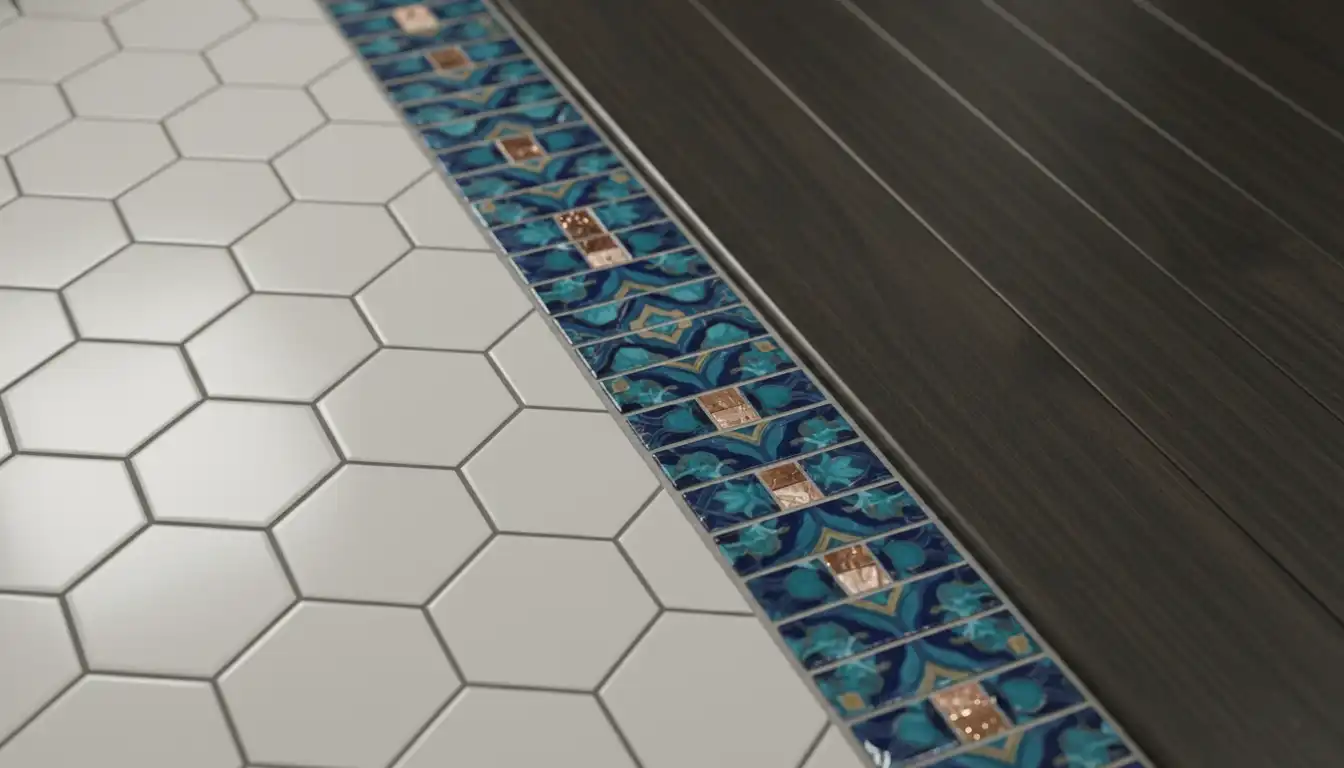
A classic solution is to use a decorative border to separate the old tile from the new. This can be a single row of small, contrasting tiles or a more intricate mosaic pattern. The border acts as a frame, cleanly defining the two different areas.
At doorways, instead of a simple metal strip, consider creating a tile threshold. A handsome row of marble, slate, or a bold patterned tile can create a beautiful and intentional divide between, for example, a tiled kitchen and a hardwood hallway.
The River of Stone
For a more organic and modern look, consider a “river” of pebbles or small, smooth stones to transition between two types of flooring. This involves creating a meandering or straight channel between the two floors and filling it with flat river rocks set in mortar.
This technique adds a unique, textural element and works wonderfully in homes with a natural or spa-like aesthetic. It’s a fantastic way to handle awkward angles or uneven transitions between different flooring materials.
Strategy 3: Embrace the Contrast with a New Zone
Sometimes, the best approach is to stop thinking about matching or blending altogether. Instead, lean into the difference by creating a distinct and separate zone with a completely new tile. This method works well in open-concept spaces where you want to define different functional areas.
The trick is to select a new tile that doesn’t try to imitate the old one. Choose a tile that is unapologetically different in color, shape, or pattern. A near-miss often looks worse than a bold, intentional contrast.
Defining Functional Spaces
For instance, if your kitchen and dining area share one continuous tiled floor and you have damage in the kitchen, replace the entire kitchen section. You might choose a durable, practical tile in a solid charcoal gray or a classic black-and-white checkerboard pattern. This not only solves the repair issue but also visually separates the cooking workspace from the dining area.
Similarly, in a large bathroom, you could use a different tile for the shower area and vanity space. This can add depth and character to the room, making it feel more like a custom-designed space. This is also a good time to consider functional upgrades, like installing a toe kick heater under the vanity for added comfort on chilly mornings.
Strategy 4: The Subtle Art of Blending
If creating a bold feature isn’t your style, you can try to blend a new, similar tile with the old one. This is trickier to pull off but can be successful if done thoughtfully. The goal is to minimize the visual disruption by choosing a tile that shares key characteristics with the original.
Focus on finding a tile that matches the primary color tone and finish (matte or glossy) of your existing floor. Don’t worry as much about matching the subtle pattern or texture perfectly. A tile that is the same size and color family will often blend in more successfully than one that tries and fails to replicate an intricate pattern.
| Solution Type | Best For | Design Approach | Key Advantage |
|---|---|---|---|
| Decorative Accent | Single or few broken tiles | Create a mosaic or patterned feature | Turns a repair into a custom design element |
| Transition Strip/Border | Joining two different floor areas | Use a contrasting border or threshold | Clearly defines spaces and looks intentional |
| Zoning with Contrast | Larger damaged sections | Replace an entire functional area (e.g., kitchen) | Creates a bold, modern look and defines space |
| Subtle Blending | Repairing sections on a budget | Find a tile of similar color, size, and finish | A cost-effective way to make a less noticeable repair |
| Full Floor Replacement | Widespread damage or outdated floors | Install entirely new flooring | Provides a completely fresh, unified look |
The Grout Factor
Never underestimate the power of grout. The color of your grout can either highlight or hide the differences between old and new tiles. If you are trying to blend tiles, using a grout color that closely matches the tiles themselves can help blur the lines between them.
Conversely, if you are creating a deliberate pattern with contrasting tiles, a grout color that pops (like a dark gray against white tiles) can enhance the design and make it look even more intentional. When selecting materials, consider how they will interact; for instance, think about how your flooring will pair with a granite backsplash to ensure a harmonious design throughout the space.
The Last Resort: When to Replace the Whole Floor
While the strategies above can solve most mismatched tile problems, there are times when a full replacement is the best option. If the damage is extensive, the existing floor is in poor condition, or the tiles are simply too outdated for your taste, starting fresh might be the most sensible long-term investment.
Replacing the entire floor gives you complete design freedom and ensures a perfectly cohesive look. It eliminates the worry of future repairs and allows you to upgrade to a more durable, modern material that better suits your lifestyle and aesthetic.