Auger Bit for 4×4 Post: Don’t Dig Before You Read This!
Starting a new fence or deck project begins with a simple but critical step: digging the post holes. Get it right, and you have a stable, long-lasting structure. Get it wrong, and you’re facing wobbly posts, wasted concrete, and a foundation that could fail years sooner than it should.
The single most important decision at this stage is choosing the correct size auger bit. This choice seems straightforward, but it’s a common stumbling block that can compromise the entire project from the ground up. An improperly sized hole is the foundation for future problems.
You'll Learn About
Why the Right Auger Bit Size Is Non-Negotiable
The stability of your fence or deck depends entirely on how securely the posts are anchored in the ground. The auger bit determines the diameter of the hole, which dictates how much concrete can surround and support the post. This concrete “collar” is essential for resisting lateral forces like strong winds, impacts, and the gradual shifting of soil over time.
A hole that is too narrow prevents an adequate amount of concrete from being used, creating a weak point at the base of your structure. Conversely, a hole that is excessively large wastes significant money on unnecessary concrete and can make it difficult to properly brace the post while the concrete sets.
The #1 Misconception: Why a 4×4 Post Isn’t 4 Inches
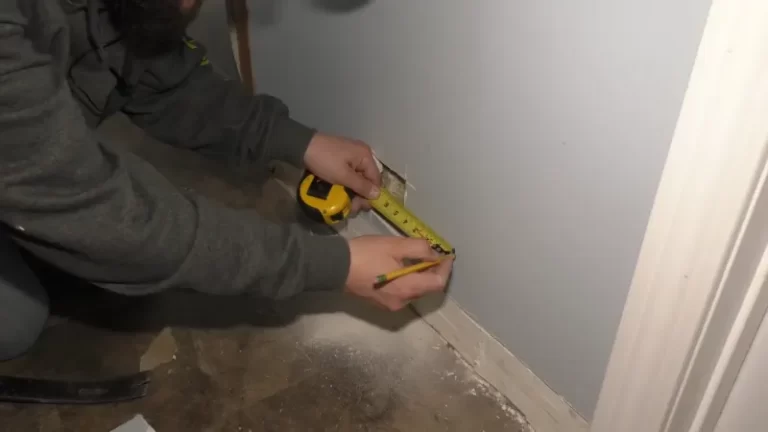
Before you can select the right auger bit, you must know the actual dimensions of your post. A “nominal” 4×4 post from a lumber yard is not actually 4 inches by 4 inches. After the wood is dried and planed smooth, its true dimensions are closer to 3.5 inches by 3.5 inches.
This half-inch difference is crucial. Basing your calculations on the nominal size will lead to incorrect bit selection. Always measure your post before you start drilling to ensure your planning is based on real-world measurements.
The Golden Rule: Choosing Your Auger Bit Size
For a standard 4×4 post (which is actually 3.5″ x 3.5″), the most recommended auger bit sizes are between 8 and 10 inches. While a 6-inch bit is the absolute minimum, it leaves very little room for error or for a sufficient concrete collar. An 8-inch auger is a much safer and more effective choice.
A general guideline is to drill a hole that is approximately three times the width of the post. For a 3.5-inch post, this would suggest a hole around 10.5 inches. Therefore, an 8-inch, 10-inch, or even 12-inch auger bit is often recommended to ensure maximum stability, especially for critical posts like gates or corners.

The goal is to have enough space around the post for the concrete to form a strong, uniform footing that anchors it securely into the ground. A wider hole provides a larger base, distributing the load over a greater area and creating a much stronger foundation.
Auger Bit and Post Size Comparison
To simplify the selection process, here is a quick reference guide for choosing the right auger bit for common post sizes. The “Good” recommendation is a functional minimum, while the “Better” option provides superior stability and is highly recommended.
| Post Size (Nominal) | Post Size (Actual) | Good Auger Size (Diameter) | Better Auger Size (Diameter) |
|---|---|---|---|
| 4×4 | 3.5″ x 3.5″ | 8 inches | 10 inches |
| 4×6 | 3.5″ x 5.5″ | 10 inches | 12 inches |
| 6×6 | 5.5″ x 5.5″ | 12 inches | 14 inches or larger |
When to Go Bigger: Exceptions to the Rule
While an 8- to 10-inch auger is suitable for most 4×4 post applications, certain conditions demand a larger hole for added security. It’s always better to over-engineer your foundation than to have it fail under stress.
Consider using a 12-inch or larger auger bit in the following situations:
Poor Soil Conditions: If your soil is sandy, loose, or otherwise unstable, a wider hole with more concrete is necessary to create a sufficient anchor.
High-Load Applications: Gate posts and corner posts endure significantly more stress than line posts. A larger footing is essential to prevent sagging and maintain alignment.
Severe Frost Heave: In regions with deep frost lines, a larger and deeper footing can help resist the upward pressure created when frozen ground expands.
Step-by-Step Guide: Drilling the Perfect Post Hole
Once you’ve selected the correct auger bit, drilling the hole properly is the next critical step. Following a methodical process will ensure your holes are clean, plumb, and ready for posts.
1. Safety First: Before any digging, call 811 to have underground utility lines marked. This is a free and essential service that prevents dangerous and costly accidents. Always wear safety glasses and gloves.
2. Mark Your Locations: Use stakes and a string line to ensure your post locations are perfectly aligned. Mark the center of each hole with spray paint or a small stake.
3. Start the Hole: Begin drilling slowly to prevent the auger from “walking” away from your mark. Once the bit has started to bite into the ground, you can increase the speed.
4. Drill and Clear: Drill in increments of about 6 to 12 inches, pulling the auger up periodically to clear the loose dirt from the hole. This prevents the bit from binding and makes the work easier.
5. Check for Plumb: As you drill, try to keep the auger as vertical as possible. A crooked hole will lead to a crooked post. Having a second person to eyeball the auger from a distance can be very helpful.
6. Verify the Depth: Use a tape measure to confirm you have reached the required depth. This is typically one-third the height of the post above ground, but must be below your local frost line.
Beyond the Bit: Factors That Guarantee a Rock-Solid Post
The right auger bit is just one part of the equation. For a truly secure post, you must also consider the depth of the hole, the concrete mix, and your setting technique.
Hole Depth is Critical: The bottom of your post hole must be below the local frost line. This prevents frost heave—a process where frozen soil expands upwards and can push your posts out of the ground over winter. A general rule is to bury at least one-third of the post’s total length.
Use the Right Concrete: Use a concrete mix specifically designed for setting posts. These mixes are formulated to set quickly and provide excellent strength. Always follow the manufacturer’s instructions for mixing.
The “Bell-Shaped” Hole Secret: For maximum stability against frost heave, skilled installers often create a “bell-shaped” hole. This involves making the bottom of the hole slightly wider than the top. This flared base acts like an anchor, making it much more difficult for the frozen ground to push the footing upward.
For those looking for alternatives to traditional digging and concrete, innovative solutions like the Titan Deck Foot Anchor can provide a stable foundation without the need for extensive excavation.
Frequently Asked Questions
What is the best size auger bit for a 4×4 post?
For a standard 4×4 post, an 8 to 10-inch auger bit is commonly recommended. This creates a hole wide enough to allow for proper alignment and enough space for backfill material like concrete or gravel to ensure a stable post.
Why should the hole be wider than the 4×4 post?
A wider hole is necessary to leave room for concrete or gravel around the post, which secures it firmly in the ground. This buffer provides stability, helps with drainage, and allows for adjustments to be made to ensure the post is plumb and level.
Can I use a 6-inch auger bit for a 4×4 post?
While a 4×4 post might technically fit into a 6-inch hole, it is not recommended as it leaves very little room for the concrete needed to properly secure the post. A larger diameter hole, typically 8 to 12 inches, ensures a stronger and more stable installation.
How deep should I dig the hole for a 4×4 post?
A general rule of thumb is to dig the hole to a depth that is at least one-third of the post’s height above ground. For example, a 6-foot tall fence would require a hole depth of at least 2 feet. However, it’s also important to check local building codes as the required depth may vary based on the frost line in your area.
Does the type of soil affect the size of the hole?
Yes, the type of soil can influence the ideal hole size. For instance, sandy soils may require a wider hole with more concrete to ensure the post is secure. In contrast, hard, compact clay soils might not require as wide of a hole.
Should I use concrete to set my 4×4 posts?
Using concrete is highly recommended for setting 4×4 posts, especially for fences and other structures that need to be sturdy. Concrete provides a solid, stable footing that will prevent the post from shifting or leaning over time. It is important to have a wide enough hole to accommodate a sufficient amount of concrete around the post for maximum stability.
Conclusion: The Foundation of a Great Project
Choosing the right size auger bit for your 4×4 posts is a foundational decision that impacts the strength and longevity of your entire project. While a 6-inch bit might seem sufficient, upgrading to an 8-inch or 10-inch auger provides the necessary space for a robust concrete footing.
Remember to account for the actual 3.5″ x 3.5″ dimensions of a 4×4 post and consider factors like soil type and post application. By combining the correct tools with proper technique, you can ensure your fence, deck, or pergola stands strong and secure for years to come.