What Is On My Ceiling? Your Guide to Identifying Scary Spots
There’s a moment of quiet dread every homeowner experiences. You glance up, perhaps for the first time in weeks, and see it—a mysterious spot, a discolored patch, or a thin, spidery crack on your ceiling. Immediately, your mind races. What is it? Is it dangerous? Is this going to be an expensive problem?
Ignoring what’s on your ceiling is never the answer. The ceiling is your home’s first line of defense against problems from above, like leaks and structural shifts. Think of it as the sky of your indoor world; any unexpected change deserves immediate attention. This guide will walk you through identifying exactly what’s on your ceiling, what’s causing it, and what you need to do next.
You'll Learn About
First Steps: How to Safely Inspect Your Ceiling
Before you can solve the mystery, you need to become a detective. Safety is the first priority. Never stand directly underneath a sagging or heavily damaged area. If the ceiling looks unstable, leave the room and call a professional immediately.
For less alarming spots, grab a sturdy step ladder and a bright flashlight. Take clear, well-lit photos from multiple angles. These images will be invaluable if you need to consult with a contractor. While you’re up there, gently touch the area (if it’s safe to do so). Is it wet, damp, soft, or crumbly? Make a note of its texture.
Decoding Discoloration: Stains and What They Mean
Stains are the most common ceiling mystery. Their color and location provide critical clues to their origin. Understanding these signs is the first step toward a solution.
Yellow or Brown Stains: The Telltale Sign of Water
If you see a stain that’s yellowish or brown, especially with a distinct ring around it, you are almost certainly looking at water damage. This is the most frequent ceiling issue, caused by a leak from your roof, an upstairs bathroom, or plumbing pipes. The discoloration comes from minerals, dirt, and decaying materials like wood or insulation that the water picks up on its journey down.
The key is to find the source. If the stain appears after heavy rain, the culprit is likely your roof. If it’s located beneath a bathroom or kitchen, suspect a plumbing leak. The placement of a ceiling fan over a kitchen island, for instance, can sometimes reveal slow leaks from pipes hidden in the floor above that might otherwise go unnoticed.
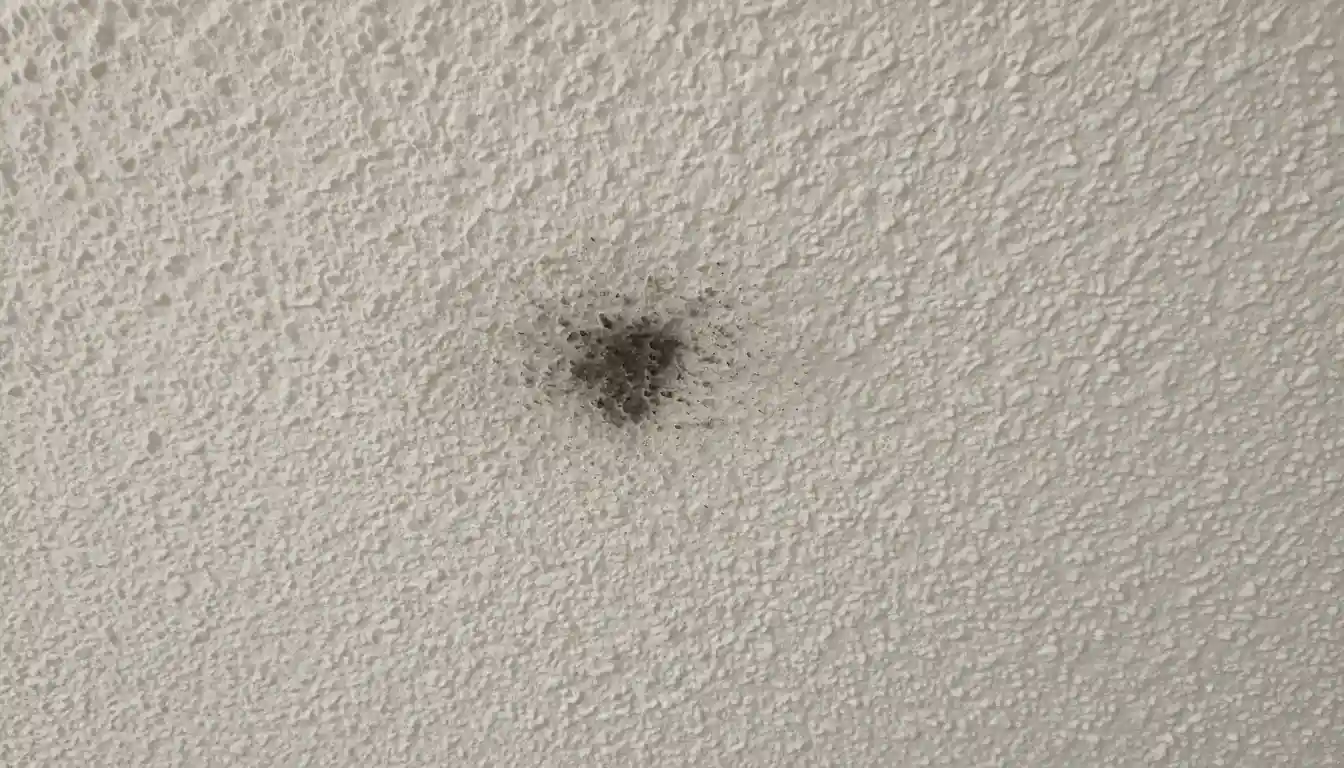
Black or Green Spots: Suspect Mold or Mildew
Dark spots, especially if they appear fuzzy or slimy, are a major red flag for mold or mildew. These fungi thrive in damp, poorly ventilated areas. They are not just cosmetic issues; mold can pose serious health risks, triggering allergies and respiratory problems. Mold on a ceiling almost always indicates an underlying moisture problem that has gone unaddressed.
Never simply paint over mold. You must first kill the mold and, most importantly, fix the moisture source that allowed it to grow in the first place. This is often linked to condensation in bathrooms or kitchens with inadequate ventilation or a persistent, slow leak.
Gray or Black “Ghosting” Stains: A Clue About Airflow
Have you noticed dark, shadowy lines that seem to outline the framing behind your drywall? This phenomenon is called “ghosting” or “soot tracking.” It happens when airborne particles (like soot from candles, dust, or pollution) stick to the ceiling in patterns dictated by temperature differences and air currents. The lines appear over the cooler ceiling joists where condensation is more likely to form, attracting the particles.
While not structurally dangerous, ghosting indicates issues with your home’s insulation, ventilation, or indoor air quality. It’s a sign that you may need to seal air leaks, improve insulation, or reduce indoor pollutants like cheap candles.
Understanding Cracks: From Harmless to Hazardous
Cracks can be even more alarming than stains, but not all cracks signal a catastrophe. Their size, direction, and type will tell you whether you have a simple cosmetic issue or a serious structural problem.
Hairline Cracks: Often Just Settling
Very thin, fine cracks are often harmless. They can be caused by the natural expansion and contraction of building materials due to humidity and temperature changes. Sometimes, they are simply the result of old paint or a thick application of drywall mud that has dried too quickly. These can typically be monitored and addressed with a simple cosmetic fix.
Straight Cracks Along Seams: A Drywall Issue
If you see a perfectly straight, continuous crack, it’s likely following the seam between two sheets of drywall. This is usually caused by improper taping and mudding during installation. While it’s an eyesore, it’s not typically a sign of structural failure. The tape has simply loosened over time and needs to be re-secured.
Spiderweb Cracks: A Plaster Problem or More
A network of fine cracks spreading out from a central point, like a spiderweb, is common in older homes with plaster ceilings. These are often just a sign of age and settling. However, if these cracks are wide or accompanied by sagging, they could indicate a more significant issue, like the plaster pulling away from the lath or foundational shifting.
Wide, Jagged, or Discolored Cracks: Call a Professional Now
This is the type of crack you cannot ignore. Large cracks (wider than 1/16 of an inch), especially those that are growing, accompanied by sagging, or showing water stains, point to serious structural damage. The cause could be a major water leak that has weakened the ceiling structure, foundation settlement, or an overloaded floor above. If you see a crack that also runs down the wall, it’s a strong indicator of structural movement that requires immediate professional assessment.
Changes in Texture: Bubbles, Peels, and Sagging
Sometimes the issue isn’t a stain or a crack, but a change in the ceiling’s surface itself. These textural changes are almost always related to moisture or gravity taking their toll.
Bubbling or Peeling Paint: Moisture Is Trapped
When paint bubbles or peels away from the ceiling, it’s a clear sign that moisture has gotten between the paint layer and the drywall or plaster beneath it. The water breaks the paint’s adhesion to the surface, causing it to lift. This could be from high humidity in a bathroom or a direct water leak. Before you can even think about scraping and repainting, you must solve the moisture problem.
Sagging or Bowing: A Sign of Immediate Danger
A sagging or bowing ceiling is a critical warning sign. It means the ceiling material itself (drywall or plaster) has become saturated with water or has detached from the framing joists above. This indicates a significant structural failure is in progress, and a collapse could be imminent. A large volume of water from a burst pipe or a long-term, heavy leak is often the cause. Evacuate the area below immediately and call an emergency contractor.
Quick Identification Guide
Use this table to quickly diagnose what might be happening on your ceiling and determine the urgency of the situation.
| Symptom | Possible Cause | Severity Level | Recommended Action |
|---|---|---|---|
| Yellow/Brown Stain with Rings | Water Leak (Roof, Plumbing) | Moderate to High | Find and repair the leak source immediately. |
| Black/Green Fuzzy Spots | Mold or Mildew Growth | High | Address moisture source; hire a mold remediation specialist. |
| Thin, Faint Hairline Cracks | House Settling, Paint Aging | Low | Monitor for growth; cosmetic repair when needed. |
| Bubbling or Peeling Paint | Trapped Moisture, High Humidity | Moderate | Fix the source of moisture, then scrape, prime, and repaint. |
| Large, Jagged Cracks with Sagging | Major Water Damage, Structural Failure | Critical | Evacuate the area and call a structural engineer or emergency contractor immediately. |
| Grayish Lines Over Joists | Poor Insulation, Air Leaks (“Ghosting”) | Low | Improve insulation and ventilation; seal air leaks. |
| Straight Crack on a Seam | Failed Drywall Tape | Low | Re-tape and re-mud the drywall joint. |
When to DIY and When to Call a Pro
Once you’ve identified the problem, the next step is deciding how to handle it. Your ability, tools, and the severity of the issue will determine the right course of action.
DIY-Friendly Ceiling Fixes
Some minor ceiling issues are well within the grasp of a confident DIYer. Cosmetic problems are the best candidates for a weekend project. This includes fixing very small hairline cracks with spackle or repairing a straight crack from failed drywall tape. You can also handle cleaning and repainting a minor water stain, but only after you are 100% certain the leak has been completely stopped and the area is bone dry.
Tackling these small tasks yourself can save you a significant amount of money. However, be realistic about your skill level. A poorly done ceiling repair can look worse than the original problem.
When a Professional Is Non-Negotiable
For many ceiling issues, calling a professional is not just the best choice—it’s the only safe one. Do not attempt to DIY any repairs involving potential structural damage, widespread mold, or asbestos.
You should hire a professional if you see:
- Any sagging, bulging, or bowing in the ceiling.
- Large, growing, or discolored cracks.
- Widespread mold growth (covering more than a few square feet).
- Any damage you suspect is caused by a structural or foundation issue.
- Water actively dripping or evidence of a major leak.
Professionals have the expertise to diagnose the root cause accurately, the specialized tools to perform the repair safely, and the experience to ensure a seamless finish.
Preventing Future Ceiling Problems
The best way to deal with ceiling issues is to prevent them from happening in the first place. Regular, proactive maintenance can save you from costly repairs and major headaches down the road.
Conduct regular inspections of your roof and attic. At least twice a year, look for signs of damaged shingles, failing flashing, or damp insulation. Ensure your gutters are clean and directing water away from your home’s foundation. Inside, periodically check the plumbing under sinks and around toilets for any signs of slow leaks.
Proper ventilation is also key, especially in moisture-prone areas like bathrooms and kitchens. Use exhaust fans to vent humid air outside. Making sure fixtures are installed correctly, such as a fan in a tray ceiling, also helps maintain structural integrity and prevent undue stress on the drywall. Finally, be mindful of what’s happening indoors; sometimes mysterious spots can even be caused by unexpected things like debris from a beloved houseplant hanging nearby.
By staying vigilant and addressing small issues before they escalate, you can keep the “sky” inside your home clear, stable, and worry-free for years to come.