Wavy Drywall Nightmare? Here’s Your Ultimate Fix-It Guide
There’s nothing more frustrating than stepping back to admire a newly finished room, only to see it: subtle (or not-so-subtle) waves, ripples, and shadows dancing across your drywall. What should be a perfectly flat, monolithic surface instead looks uneven and unprofessional. This common issue, known as wavy drywall, can detract from an otherwise beautiful space and leave you wondering where things went wrong.
The good news is that you’re not alone, and in most cases, this is a fixable problem. Understanding the root cause is the first step toward achieving the flawless walls you envisioned. From structural quirks to finishing mistakes, the reasons for wavy drywall are varied, but with the right knowledge and techniques, you can diagnose the issue and implement a lasting solution.
You'll Learn About
Why Does My Drywall Look Wavy? Uncovering the Hidden Causes
Wavy drywall rarely stems from a single error. More often, it’s the result of underlying issues with the structure, the installation process, or environmental factors. Identifying the specific cause is critical to applying the correct fix and preventing the problem from recurring.
Structural and Framing Issues
The foundation of any good drywall job is the framing behind it. If the studs or ceiling joists are not perfectly aligned and straight, the drywall sheets will follow those imperfections, resulting in a wavy surface. This is a frequent problem in both new construction, where lumber may not have been properly culled, and in older homes where settling has occurred over time.
One of the most common and misunderstood structural causes, especially for ceilings, is truss uplift. This occurs when the bottom chord of a roof truss, buried in insulation, stays warm and dry while the top chords in the attic get cold and absorb moisture. This differential causes the truss to arch upwards, pulling the ceiling drywall with it and creating a gap or wave at the wall-to-ceiling joint. Tackling these foundational challenges requires precision, much like when you’re framing over basement blanket insulation, where every measurement impacts the final outcome.
Installation and Finishing Errors
Even with perfect framing, the installation and finishing phase can introduce waves. A primary culprit is improper fastening. If too few screws or nails are used, or if they are driven too deep and break the paper face of the drywall, the sheets can sag between studs. This creates noticeable dips and valleys on the surface.
The finishing process—taping and mudding—is an art form, and mistakes here are highly visible. Applying too much joint compound, failing to feather the edges of the mud properly, or aggressive over-sanding can all create ridges and unevenness. A truly flat finish requires multiple, thin coats of mud, with each layer expertly smoothed and blended into the surrounding surface.
Moisture and Environmental Factors
Drywall is highly susceptible to moisture. Prolonged exposure to high humidity can cause the gypsum core to soften and the panels to sag between framing members, leading to a wavy appearance. More acute water damage from a slow plumbing leak or a compromised roof can cause the drywall paper to bubble, peel, and ripple.
It’s crucial to address any potential sources of moisture before attempting a repair. Hidden issues behind walls can cause persistent problems, a challenge that is also present when you have to work around obstacles like a drywall over protruding pipe. Always ensure the underlying cause of the moisture is fully resolved to prevent the waviness from returning.
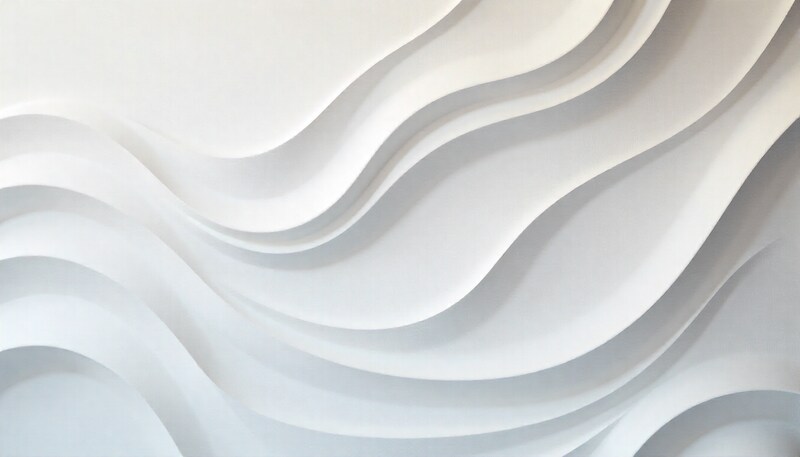
Beyond the Obvious: The Critical Role of Light and Perception
Here is an element that many guides overlook: the profound impact of lighting on how you perceive your walls. Sometimes, a wall that feels perfectly flat to the touch can look incredibly wavy. This is often due to raking light—light that strikes the wall at a low, oblique angle.
Large windows, skylights, or poorly placed overhead lighting can cast long shadows that exaggerate even the most minuscule imperfections, turning a nearly perfect wall into a landscape of hills and valleys. Before undertaking a major repair, observe how the light interacts with the surface throughout the day. You might find the issue is more about light management than a major flaw in the wall itself.
Furthermore, your choice of paint sheen can either hide or highlight these issues. A high-gloss or semi-gloss paint will reflect more light and make every tiny bump and wave stand out. In contrast, a flat or matte finish absorbs light, providing a softer look that is much more forgiving of minor surface variations. Simply changing the paint sheen can sometimes be the easiest and most effective “fix.”
How to Diagnose the Severity of Your Wavy Drywall
Before you can fix the problem, you need to understand its extent. The best tool for this job is a long straightedge, such as a 4-foot level or any guaranteed-straight board. Place the edge against the wall vertically, horizontally, and diagonally across the seams. This will immediately reveal the high and low spots.
Use a pencil to lightly circle the low areas and mark the high ridges. This visual map will guide your repair process. To better understand the scope of the work ahead, you can categorize the severity of the waviness using the table below.
| Gap Size (at deepest point) | Severity Level | Likely Cause | Recommended Course of Action |
|---|---|---|---|
| Less than 1/8″ | Minor | Finishing imperfections, paint texture | DIY-friendly skim coat or touch-up sanding and mudding. |
| 1/8″ to 1/4″ | Moderate | Improperly finished seams, minor framing issues | Requires a more extensive skim coat; manageable for an experienced DIYer. |
| More than 1/4″ | Severe | Significant framing problems, truss uplift, moisture damage | Professional assessment is strongly recommended before attempting a repair. |
Your Step-by-Step Guide to Fixing Wavy Drywall
For minor to moderate waviness caused by finishing issues, a skim coat is the most effective solution. Skim coating involves applying a thin layer of joint compound over the entire surface to fill in the low spots and create a new, perfectly flat plane.
Essential Tools and Materials
Gathering the right tools is essential for a professional result. You will need a 10- or 12-inch drywall taping knife, a mud pan, all-purpose joint compound, a high-quality PVA drywall primer, fine-grit sandpaper or a sanding sponge, drop cloths, and safety glasses. For larger areas, a pole sander can save significant time and effort.
Step 1: Preparation is Everything
Proper preparation is the most critical step. Start by washing the walls with a mild detergent to remove any dust, grease, or grime. Protect your floors and furniture with drop cloths. Use your straightedge and pencil to mark all the high and low spots across the entire wall.
Next, use your taping knife to scrape off any bumps or high ridges. If you encounter significant high spots, you may need to sand them down first. The goal is to create a surface that is as smooth as possible before you begin applying mud.
Step 2: Applying the Skim Coat (The Right Way)
Mix your joint compound to a smooth, yogurt-like consistency. The key to a successful skim coat is applying multiple thin layers rather than one thick one. Using your taping knife, apply a thin coat of mud to the low spots you identified, feathering the edges outward to blend them with the rest of the wall.
Hold the knife at a low angle to the wall to spread the mud, and at a higher angle to smooth and remove the excess. Work in manageable sections, about 3-4 feet square at a time. Allow each coat to dry completely—typically 24 hours—before applying the next.
Step 3: Sanding for a Flawless Finish
Once your final coat is completely dry, it’s time to sand. The goal of sanding is not to remove a lot of material, but to smooth out any minor imperfections, tool marks, or ridges. Use a fine-grit sandpaper (120-150 grit) and apply light, even pressure.
After sanding, wipe the entire wall down with a damp cloth to remove all dust. This is a crucial step; any remaining dust will prevent the primer and paint from adhering properly. Check your work one last time with the straightedge to ensure the surface is perfectly flat.
When to Call a Professional
While skim coating can fix many issues, some problems are best left to the professionals. If you discover large, widespread waves that seem to correspond with every stud, this points to a significant framing issue. Do not try to fix this with mud alone.
Additionally, if you see any signs of moisture—such as discoloration, soft spots, or a musty smell—it is imperative to call a professional. They can identify and fix the source of the water and assess whether the drywall needs to be replaced entirely to prevent mold growth.
Prevention: How to Ensure Flat Drywall from the Start
The best way to deal with wavy drywall is to prevent it from happening in the first place. If you are involved in a new construction or renovation project, insist on using high-quality, straight framing lumber. Ensure studs and joists are properly spaced, typically 16 inches on center, and that drywall is secured with screws, not nails, at the correct intervals.
Proper finishing techniques are equally important. The level of precision required is similar to what’s needed for other wall finishing projects, like when you are installing wainscoting on plaster walls, where a perfectly flat and stable substrate is non-negotiable for a professional look.
The Critical Role of Primer
Never skip the primer. A quality PVA drywall primer is designed to seal the porous surfaces of both the drywall paper and the joint compound, creating a uniform surface for your paint. More importantly, the primer will reveal any final, minor imperfections that you may have missed, giving you one last chance to fix them before the final color goes on the wall.
Wavy drywall can be a disheartening sight, but it is not an insurmountable problem. By carefully diagnosing the cause, preparing the surface meticulously, and applying thin, patient coats of joint compound, you can transform an uneven wall into a perfectly smooth canvas. Whether you tackle it as a DIY project or decide to hire a professional, the result will be a flawless finish that enhances the beauty and value of your home.