Tub Refinishing Gone Wrong? Your Ultimate Rescue Guide
The promise of bathtub refinishing is incredibly appealing: a sparkling, like-new tub for a fraction of the cost and hassle of a full replacement. For many, it’s a dream renovation. But when that dream curdles into a nightmare of peeling, bubbling, and cracking, the frustration is immense. If you’re staring at a botched refinishing job, know that you are not alone and, more importantly, it is fixable.
This guide dives deep into the common causes of tub refinishing gone wrong. We will explore the tell-tale signs of a failing finish and provide a clear, actionable plan to rescue your bathtub from disaster. You can restore the beauty of your bathroom centerpiece with the right knowledge and approach.
You'll Learn About
Why Did My Bathtub Refinishing Fail? Uncovering the Culprits
Understanding why your refinishing project failed is the first step toward a lasting solution. More often than not, the issue can be traced back to a handful of critical errors during the process. These missteps compromise the bond between the new coating and the tub’s original surface, leading to premature failure.
The Cardinal Sin: Inadequate Surface Preparation
Virtually every professional will agree that the number one cause of refinishing failure is improper surface preparation. The new coating needs a perfectly clean, slightly porous surface to grab onto. Skipping or rushing any part of this foundational stage is a recipe for disaster.
Common preparation mistakes include failing to remove all soap scum, body oils, and silicone residue. Even microscopic amounts of these contaminants can prevent the coating from adhering correctly. A thorough cleaning is essential, and for best results, consider all your options before starting. For example, understanding do you use tsp before or after sanding can make a significant difference in the final quality of the surface.
Low-Quality Materials vs. Professional-Grade Coatings
There is a vast difference between a cheap DIY kit and the high-performance coatings used by professionals. Many off-the-shelf kits use one-part epoxy paints that lack the durability and chemical resistance of professional two-part acrylic urethanes. These lower-quality materials are more prone to yellowing, chipping, and peeling.
Investing in a higher-quality product or professional service often saves money in the long run. Professional coatings create a harder, more resilient surface that better withstands the daily rigors of use, from cleaning agents to temperature fluctuations.
The Hidden Menace: Moisture and Humidity
Moisture is the arch-nemesis of a fresh bathtub finish. Applying a coating in a humid bathroom can trap microscopic water droplets beneath the surface, leading to bubbles and blisters as the finish cures. The temperature of the room and the tub surface itself also plays a critical role in how the coating cures.
Proper ventilation is non-negotiable during and after the application process. Controlling the environment is key. Interestingly, the same principles of managing home air quality, such as considering an aprilaire vs honeywell humidifier for other areas of your home, highlight the importance of moisture control in achieving a lasting finish in the bathroom.
Application Errors: Rushing the Process
A flawless finish requires patience and precision. Applying the coating too heavily can lead to drips, runs, and an uneven surface that never cures properly. Conversely, applying it too thinly can result in a weak, faded finish that wears away quickly.
Many DIY kits and inexperienced applicators fail to allow adequate drying time between coats. This can trap solvents and prevent the layers from bonding together correctly, leading to a soft, tacky surface that peels away easily.
The Anatomy of a Refinishing Disaster: Common Signs and Symptoms
A failing refinishing job will announce itself in several unmistakable ways. Recognizing these symptoms can help you diagnose the root cause and determine the best course of action. From minor aesthetic issues to catastrophic coating failure, each sign tells a story about what went wrong.
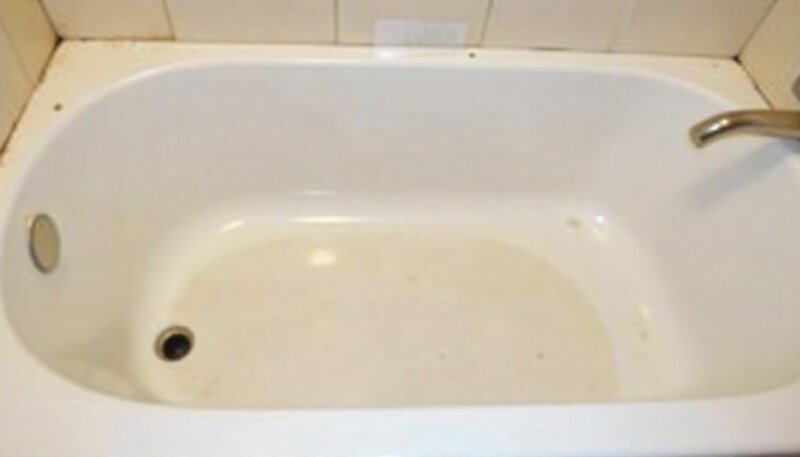
The most dramatic sign of failure is widespread peeling or flaking. This indicates a complete loss of adhesion, almost always due to poor surface preparation. Bubbling and blistering are also common and point to trapped air or moisture beneath the coating. These issues often appear within days or weeks of the refinishing job.
| Symptom | Likely Cause | Severity Level |
|---|---|---|
| Peeling or Flaking | Improper surface preparation; leftover contaminants (soap, oil). | High |
| Bubbling or Blistering | Trapped air, moisture, or solvents; high humidity during application. | High |
| Tacky or Soft Surface | Incorrect mixing of coating components; insufficient curing time. | High |
| Cracking | Coating applied too thickly; over-catalyzed mixture curing too fast. | Medium |
| Yellowing/Discoloration | Use of low-quality epoxy; reaction to harsh cleaners or bathmats. | Medium |
| Rough or Gritty Texture | Dust and debris settling on the wet surface; poor cleaning. | Low |
Your Rescue Mission: A Step-by-Step Guide to Fixing the Damage
Seeing your refinished tub fail is disheartening, but it’s not the end of the road. With the right strategy, you can strip the failed coating and start fresh, ensuring a beautiful and durable result this time. This process requires diligence and a focus on safety.
Step 1: Assess the Damage – Repair or Redo?
First, determine the extent of the failure. If there’s a single, small chip, a touch-up kit might suffice. However, if you’re seeing widespread peeling, bubbling, or a persistently sticky surface, a complete redo is the only reliable solution. Attempting to patch a systemic failure will only lead to more frustration.
Step 2: The Essential Stripping Process
To fix a bad refinishing job, you must first remove it entirely. This is the most labor-intensive part of the process and requires strict adherence to safety protocols. You will need a chemical paint stripper designed for epoxy or polyurethane coatings.
Always wear chemical-resistant gloves, safety goggles, and a respirator with organic vapor cartridges. Ensure the bathroom is extremely well-ventilated by opening windows and using an exhaust fan. Apply the stripper according to the manufacturer’s directions and allow it to work. The old coating will begin to bubble and lift, at which point you can scrape it away with a plastic scraper.
Step 3: Perfecting the Foundation – The *Real* Prep Work
Once the tub is stripped, the real preparation begins. This is your chance to do what wasn’t done correctly the first time. Clean the tub meticulously with an abrasive cleaner to remove any remaining residue. Then, inspect the surface for any chips, cracks, or imperfections.
Addressing these underlying issues is crucial for a smooth final finish. A guide on how to fix a dip in a bathtub or repair minor chips before you begin refinishing can be an invaluable resource. After repairs, the entire surface must be sanded to create a “profile” that the new coating can grip onto. Finally, clean the tub one last time to remove all dust, and wipe it down with a solvent like denatured alcohol.
Step 4: Choosing Your Weapon and Applying the New Coat
Select a high-quality, two-part refinishing kit. Read and re-read the instructions before you begin. Pay close attention to mixing ratios and application temperatures. When you’re ready to apply the coating, work in thin, even coats using a high-quality roller or sprayer.
Allow the recommended drying time between each coat—do not rush this step. Once the final coat is applied, let the tub cure for the full duration specified by the manufacturer, which is often 24 to 72 hours. Do not expose the surface to water or moisture during this critical curing period.
Preventing a Sequel: How to Ensure Your Next Refinishing Project Succeeds
Once you’ve restored your tub, the goal is to make sure it lasts. Proper care and making the right choices from the start can prevent you from ever having to repeat this rescue mission. The key lies in either hiring a qualified professional or becoming an incredibly diligent DIYer.
To DIY or To Hire a Pro? An Honest Assessment
While DIY kits have improved, they still can’t match the durability of professionally applied coatings. A professional has access to superior materials, specialized equipment like HVLP sprayers for a flawless finish, and crucial experience. They also have the proper safety equipment to handle the potent chemicals involved.
Consider the cost of a failed DIY project—including the stripping materials and the second kit—versus the price of hiring a reputable professional. Often, hiring a pro from the outset is the more cost-effective and stress-free option, delivering a finish that can last for years.
Vetting a Professional: Questions You MUST Ask
If you choose to hire a professional, do your homework. A reputable refinisher is a craftsman, and not all are created equal. Here are some essential questions to ask before hiring:
- How long have you been in business? Experience matters in this industry.
- What specific type of coating do you use? Look for acrylic urethane, not epoxy.
- Can you detail your surface preparation process? They should mention chemical stripping, cleaning, sanding, and repairs.
- Do you offer a warranty? A trustworthy company will stand by its work with a meaningful warranty.
- Can I see a portfolio of your work and speak to references?
The Aftercare Bible: Protecting Your New Finish
Whether you did it yourself or hired a pro, proper aftercare is vital for longevity. The new surface is durable, but not indestructible. Follow these simple rules to keep your tub looking pristine:
- Do not use abrasive cleaners. Avoid products like Comet, Ajax, or scouring pads. Stick to mild, non-abrasive liquid cleaners.
- Avoid bathmats with suction cups. These can trap water and may pull at the finish over time. If you use a mat, remove it after each use.
- Fix leaky faucets immediately. A constant drip can erode the finish over time.
- Never use harsh chemicals. Drain cleaners and other acidic or bleach-heavy products can damage the finish.
A bathtub refinishing failure is a major inconvenience, but it’s a solvable problem. By understanding the causes, methodically correcting the damage, and committing to proper procedure and aftercare, you can achieve the beautiful, durable finish you wanted from the start. Your bathroom oasis is within reach.