Trim Under Countertop: The Pro Secret to a Flawless Kitchen Finish
You’ve invested in beautiful countertops, the cabinets are perfectly aligned, but something still looks unfinished. There’s a subtle, yet persistent, gap or an exposed edge just under the lip of your countertop. It’s a small detail that can cheapen the look of your entire kitchen.
This overlooked space is often a magnet for dust, crumbs, and grime, creating a cleaning nuisance. Far from just a cosmetic issue, this gap can undermine the high-end, polished appearance you worked so hard to achieve. This is the final detail that separates a standard installation from a truly custom, professional finish.
You'll Learn About
Why That Unsightly Gap Under Your Countertop Exists
That frustrating gap between your cabinet top and countertop isn’t necessarily a sign of a bad installation. More often than not, it’s the unavoidable result of a standard, high-quality installation process meeting the realities of a normal home.
Understanding the root cause is the first step to finding the perfect, seamless solution.
The Reality of Uneven Walls and Floors
Very few homes have perfectly plumb walls or completely level floors. Over time, houses settle, and subtle imperfections are a natural part of any structure. When cabinets are installed, they must be perfectly level to ensure doors hang correctly and the countertop has a stable, flat surface.
This leveling process, often involving shims, creates a straight, true line across the top of the cabinets. However, this perfectly level line will inevitably expose any waviness in the adjacent wall or dips in the floor, resulting in small, visible gaps.
Standard Cabinet and Countertop Installation
Professional installers prioritize function and stability. Their primary goal is to create a level and secure base for your heavy countertops. This means the cabinets are adjusted to be level with each other, regardless of minor imperfections in the room’s structure.
When the countertop is placed on this level base, any space between the top edge of the cabinet box and the underside of the countertop becomes apparent, especially along the overhang of an island or peninsula.
More Than an Eyesore: Hidden Problems Caused by Gaps
While the primary frustration with under-countertop gaps is aesthetic, they can create practical problems as well. These seemingly minor issues can detract from both the beauty and functionality of your kitchen space over time.
This small gap becomes a collection point for dust, grease, and food particles, making it difficult to keep your kitchen truly clean. Furthermore, on stained or painted wood cabinets, this exposed top edge can be prone to chipping or splintering without a protective trim piece.
The Ultimate Solution: Choosing the Perfect Trim for the Job
The professional solution to hiding gaps and creating a finished look is a simple and cost-effective one: installing wood molding. The right piece of trim not only conceals imperfections but also adds a layer of architectural detail, elevating the entire design of your kitchen.
Different situations call for different types of trim, each offering a unique look and level of coverage.
Scribe Molding: The Pro’s Choice for Tight Fits
Scribe molding is a very thin, flexible piece of trim used to cover small, inconsistent gaps where cabinets meet a wall or ceiling. Its flexibility allows it to conform to slight curves in a wall, providing a seamless finish. While typically used vertically against walls, it can be adapted to hide a very minimal horizontal gap under a countertop edge.
Quarter Round & Shoe Molding: The Versatile Classics
Quarter round and shoe molding are two of the most common choices for covering gaps. Quarter round is shaped like a perfect quarter-circle, while shoe molding has a slightly flatter, less obtrusive profile. Both are excellent for hiding the space under a countertop overhang and are easy to cut and install.
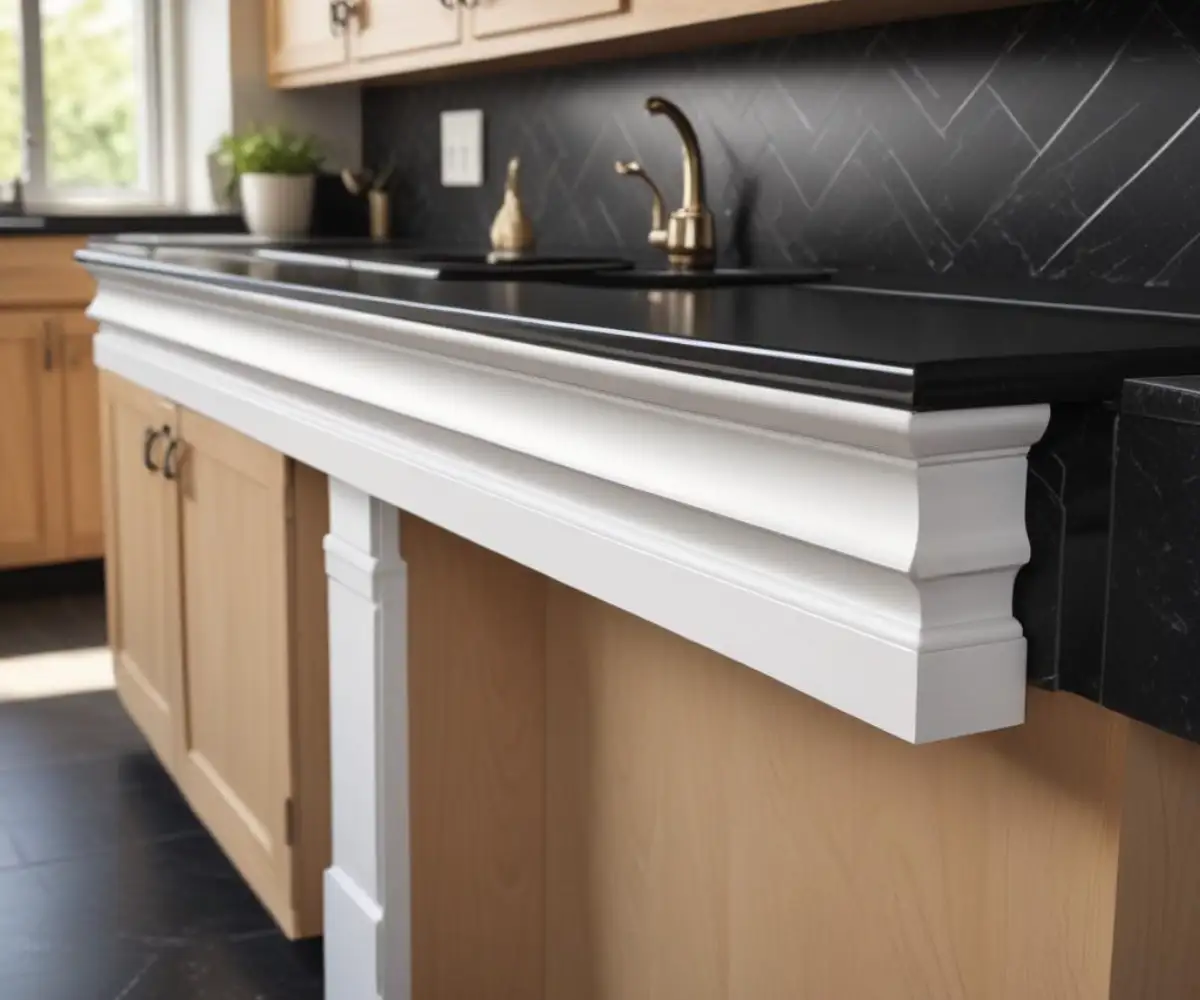
Decorative Molding: Elevating Your Kitchen’s Style
For a more impactful statement, consider using a decorative molding. This is an opportunity to add a significant design element, especially on a kitchen island. A piece of ornate base cap or panel molding can transform a standard island into a beautiful, furniture-like centerpiece.
This approach not only hides any gaps but adds a layer of sophistication and custom detail that makes the entire kitchen feel more luxurious. Choosing a molding that complements your cabinet style creates a cohesive and intentional design.
Light Rail Molding: A Functional and Stylish Option
Light rail molding is specifically designed for the bottom of upper cabinets to help conceal under-cabinet lighting. However, its stylish profile can often be repurposed as a decorative trim under a countertop overhang. This can be a great way to create a consistent look if you’ve used it on your upper cabinets.
Trim Material Showdown: Wood vs. MDF vs. PVC
The material you choose for your trim is just as important as the style. Each option offers different benefits in terms of cost, durability, and ease of installation, particularly in a kitchen environment where moisture and activity are high.
This table breaks down the key differences to help you select the best material for your project.
| Material | Best For | Paint/Stain | Cost | Installation Difficulty |
|---|---|---|---|---|
| Solid Wood | Staining to match cabinets, durability | Stainable and Paintable | $$$ | Moderate (requires precise cuts) |
| MDF (Medium-Density Fiberboard) | Painting, smooth finish, budget projects | Paintable Only | $ | Easy (cuts smoothly but creates dust) |
| PVC | High-moisture areas (near sinks/dishwashers) | Paintable (requires specific primer) | $$ | Easy (lightweight and flexible) |
Step-by-Step Guide: Installing Trim Under Your Countertop
With the right tools and a methodical approach, installing trim is a straightforward DIY project that yields professional results. Following these steps will ensure a clean installation and a flawless finish.
Step 1: Gather Your Tools and Materials
Before you begin, assemble everything you need. This includes your chosen trim, a tape measure, a pencil, a miter saw (or miter box and hand saw), a brad nailer with 1-inch to 1.5-inch nails, wood glue, and safety glasses.
Step 2: Measure Twice, Cut Once
Measure the length of each section where you will be installing the trim. For outside corners, measure from the corner to the end of the cabinet run. Always double-check your measurements before making a cut to ensure accuracy and avoid wasting material.
Step 3: Cutting Your Molding Like a Pro
For pieces that meet at an outside corner, you will need to cut a 45-degree miter. Set your miter saw to 45 degrees to make the angled cut. The two pieces should fit together to form a perfect 90-degree corner. For straight runs that end against a wall, a simple 90-degree straight cut is all that is needed.
Step 4: Secure the Trim in Place
Run a thin bead of wood glue along the top edge of the trim piece that will make contact with the underside of the countertop. Press the trim firmly into place, ensuring it is tight against both the cabinet and the countertop. Use a brad nailer to secure the trim to the cabinet face with nails spaced every 12-18 inches.
Step 5: The Finishing Touches
Once the trim is installed, the final details make all the difference. Fill any nail holes with a small amount of wood putty. Then, apply a thin, smooth bead of paintable caulk along the top edge where the trim meets the countertop. For advice on achieving a perfect seal, exploring different techniques for caulking butcher block countertop can provide valuable insights, even for other materials.
Common Mistakes to Avoid for a Flawless Finish
A few common pitfalls can undermine an otherwise excellent trim installation. Using trim that is too small for the gap will fail to cover the imperfection adequately. Conversely, trim that is too bulky can overwhelm the design and look out of place.
Another frequent error is poorly mitered corners that leave a gap. Always test-fit your cuts before nailing them into place. Finally, skipping the final caulking and painting steps will leave the installation looking unfinished and unprofessional.
Beyond the Kitchen: Other Areas That Benefit from Under-Counter Trim
This finishing technique is not limited to the kitchen. It can be applied in any area where a countertop meets a cabinet base to create a more polished and integrated look.
In bathrooms, trim can elegantly finish the space under a vanity top, creating a clean line that complements the floor. This is especially important when considering details like whether to tile under the vanity itself. The same principle applies to built-in desks, laundry room folding stations, and home bars, where this small detail provides a high-end, custom-built appearance.
The Finishing Touch That Makes All the Difference
Adding trim under your countertop is a small, inexpensive upgrade with a massive impact. It closes unsightly gaps, simplifies cleaning, and adds a layer of architectural detail that elevates your entire space. It’s the final touch that proves great design is all about the details.
By focusing on these finishing elements, much like choosing the right baseboard under kitchen cabinets, you create a cohesive and professionally finished room. This simple project is a testament to the fact that you don’t need a complete overhaul to achieve a high-end, custom look.