Trim for Corrugated Metal Ceiling: The Ultimate Guide
A corrugated metal ceiling offers a unique blend of industrial chic and rustic charm. But once the panels are up, a glaring problem emerges: the unfinished edges. These raw, exposed edges not only look unprofessional but also create functional issues, leaving gaps that invite dust, pests, and drafts.
This creates a significant challenge for homeowners and DIY enthusiasts aiming for a polished look. How do you conceal these rough cuts and seal the perimeter for a clean, airtight finish? The solution lies in choosing and correctly installing the right trim.
You'll Learn About
Understanding Corrugated Metal Ceiling Trim: What It Is and Why You Need It
Trim for a corrugated metal ceiling is more than just a decorative element; it’s a critical component that bridges the gap between your ceiling panels and walls. It provides a clean, finished appearance while sealing the perimeter of the ceiling. Without it, the installation looks incomplete and amateurish.
Properly installed trim is essential for both the longevity and the aesthetic success of your ceiling project. It protects the cut edges of the metal panels from potential damage and corrosion while completing the room’s overall design.
The Functional Benefits: Sealing Gaps and Enhancing Durability
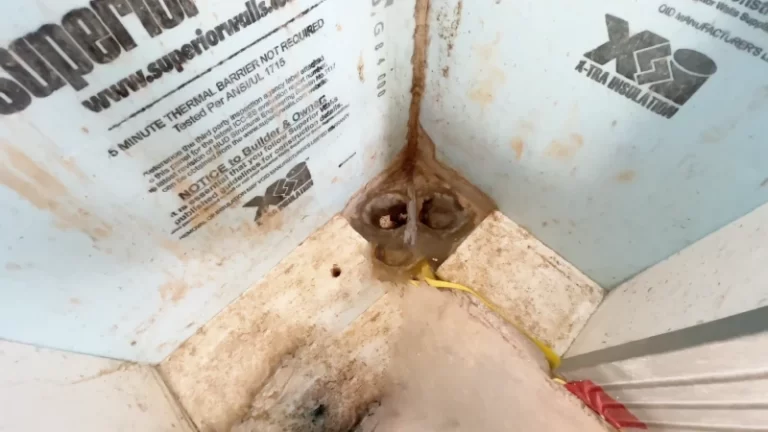
The primary function of ceiling trim is to cover the uneven gaps left where the corrugated panels meet the wall. This creates a tight seal that prevents air leakage, which can improve your home’s energy efficiency. It also acts as a barrier, keeping out insects and dust.
Furthermore, trim adds a layer of protection to the vulnerable cut edges of the metal panels. By covering these edges, the trim helps prevent moisture intrusion and rust, extending the life of your ceiling and maintaining its structural integrity.
The Aesthetic Benefits: Creating a Clean, Professional Look
Aesthetically, trim is the finishing touch that transforms a raw installation into a cohesive design element. It provides a smooth transition from the textured ceiling to the flat wall surface. This clean line defines the space and elevates the entire look of the room.
Whether you are aiming for a modern industrial vibe or a rustic farmhouse feel, the right trim helps achieve a polished and intentional result. It demonstrates attention to detail and a commitment to quality craftsmanship.
Types of Trim for Corrugated Metal Ceilings: A Comprehensive Guide
Several types of trim are specifically designed to work with corrugated metal panels. Each has a unique profile suited for different applications, from simple perimeters to complex corners. Understanding these options is key to selecting the right product for your project.
The most common types include J-channel, L-channel, and various corner trims. The choice depends on where the trim will be installed and the desired final appearance.
J-Channel Trim: The All-Purpose Solution
J-channel is arguably the most versatile and widely used trim for corrugated metal ceilings. Its “J” shape creates a deep channel that neatly receives and conceals the edge of the metal panel. This makes it incredibly forgiving, as it can hide minor imperfections in cuts.
It is typically installed first around the entire perimeter of the ceiling area. The corrugated panels are then measured, cut, and slid into the channel for a secure and clean fit. This method provides excellent coverage and a professional finish.
L-Channel (Angle) Trim: For Simple Corners and Edges
L-channel, also known as angle trim, features a simple 90-degree profile. It is often used on outside corners or as a minimalist perimeter trim where one leg of the “L” covers the edge of the panel and the other sits flush against the wall or ceiling joist.
While less forgiving than J-channel, L-trim offers a very clean, sharp edge. It is a great choice for modern or minimalist designs where a less bulky trim is desired.
Inside/Outside Corner Trim: For Perfect 90-Degree Angles
As the name suggests, inside and outside corner trims are pre-bent pieces designed to fit perfectly into or around 90-degree corners. These specialized pieces eliminate the need for difficult miter cuts, ensuring a seamless and professional-looking corner.
Using these dedicated corner pieces saves time and greatly improves the final quality of the installation. They ensure that all corner joints are tight, clean, and uniform.
Beyond Metal: Exploring Wood and PVC Trim Options
While metal trim is the standard, it is not the only option. For a striking contrast, consider using wood trim with your corrugated metal ceiling. The warmth and natural texture of wood paired with the cool, industrial feel of metal creates a balanced and visually interesting aesthetic, perfect for modern farmhouse or rustic designs.
Another increasingly popular alternative is PVC trim. Cellular PVC is lightweight, impervious to moisture, and will not rot or warp, making it exceptionally durable. It cuts and installs easily and can be painted to match any decor, offering both versatility and longevity.
Choosing the Right Trim Material and Finish
The material and finish of your trim are just as important as its profile. The choice will impact the durability, corrosion resistance, and overall look of your ceiling. The most common materials are galvanized steel, Galvalume steel, and aluminum.
Matching the trim material to your ceiling panels is often the safest choice for a consistent look. However, contrasting materials can be used to create a deliberate design statement.
Galvanized Steel: The Durable Standard
Galvanized steel is steel that has been coated with a layer of zinc to protect it from rust and corrosion. It is a strong, durable, and cost-effective option that has been the industry standard for decades. Its classic spangled appearance is a popular choice for rustic and industrial aesthetics.
This material is an excellent all-around choice for most interior applications, offering a great balance of performance and value. Proper maintenance is key to a long-lasting finish.
Galvalume Steel: Superior Corrosion Resistance
Galvalume is a steel product with a coating of zinc and aluminum. This combination provides superior corrosion resistance compared to traditional galvanized steel, making it an excellent choice for applications in more humid environments like bathrooms, kitchens, or covered porches.
While slightly more expensive, its enhanced durability often justifies the cost. Galvalume has a smoother, more uniform appearance than galvanized steel.
Aluminum: Lightweight and Rust-Proof
Aluminum trim is naturally rust-proof and very lightweight, making it easy to handle and install. It is an ideal choice for high-moisture areas or coastal environments where salt corrosion is a concern. Aluminum is often available in a wide variety of painted colors.
Its primary drawback is that it is softer and more prone to dents and scratches than steel. Careful handling is required during installation.
A Note on Material Compatibility
A critical but often overlooked factor is galvanic corrosion. This occurs when two different types of metal are in contact in the presence of an electrolyte, like moisture. To prevent this, always use fasteners made from a compatible material. For example, use stainless steel or zinc-coated screws for steel trim, and never use steel fasteners with aluminum trim.
| Trim Material | Key Properties | Best For | Relative Cost |
|---|---|---|---|
| Galvanized Steel | Strong, durable, good corrosion resistance | General purpose, rustic/industrial look | $0.80 – $1.50 |
| Galvalume Steel | Excellent corrosion resistance, smooth finish | High-humidity areas, modern aesthetic | $1.00 – $2.00 |
| Aluminum | Lightweight, rust-proof, available in many colors | Coastal areas, high-moisture environments | $1.50 – $3.50 |
| Wood | Natural look, creates high contrast | Farmhouse, rustic, and eclectic designs | $0.75 – $2.50 |
| PVC | Moisture-proof, rot-proof, paintable, low maintenance | Any interior space, especially bathrooms/basements | $1.50 – $5.00+ |
How to Install Trim for a Corrugated Metal Ceiling: A Step-by-Step Guide
Proper installation is crucial for a professional and long-lasting finish. While the process is straightforward, it requires careful measurement and attention to detail. Following these steps will help ensure a successful outcome.
Always prioritize safety by wearing appropriate personal protective equipment (PPE), especially when cutting and handling metal.
Step 1: Safety First – Essential Gear and Precautions
Before beginning, gather your safety gear. Always wear safety glasses to protect your eyes from metal filings and sharp edges. Heavy-duty leather gloves are essential to protect your hands from cuts when handling and cutting metal panels and trim.
Work in a well-ventilated area, especially if using sealants. Ensure your work area is clean and free of clutter to prevent trips and falls.
Step 2: Accurate Measurements are Non-Negotiable
Measure the perimeter of the ceiling where the trim will be installed. Use a quality tape measure and measure each wall section at least twice to ensure accuracy. When planning for J-channel, remember that the ceiling panels will slide into the channel, so your panel measurements will be slightly different from your wall-to-wall measurements.
For corners, decide whether you will use pre-made corner pieces or create miter cuts. Accurately marking your cut lines with a fine-tip marker is crucial for a tight fit.
Step 3: Cutting Metal Trim Like a Pro
Several tools can be used to cut metal trim, including tin snips, electric metal shears, or a circular saw with a metal-cutting blade. For straight cuts on trim like J-channel or L-channel, tin snips (aviation snips) are often sufficient and provide excellent control.
For making many cuts, electric shears can save significant time and effort. When using a circular saw, be aware that it creates hot metal filings that can mar the trim’s finish. Always cut with the finished side down and clean off all debris immediately.
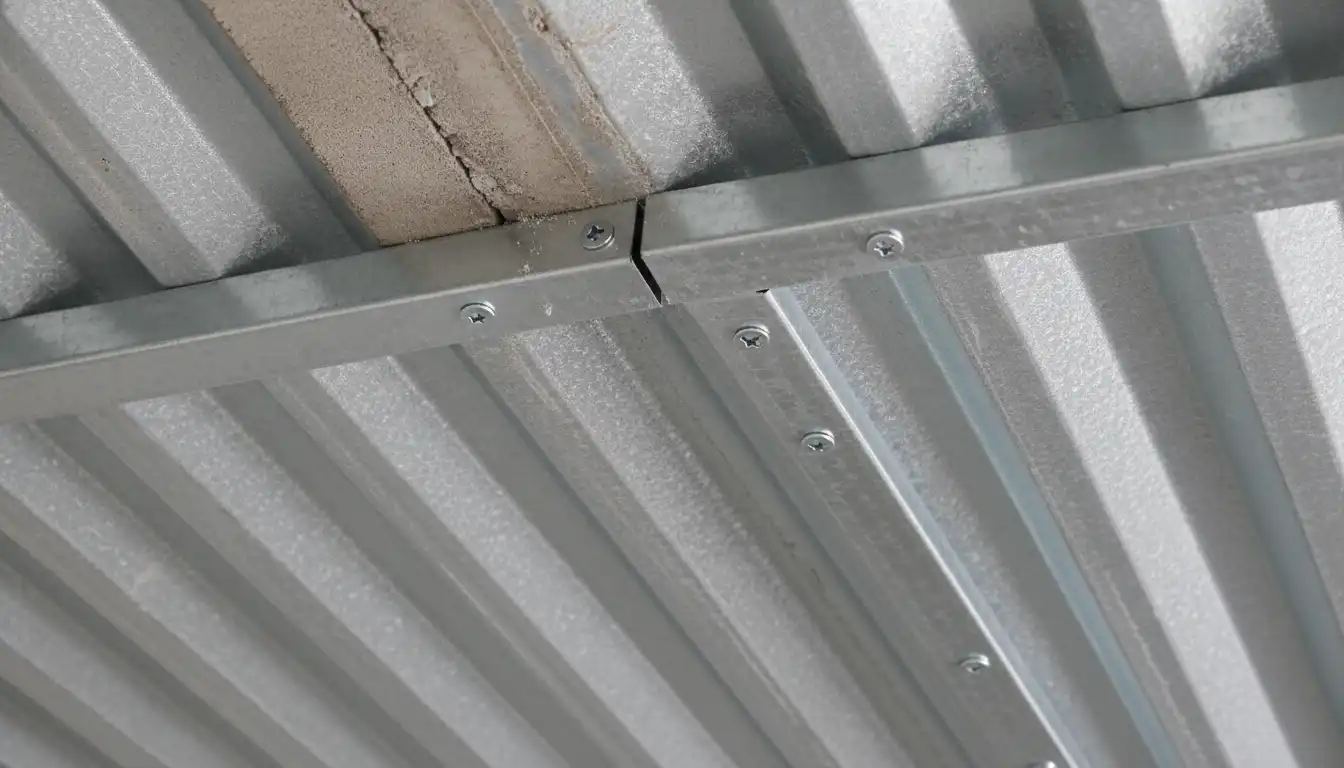
Step 4: Fastening the Trim Securely
Position the first piece of trim and fasten it to the wall studs or ceiling joists. Use appropriate screws for the material; typically, #8 or #10 low-profile head or pancake-head screws work well as they will not interfere with the ceiling panels.
Space fasteners approximately 16 to 24 inches apart. Do not over-tighten the screws, as this can warp or dimple the trim. The goal is a snug, secure fit against the framing.
Step 5: Finishing Touches for a Flawless Seam
Once the trim is installed, you can begin fitting your corrugated panels. After the panels are in place, apply a bead of high-quality polyurethane or acrylic caulk along the top edge where the trim meets the wall. This will seal any small gaps and create a perfectly clean, finished line.
Choose a paintable caulk if you plan to paint the walls. This final step makes a significant difference in the overall appearance of the project.
Common Mistakes to Avoid When Installing Ceiling Trim
Even with careful planning, mistakes can happen. Being aware of common pitfalls can help you avoid them and achieve a better result. The most frequent issues relate to measurements, fastening, and sealing.
Taking your time and double-checking your work at each stage is the best way to prevent costly and time-consuming errors.
Mismatched Profiles and Gaps
One common error is not purchasing enough trim or buying slightly different profiles. Always buy all your trim from the same supplier at the same time to ensure consistency. When joining two pieces of trim, create a clean overlap of at least one inch to prevent visible gaps.
Inaccurate measurements are the primary cause of gaps at the corners. Miter cuts must be precise, or it’s often better to use pre-formed corner pieces for a guaranteed fit.
Over-tightening Fasteners and Causing Distortion
It’s tempting to drive screws in as tightly as possible, but this can damage metal trim. Over-tightening can create dimples and cause the trim to warp or twist, resulting in a wavy, unprofessional appearance. The screw should be just snug enough to hold the trim firmly in place.
Using a drill with an adjustable clutch can help prevent this by stopping the screw at a preset torque.
Forgetting Sealant and Inviting Leaks or Pests
Skipping the final caulking step is a mistake that undermines the functional benefits of the trim. The sealant bead is what creates the airtight and pest-proof barrier. Without it, small gaps will remain, defeating one of the main purposes of the installation.
This is especially critical in areas like garages, basements, or workshops where preventing drafts and insects is a high priority. A homeowner focused on proper upkeep, whether it’s checking the oil in their snowblower’s gearbox or inspecting ceiling seams, knows that preventative care is key.
Advanced Applications and Creative Ideas
Trim for a corrugated metal ceiling can be used for more than just finishing the perimeter. With a little creativity, it can become an integral part of unique design features that enhance the functionality and style of your space.
These advanced techniques can elevate your project from a simple ceiling covering to a custom design statement.
Integrating Lighting with Your Ceiling Trim
Certain trim profiles can be used to cleverly conceal and integrate LED strip lighting. A well-placed L-channel or a custom-formed piece of trim can create a recessed channel for LED tape, providing ambient cove lighting around the perimeter of the room.
This technique adds a dramatic and sophisticated lighting effect that highlights the texture of the corrugated panels. It combines the raw, industrial nature of the metal with modern lighting technology for a truly custom look.
Transitioning Between Different Ceiling Materials
Trim is essential when transitioning from a corrugated metal ceiling to another material, like drywall. A J-channel or back-to-back L-channel can create a clean and intentional break point between the two surfaces. This defines the different zones within an open-concept space.
Just as you’d carefully consider the transition from walls to flooring, perhaps choosing between vinyl or laminate flooring for a basement, the transition from wall to ceiling demands equal attention.
Maintenance and Care for Your Metal Ceiling Trim
Once installed, metal ceiling trim is exceptionally low-maintenance. However, a few simple steps can ensure it looks great for years to come. Regular cleaning and prompt attention to any scratches will keep it in top condition.
The durability of metal means you will not have to worry about the common issues that affect other materials, like rot or warping.
Regular Inspections and Cleaning
Periodically inspect the trim for dust and cobwebs, especially along the top edge. A quick wipe-down with a soft cloth or a duster is usually all that is needed. For more stubborn grime, a mild detergent and water solution can be used, but be sure to dry the metal thoroughly afterward.
If you’re considering painting your trim for a custom color, using a high-quality paint designed for metal is crucial, much like when you compare premium options such as Sherwin Williams Latitude vs. Duration for outdoor projects.
Dealing with Scratches and Minor Damage
If a scratch occurs, it’s best to address it quickly to prevent potential corrosion, especially on galvanized steel. Use a touch-up paint pen from the trim manufacturer to seal the scratch. For painted aluminum or steel, matching the color and sheen is key to an invisible repair.
Careful handling during installation is the best way to prevent scratches in the first place.
Conclusion: The Finishing Touch That Makes All the Difference
Trim for a corrugated metal ceiling is a small detail that has a major impact. It solves the practical problem of unfinished edges while providing the aesthetic polish that completes the room. From the versatile J-channel to the clean lines of L-trim, the right choice will protect your investment and elevate your design.
By understanding the different types, materials, and installation techniques, you can confidently select and install the perfect trim, ensuring your corrugated metal ceiling is a stunning and durable feature in your home for years to come.