How to Safely Transport Drywall on a Roof Rack: Essential Tips for a Smooth Ride
You have a home renovation project, a few sheets of drywall, and a car with a roof rack. The nagging question begins: can you actually transport drywall on your roof rack safely and without turning those pristine sheets into a pile of gypsum dust? It’s a common dilemma for DIY enthusiasts looking to save on delivery fees, but one fraught with potential disaster.
The core of the problem lies in the nature of drywall itself. It’s heavy, unwieldy, and surprisingly fragile. Combine that with the aerodynamic forces at play on a moving vehicle, and you have a recipe for cracked boards, damaged property, or even a serious road hazard. Many have tried and failed, littering highways with shattered dreams and sheetrock.
But fear not, with the right knowledge and preparation, it is possible to get your drywall home in one piece. This comprehensive guide will walk you through the problems, the solutions, and the absolute must-dos to ensure a successful and safe transport. We’ll cover everything from weight limits and proper support to the best strapping techniques, so you can tackle your project with confidence.
You'll Learn About
The inherent Risks: Why Transporting Drywall is So Tricky
Understanding the “why” behind the difficulty is the first step to a successful transport. It’s not as simple as just throwing the sheets on top and hoping for the best. Several factors conspire to make this a challenging task.
Weight and Balance: A Heavy Burden
A standard 4×8 sheet of 1/2-inch drywall weighs over 50 pounds. Even a small number of sheets can quickly exceed your vehicle’s roof rack weight capacity. Most factory-installed roof racks have a dynamic weight limit (the weight they can carry while the vehicle is in motion) of around 100 to 165 pounds. Overloading your rack can damage your vehicle’s roof, the rack itself, and create an unstable, top-heavy driving condition. Before you even think about loading up, you should be asking yourself, am I too heavy to get on my roof? The same principles of weight distribution and capacity apply to your cargo.
The “Sail” Effect: Fighting the Wind
A 4×8 sheet of drywall presents a massive surface area to the wind. As you drive, air gets underneath the leading edge, creating significant upward lift – a phenomenon known as the “sail effect.” This force can be surprisingly powerful, enough to bend, snap, or even rip the drywall right off your roof, even with what seems like secure straps. This is the single most common cause of transport failure. High speeds, especially on the highway, amplify this risk exponentially.
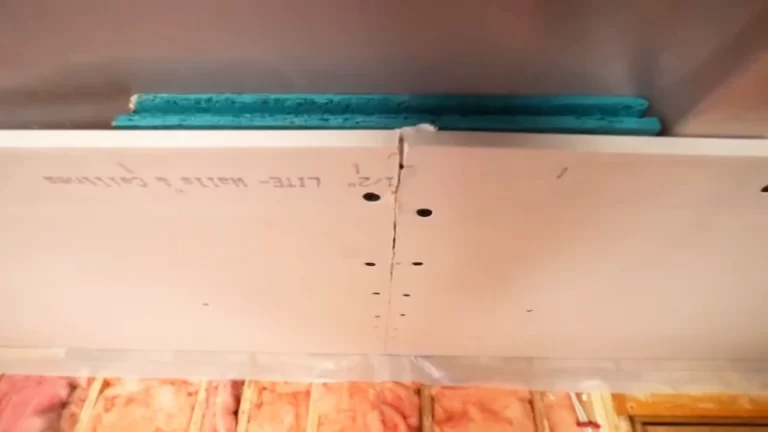
Fragility and Lack of Support: The Cracking Point
Drywall is rigid but brittle; it’s designed to be flat and supported. Most roof rack crossbars are spaced several feet apart, leaving large sections of the drywall sheet completely unsupported. The bouncing and flexing from road vibrations, bumps, and the aforementioned wind lift can easily cause the sheets to crack or snap in the middle. Without proper, full-length support, you’re practically guaranteeing damage.
The Solution: A Step-by-Step Guide to Safe Transport
Now that we’ve identified the problems, let’s focus on the actionable solutions. Following these steps meticulously will dramatically increase your chances of success and ensure you, your car, and your drywall arrive safely at your destination.
Step 1: Preparation is Everything
Before you even leave for the hardware store, you need to prepare your vehicle and gather the necessary supplies. Don’t rely on the flimsy twine they offer at the checkout counter.
- Check Your Roof Rack’s Weight Limit: This is non-negotiable. Consult your vehicle’s owner’s manual or the rack manufacturer’s specifications to find the dynamic weight capacity. Do not exceed it.
- Gather the Right Equipment: You will need several high-quality ratchet straps (not bungee cords), some 8-foot long 2x4s for support, and potentially a sheet of plywood or OSB to create a solid base.
- Plan Your Route: Avoid highways and high-speed roads at all costs. Plan a route that uses slower, local streets, even if it takes longer.
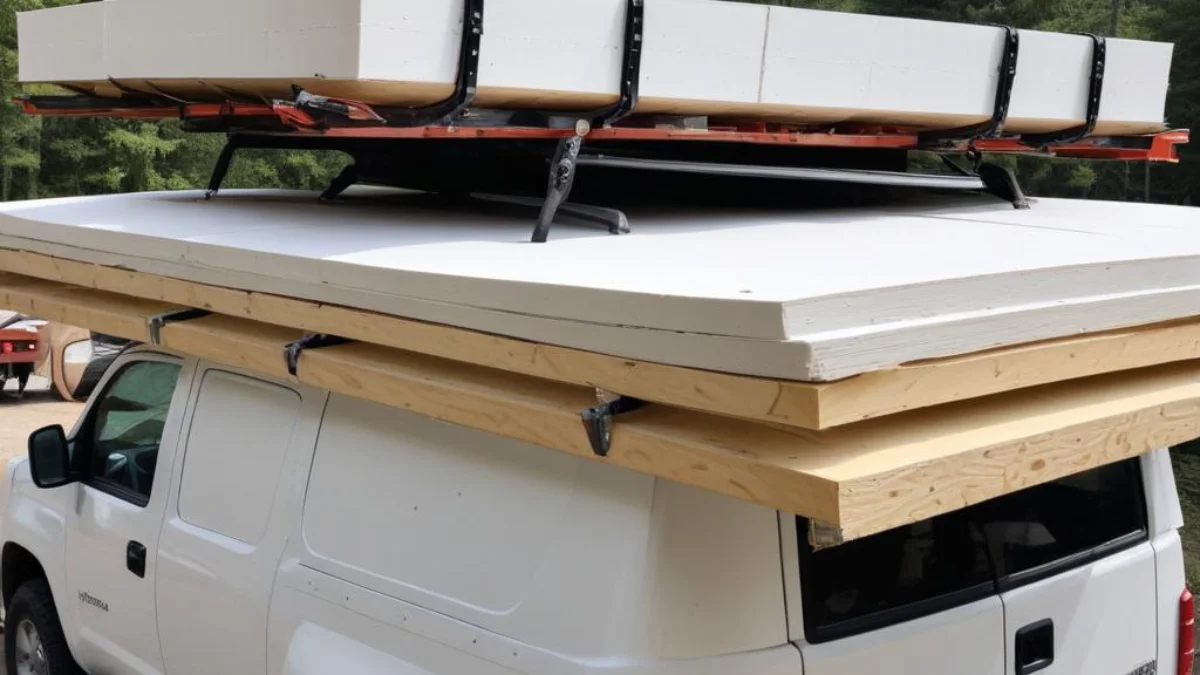
Step 2: Create a Solid, Supportive Base
You must counteract the lack of support between your crossbars. This is arguably the most crucial step in preventing cracked sheets.
Lay two or three 8-foot 2x4s along the length of your roof rack, parallel to the direction of travel. Secure these 2x4s to your roof rack’s crossbars first. This creates a solid platform that will support the entire length of the drywall sheets and prevent them from flexing and cracking.
For even better protection, consider placing a sheet of plywood on top of the 2x4s. This distributes the load even more evenly and provides a smooth surface, further protecting the bottom sheet of drywall from damage.
Step 3: Loading the Drywall Correctly
With your support structure in place, it’s time to load the drywall. Get help; this is not a one-person job. Lift the sheets carefully onto the prepared base.
Make sure the stack is centered on your vehicle both side-to-side and front-to-back. Proper balance is key to safe handling. Be mindful not to stack too many sheets. Remember your weight limit and err on the side of caution by taking fewer sheets than you think you can handle.
| Drywall Thickness | Approximate Weight per 4×8 Sheet | Recommended Max Sheets (150 lb Rack Limit) |
|---|---|---|
| 1/4″ | 38 lbs | 3-4 Sheets |
| 1/2″ Standard | 54 lbs | 2 Sheets |
| 5/8″ Fire-Resistant | 70 lbs | 2 Sheets |
Step 4: The Art of Strapping Down
How you secure the load is just as important as how you support it. This is where you’ll use those heavy-duty ratchet straps.
Use at least three straps. Run the straps over the top of the drywall and secure them through the doors of your car, not just to the roof rack itself. Pass the straps through the open doors and then close the doors on the straps. This anchors the load to the vehicle’s frame, providing a much more secure hold and preventing the rack from being pulled upwards by wind forces.
Crucially, you must also have a strap running from the front of the load to the front of your car and one from the back of the load to the rear. This prevents the sheets from sliding forward during a sudden stop or backward during acceleration. The front tie-down is especially important for combating wind lift.
Tighten the straps until the load is firm and doesn’t shift when you push on it, but be careful not to overtighten and damage the edges of the drywall. The whole car should rock when you push the load. After driving a short distance, pull over and check your straps to ensure they are still tight.
Additional Considerations and Pro-Tips
Beyond the core steps, a few extra tips can make the process smoother and safer. These are the details that separate a successful haul from a roadside cleanup.
What About Bad Weather?
Transporting drywall in the rain is highly discouraged. The paper facing can get saturated, weakening the entire sheet and leading to mold issues down the line. If you absolutely must transport it in wet conditions, wrap the entire stack thoroughly in a heavy-duty tarp before strapping it down. Ensure the tarp is secured tightly so it doesn’t flap in the wind, which could loosen your load.
After the Haul: Handling and Storage
Once you’ve successfully transported the drywall, the job isn’t over. Unload it carefully and carry the sheets vertically to prevent breakage. Store them flat in a dry, protected area. Improper storage can lead to warping, making your installation work much harder. If you’ve had a messy project, you might find yourself needing to clean up fine dust, a perfect job for a specialized tool. In fact, many DIYers find that a shop vac blown insulation setup can be repurposed for excellent dust collection.
When to Say No: The Alternatives
Sometimes, the best solution is to recognize when the risk isn’t worth it. If you need a large quantity of drywall, have a very small car, or don’t have a proper roof rack, consider the alternatives. Renting a truck from a home improvement store for a couple of hours is often a cheap and much safer option. The cost of a rental is minimal compared to the cost of replacing damaged drywall, repairing your car, or worse. And while you’re focused on your project, don’t forget about other potential home issues; it’s always good to know how to get rid of mice before they become a bigger problem.
By understanding the risks and meticulously following the steps for proper support and securing, you can safely transport drywall on your roof rack. Remember to prioritize safety above all else: check your weight limits, use proper support, secure the load from all directions, and drive slowly. With careful planning, you can avoid disaster and keep your DIY project on track.