Toggle Bolts in Plaster: The Fail-Proof Guide to Securely Hanging Anything
You found the perfect spot for that heavy mirror, antique clock, or floating shelf. You carefully measure, mark the spot on your beautiful old plaster wall, and drive in a screw. It feels secure at first, but minutes, days, or even weeks later, you hear the dreaded crash. The screw has ripped out, leaving a crater of crumbled plaster and your prized possession in a heap on the floor.
This frustrating scenario is all too common in homes with plaster walls. Unlike modern drywall, plaster is thick, hard, and notoriously brittle. Standard nails and screws simply can’t get the grip they need in the hollow space between the plaster and the wall studs, leading to inevitable failure.
But there is a solution that is practically tailor-made for this exact problem. It’s a time-tested piece of hardware that can give you the confidence to hang almost anything: the toggle bolt.
You'll Learn About
Why Your Plaster Walls Keep Betraying You
To understand why toggle bolts are so effective, it’s crucial to first understand the nature of your walls. Most older homes with plaster walls use a “lath and plaster” construction. This consists of thin horizontal strips of wood, called lath, nailed to the wall studs. A thick, cement-like plaster is then applied over the lath, creating a hard, durable surface.
The problem is the space behind the plaster and between the lath strips. When a regular screw is driven into this hollow cavity, it only has the brittle plaster to hold onto. Any significant weight, or even slight vibration, will cause the plaster to crumble and the screw to pull out. This is precisely why that closet wire shelf fell out of the wall; standard anchors just weren’t up to the task.
Even if you hit one of the thin wood lath strips, it’s often not substantial enough to support heavy loads. You need a way to bypass the brittle plaster entirely and use the structural integrity of the wall system to your advantage.
Enter the Toggle Bolt: Your Heavy-Duty Hero for Plaster
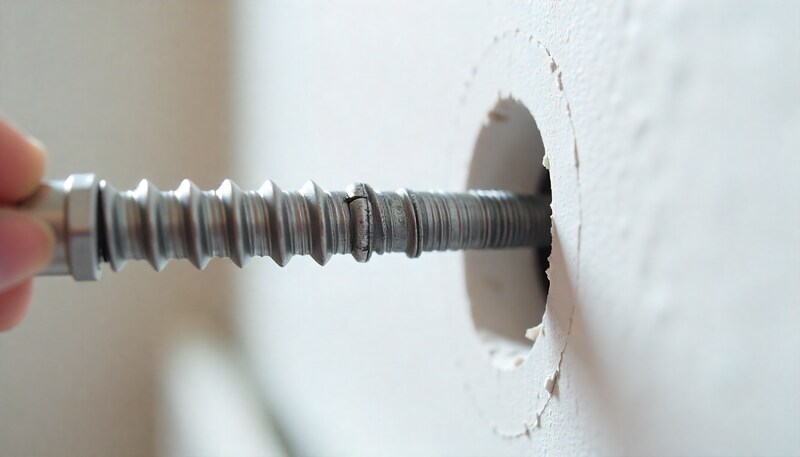
A toggle bolt, sometimes called a butterfly anchor, is a simple yet brilliant two-part fastener: a machine screw and a set of spring-loaded metal wings. Its genius lies in its method of operation. The wings are folded back and pushed through a pre-drilled hole in the wall. Once they clear the back of the plaster and lath, the springs force them to open up.
When you tighten the screw, these open wings are pulled flat against the *inside* of the wall. This action distributes the weight of the hanging object over a much larger surface area, effectively clamping it to the wall from behind. Instead of relying on the crumbly plaster for grip, the toggle bolt braces against the solid wood lath and the back of the plaster, creating an incredibly secure anchor point.
This distribution of force is the secret to its strength. It addresses the fundamental weakness of plaster, turning the entire wall section into a support system.
Choosing the Right Toggle Bolt: A Critical Decision
Not all toggle bolts are created equal. Selecting the correct size is paramount for a safe and secure installation. There are two key measurements to consider: the diameter of the bolt and the length of the bolt.
The bolt’s diameter determines its strength. Larger diameter bolts have larger, stronger wings and can support more weight. The bolt’s length is equally important; it must be long enough to pass through your hanging item’s bracket, the thickness of the plaster, and still have enough room for the wings to open fully behind the wall.
Always choose a toggle bolt rated for significantly more weight than the object you are hanging. This provides a crucial safety margin. Consult a sizing chart to make an informed decision.
| Bolt Diameter | Drill Bit Size | Typical Load Capacity (in Hollow Walls) |
|---|---|---|
| 1/8″ | 3/8″ | Up to 30 lbs |
| 3/16″ | 1/2″ | Up to 50 lbs |
| 1/4″ | 5/8″ | Up to 70 lbs |
| 3/8″ | 7/8″ | Up to 100+ lbs |
The Ultimate Step-by-Step Installation Guide (No More Mistakes)
Proper installation is the key to unlocking the full strength of a toggle bolt. Rushing this process or using the wrong technique is the primary reason for failures. Follow these steps meticulously for a perfect result every time.
Step 1: Gather Your Tools (The Right Way)
Before you begin, assemble the necessary tools. Having everything on hand prevents mistakes and frustration. You will need a power drill, a set of drill bits, a screwdriver (Phillips or flathead, depending on the bolt), painter’s tape, and a pencil.
Step 2: The Secret to Drilling a Clean Hole in Plaster
Drilling into plaster can be messy and lead to cracking if done incorrectly. The key is to prevent the surface from chipping as the drill bit enters. Place a small ‘X’ of painter’s tape over the spot where you intend to drill. This simple trick helps hold the plaster together and gives you a much cleaner hole.
Select a drill bit that matches the size specified for your toggle bolt (this is usually printed on the packaging). Begin drilling on a slow speed, applying steady, gentle pressure. Do not use the hammer function on your drill, as the vibrations will shatter the plaster. Once you feel the bit punch through the plaster and lath into the hollow space, you’re done.
Step 3: Inserting the Toggle (Don’t Mess This Up)
This is a crucial step that must be done in the correct order. First, remove the spring-loaded wings from the screw. Pass the screw through the mounting hole of the object you want to hang (e.g., the shelf bracket or mirror hanger). Now, re-thread the wings back onto the end of the screw just a few turns.
Pinch the wings together so they are flat against the screw and push them through the drilled hole in the wall. You should feel and often hear a distinct “snap” or “pop” as the wings spring open inside the wall cavity. This sound is your confirmation that the anchor is ready.
Step 4: The Final Tightening – The Make-or-Break Moment
Here is the most important technique that ensures a rock-solid installation. Before you start turning the screwdriver, gently pull the screw head towards you. This slight outward pressure pulls the open wings firmly against the back of the wall, preventing them from spinning as you tighten the screw.
While maintaining this outward pull, use your screwdriver to tighten the bolt. You will feel it begin to bite and then become progressively tighter as it secures your item to the wall. Stop when it is snug; overtightening can crack the plaster or damage the wings.
Common Toggle Bolt Disasters in Plaster (And How to Avoid Them)
Even with the best intentions, things can go wrong. Understanding common pitfalls is the best way to avoid them.
- The Hole is Too Big: Drilling a hole larger than necessary provides less surface area for the wings to brace against, weakening the hold. Always use the exact drill bit size recommended.
- The Bolt is Too Short: If the bolt isn’t long enough, the wings won’t have enough clearance to open behind the lath. Always measure the thickness of your item’s bracket and the wall before purchasing bolts.
- Forgetting to Pull While Tightening: If you don’t pull the screw towards you, the entire toggle mechanism will just spin uselessly inside the wall. This is the most common installation error.
- Losing the Wings: If you fully unscrew the bolt after the wings are inside the wall, the wings will fall down into the wall cavity, lost forever. Remember, you can’t reuse a traditional toggle bolt in the same hole.
Beyond the Basics: Advanced Toggle Bolt Tips for Plaster
Once you’ve mastered the basics, a few advanced considerations can elevate your skills. One important factor is understanding what lies behind your plaster. In some older homes, plaster was applied directly over brick or masonry. A toggle bolt will not work here, as it needs a hollow cavity to open. If you drill and hit solid material, you’ll need a masonry anchor instead.
Another common occurrence is hitting a wood lath strip directly with your drill bit. This is not a problem. In fact, it’s beneficial. Simply drill through the lath. When the toggle opens, it will brace against that solid piece of wood, creating an even stronger anchor point than it would in a hollow space. This is much more secure than relying on the strength of furring strips alone.
For an easier installation experience, consider modern strap-style toggles. These anchors use a similar principle but feature a plastic strap that allows you to secure the toggle inside the wall before inserting the bolt. This design prevents the toggle from falling into the wall if you need to remove the screw temporarily.
Frequently Asked Questions (We’ve Got Answers)
How much weight can a toggle bolt really hold in plaster?
The holding power depends on the bolt size and the condition of the wall. A properly installed 1/4-inch toggle bolt can often hold 70 pounds or more. However, the ultimate limiting factor is the plaster itself. For a deep dive into this topic, explore this article on how much weight plaster can hold.
Can I reuse a toggle bolt?
No. Once you fully remove the screw from a traditional toggle bolt, the spring-loaded wings will fall off inside the wall. Each installation requires a new toggle bolt.
What if I hit a wall stud?
If you drill and hit a solid wood stud, that’s great news! You don’t need a toggle bolt. You can use a long wood screw driven directly into the stud for the strongest possible hold.
The Final Word on Plaster and Toggle Bolts
Working with plaster walls doesn’t have to be a source of anxiety. Armed with the right hardware and the right knowledge, you can hang heavy items with complete confidence. The toggle bolt is a simple, effective, and powerful solution to the unique challenges that plaster presents.
By understanding how your walls are constructed and following a meticulous installation process, you can ensure your shelves, mirrors, and artwork stay securely attached for years to come, turning potential wall disasters into DIY triumphs.