Temporary Countertops That Look Amazing (And Won’t Break the Bank)
You’re in the middle of a kitchen renovation. The dust is flying, the old cabinets are gone, and your beautiful new ones are in place. But there’s a problem: your dream countertops are weeks away from being installed, leaving you with a chaotic, barely functional space. This frustrating delay is a common issue that can turn an exciting project into a daily struggle.
Living without a proper work surface makes even the simplest tasks, like making coffee or a sandwich, feel like a major challenge. The solution isn’t to live on takeout for a month. It’s to find a smart, affordable, and stylish temporary countertop that bridges the gap and keeps your kitchen working.
You'll Learn About
Why You Absolutely Need a Temporary Countertop
A temporary countertop is more than just a placeholder; it’s a crucial tool for maintaining your sanity and the functionality of your home during a renovation. It provides a stable surface for meal prep, small appliances, and daily tasks, preventing the frustration of a kitchen in limbo. For renters, it’s a way to personalize a space without making permanent changes.
These solutions are also perfect for homeowners on a tight budget. They allow you to get the look you want now while you save up for a more permanent, high-end material down the line. A good temporary solution solves an immediate problem while providing long-term flexibility.
Surviving a Kitchen Renovation
A full kitchen remodel can be a stressful and lengthy process. Having a temporary work surface allows you to maintain a semblance of normal life. A simple sheet of sealed plywood or a peel-and-stick cover can provide a functional area for your microwave, coffee maker, and toaster oven. This small convenience makes a massive difference in your daily routine.
Setting up a temporary kitchen space, even in a different room, can significantly reduce the stress of a renovation. Using folding tables or your new base cabinets as a foundation for a temporary top keeps essential items organized and accessible. This approach helps keep your household running smoothly while the professionals do their work.
The Renter’s Smart Upgrade
Renters often face the challenge of living with outdated or worn-out countertops they can’t replace. Temporary countertop solutions offer a fantastic way to upgrade the look and feel of a rental kitchen without violating a lease agreement. Peel-and-stick vinyl is a game-changer for renters, offering styles that mimic granite or marble.
These products are designed to be easily removable, leaving the original surface underneath undamaged when it’s time to move out. It’s an inexpensive way to make a rental feel more like your own personal space. This simple DIY project can dramatically improve your daily experience in the kitchen.
A Budget-Friendly Bridge to Your Dream Kitchen
High-end countertops like quartz or granite are a significant investment. Sometimes, your budget doesn’t stretch to cover everything at once. Temporary countertops serve as an excellent “bridge,” giving you a beautiful and functional kitchen now while you save for your ultimate goal.
Options like laminate or well-finished plywood can look surprisingly high-end for a fraction of the cost. This allows you to complete the rest of your kitchen renovation without compromise. When you’re ready, you can upgrade the countertops without having to redo the entire kitchen.
The Top Temporary Countertop Solutions Uncovered
When it comes to temporary countertops, there is a wide range of options to fit any budget and skill level. From ultra-affordable DIY solutions to more durable, pre-fabricated choices, you can find the perfect fit for your needs. The best solution depends on your timeline, how you use your kitchen, and your desired aesthetic.
We’ll explore some of the most popular and effective temporary countertop materials. Each has its own set of pros and cons, from cost and ease of installation to durability and appearance. Understanding these differences will help you make an informed decision.
The Ultra-Budget Option: Plywood and a Sealant
For a truly budget-friendly and functional temporary surface, a simple sheet of plywood is an excellent choice. Plywood provides a sturdy, flat workspace that can be cut to the exact dimensions of your cabinets. To protect it from moisture and stains, it’s essential to seal it properly.
Applying several coats of a food-safe sealant like polyurethane will create a durable, wipeable surface. This is a practical solution that can be installed quickly and will easily last through a lengthy renovation. It’s a no-frills approach that prioritizes function over high-end aesthetics.
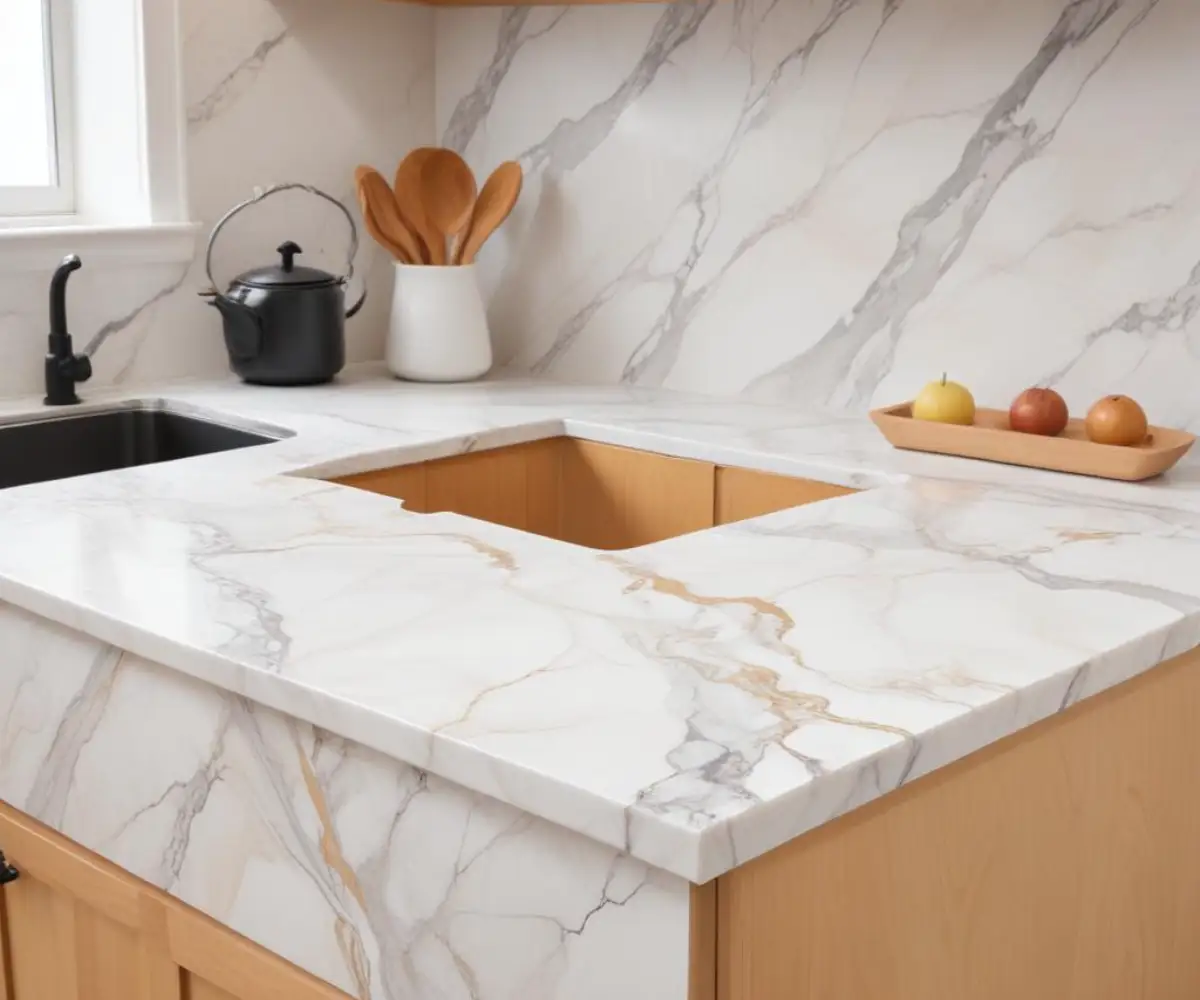
The Quick & Stylish Fix: Peel-and-Stick Countertops
Peel-and-stick countertop covers, often made of durable vinyl, are one of the most popular temporary solutions. They come in an endless variety of patterns and colors, realistically mimicking materials like marble, granite, and wood. This option is perfect for both renters and renovators looking for an instant and dramatic upgrade.
The installation process is straightforward and requires minimal tools, making it a great DIY project. Proper surface preparation is key to a smooth, bubble-free finish. When it’s time for a change, the vinyl can be removed, often with a little heat from a hairdryer to loosen the adhesive.
The Laminate Sheet Advantage
Laminate has been a countertop staple for decades for a good reason: it’s affordable, durable, and comes in countless styles. You can purchase laminate sheets and adhere them to a plywood or MDF substrate. This option offers a more substantial and long-lasting temporary solution compared to peel-and-stick vinyl.
While the installation is more involved, requiring contact cement and precise cutting, the result is a tough surface that resists stains and is easy to clean. Laminate is an excellent choice if your “temporary” period might stretch into a year or more. It provides a great balance of cost, durability, and style.
Modular and Prefabricated Options
For a solution that requires even less DIY effort, consider prefabricated laminate countertops from home improvement stores. These come in standard lengths and are ready to be cut to size and installed. They offer a finished look instantly and are designed to be user-friendly.
Another option is butcher block, which can be surprisingly affordable, especially if sourced from places like IKEA. While it requires sealing to protect it from water, a butcher block section can provide a warm, beautiful, and highly functional workspace. It can even be repurposed later in a laundry room or workshop.
Comparison of Temporary Countertop Options
Choosing the right temporary countertop involves weighing cost, durability, ease of installation, and overall look. To help you decide, here is a comparison of the most popular options. Think about how long you’ll need the surface and how much daily wear and tear it will face.
| Material | Average Cost (per sq. ft.) | Durability | Ease of Installation | Best For |
|---|---|---|---|---|
| Sealed Plywood | $2 – $5 | Low to Medium | Easy | Short-term renovation survival |
| Peel-and-Stick Vinyl | $1 – $7 | Low | Very Easy | Renters and quick cosmetic updates |
| Laminate Sheets | $3 – $10 | Medium to High | Moderate | Longer-term temporary use |
| Prefabricated Laminate | $20 – $50 | Medium to High | Moderate | A polished look on a budget |
| Butcher Block | $40 – $60 | High (with maintenance) | Moderate to Difficult | A stylish, repurposable option |
Step-by-Step Installation Guide: The Perfect Peel-and-Stick Application
Achieving a professional-looking finish with peel-and-stick countertops is all about patience and preparation. Rushing the process can lead to bubbles, creases, and misalignment. Follow these steps for a flawless application that will transform your kitchen.
1. Prepare the Surface
The foundation of a good application is a perfectly clean and smooth surface. Thoroughly clean the existing countertop with a degreasing cleaner to remove any oil or residue. For surfaces with texture or grout lines, you may need to apply a thin layer of filler and sand it smooth once dry.
Any imperfections on the underlying surface will show through the vinyl, so take your time with this step. Once clean and smooth, wipe the surface with rubbing alcohol to ensure it’s completely free of any remaining contaminants. A pristine surface ensures the best possible adhesion.
2. Measure and Cut Carefully
Measure your countertop sections carefully, always adding a few extra inches to each dimension for overhang. This extra material, known as “bleed,” gives you room for error and allows you to wrap the edges for a seamless look. It’s much easier to trim excess vinyl than to patch a piece that’s too short.
When cutting, use a sharp utility knife and a straight edge to get clean, precise lines. If your pattern, like marble, has veins, think about how you want the seams to line up for the most natural appearance before you make your cuts.
3. The Application Process
Start at one end of the countertop. Peel back only a few inches of the paper backing. Carefully align the edge of the vinyl with the countertop, ensuring it’s straight. Use a squeegee or a credit card to slowly press the vinyl onto the surface, working from the center outwards to push out air bubbles.
Continue to pull off the paper backing in small sections as you smooth the vinyl into place. This slow, methodical approach is the best way to prevent bubbles. If you do get a stubborn bubble, you can prick it with a fine needle and smooth it down. Sometimes, using a sealant around the sink can prevent lifting, but if you do, you’ll want to know how to handle any lingering smells.
4. Finishing the Edges and Seams
For the edges, gently heat the overhanging vinyl with a hairdryer to make it more pliable. Carefully fold it down and under the countertop edge, smoothing it firmly. For corners, you can make precise relief cuts to create a neat fold, similar to wrapping a gift.
When you need to create a seam, overlap the two pieces of vinyl by about a quarter of an inch. If the pattern allows, try to align it for a continuous look. Press the seam down firmly to ensure it is sealed and less visible.
Common Mistakes to Avoid with Temporary Countertops
While temporary countertops are fantastic solutions, a few common mistakes can lead to disappointing results. Avoiding these pitfalls will ensure your temporary fix looks great and functions well for as long as you need it to. From improper material choice to skimping on preparation, awareness is key.
The biggest mistake is having unrealistic expectations. Remember, these are temporary, budget-friendly solutions. While they can look fantastic, they won’t have the same durability as a solid stone slab. Treating them with a bit of care will greatly extend their life and appearance.
Choosing the Wrong Material for Your Needs
It’s crucial to match the material to your lifestyle. If you have a busy kitchen with a lot of cooking and activity, a thin peel-and-stick vinyl might not be durable enough. In that case, a laminate or sealed plywood surface would be a better choice to withstand the wear and tear.
Conversely, if you’re a renter looking for a purely cosmetic and easily reversible upgrade, a heavy-duty option might be overkill. Assess how you use your kitchen and how long you need the solution to last before making a decision. Considering the pros and cons of different materials, like in a Kraus vs Kohler showdown for sinks, can help you make a more informed choice for all your kitchen components.
Poor Surface Preparation
As mentioned in the installation guide, skipping proper surface preparation is the fast track to a sloppy-looking job. Dust, grease, or grime will prevent proper adhesion and cause the material to lift or bubble over time. Taking an extra hour to properly clean and prep the surface is well worth the effort.
Ensure the surface is not only clean but also completely dry before you begin. Any trapped moisture can compromise the adhesive and lead to failure. This step is the most critical for a long-lasting and professional-looking result.
Neglecting Proper Maintenance
Even though the countertop is temporary, it still requires some care to keep it looking its best. Avoid using abrasive cleaners or scrubbers that can scratch the surface. Always use cutting boards for chopping and trivets for hot pots and pans, as most temporary materials are not heat-resistant.
Wipe up spills promptly, especially on sealed wood, to prevent staining or water damage. A little bit of mindful care will keep your temporary surface looking fresh. Proper cleaning also helps prevent unwelcome visitors; after all, you don’t want to be dealing with random ants in the house on your new surface.
Conclusion: Your Smart and Stylish Temporary Solution Awaits
Whether you’re navigating a kitchen renovation, upgrading a rental, or simply working with a tight budget, temporary countertops offer a fantastic and empowering solution. They prove that you don’t have to live in a chaotic, non-functional space or settle for outdated surfaces while waiting for your dream kitchen to become a reality.
From the rustic simplicity of sealed plywood to the stylish versatility of peel-and-stick vinyl, there is a temporary option to suit every need and aesthetic. By choosing the right material and following proper installation techniques, you can create a beautiful, durable, and affordable work surface that will serve you well. Embrace the temporary and enjoy a more functional and beautiful kitchen today.