Air Leak During Sprinkler Blowout? Backflow Preventer Fix
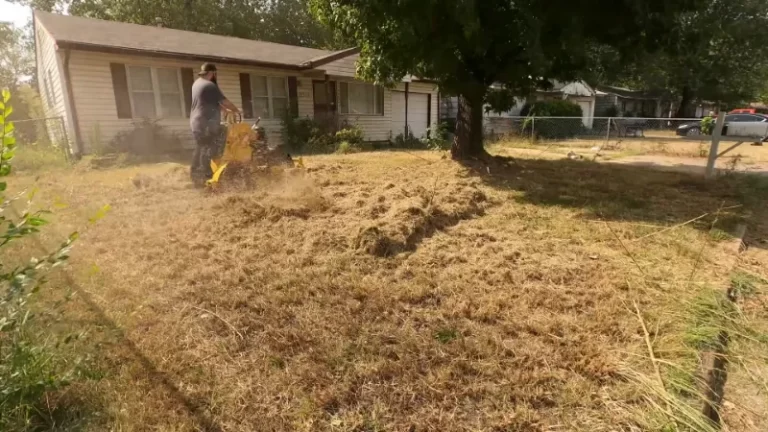
You’re in the middle of winterizing your sprinkler system, air compressor humming, when you hear it. A distinct, and often loud, hissing or sputtering of air, sometimes mixed with water, coming directly from your backflow preventer. Instantly, your mind races with questions: Is this normal? Did I break something? Is my drinking water safe?
This experience is incredibly common and a major source of anxiety for homeowners performing their own sprinkler blowouts. Seeing air escape from a device designed to hold water under pressure seems counterintuitive and dangerous. Rest assured, while it can indicate a problem, it is often a normal part of the process or a sign of an incorrect procedure.
This comprehensive guide will eliminate the guesswork and panic. We will explore exactly why air comes out of your backflow preventer, differentiate between normal operation and signs of trouble, and provide a step-by-step master guide to performing a perfect, stress-free sprinkler blowout. You will learn to identify the issue and confidently apply the solution.
You'll Learn About
First, What Is a Backflow Preventer and Why Does It Matter?
Before diving into the “why,” it’s crucial to understand what this device is and the critical job it performs. A backflow preventer is a non-negotiable safety device installed on your irrigation system. Its sole purpose is to protect your home’s potable (drinkable) water supply from contamination.
Without it, a drop in pressure in the main water line could cause water from your lawn—potentially contaminated with fertilizers, pesticides, and bacteria—to be siphoned backward into your pipes. The backflow preventer contains a series of valves and chambers that ensure water can only flow in one direction: out to your sprinklers, never back into your house.
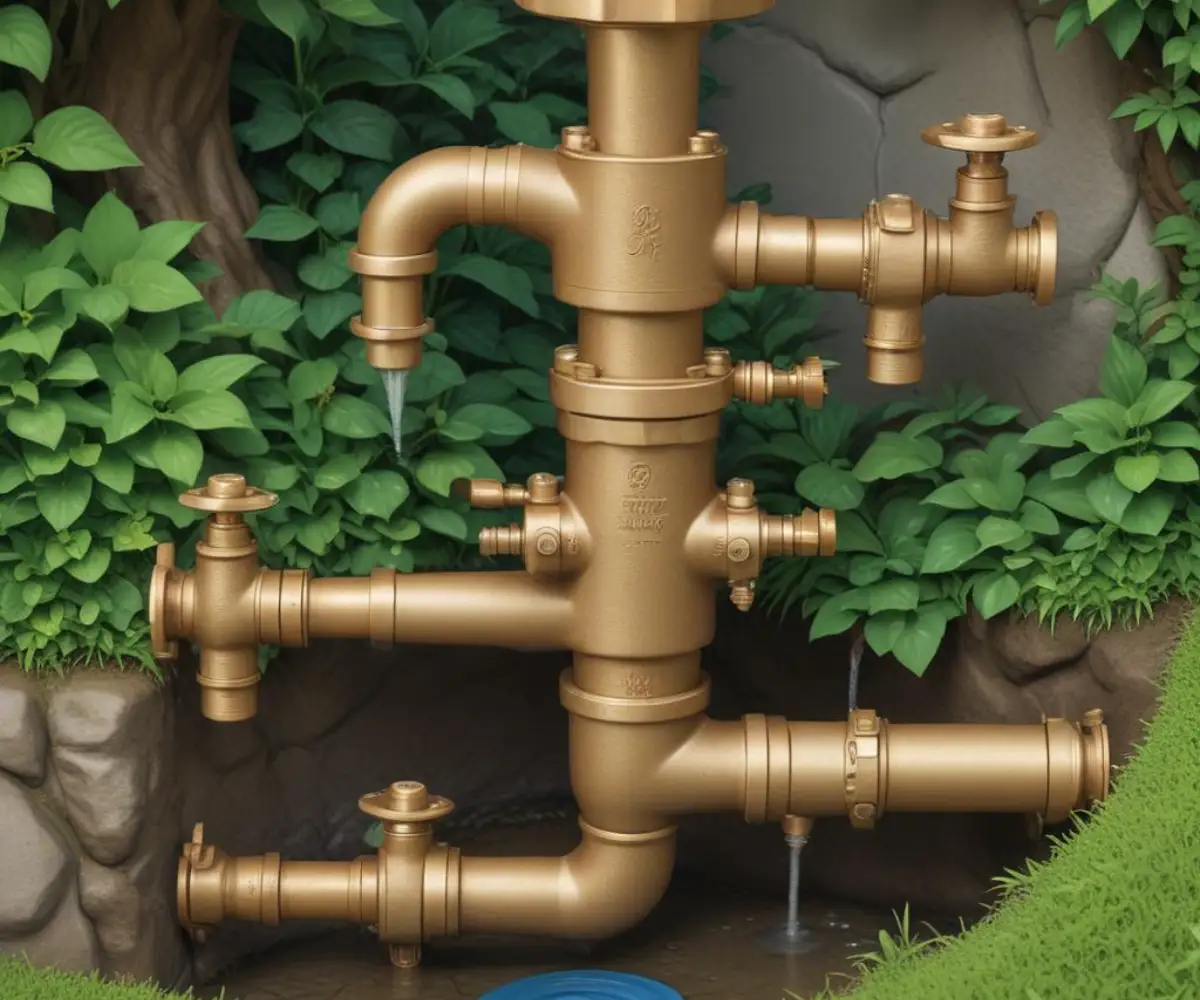
The Key Players: Common Types of Backflow Preventers
While several types exist, most residential homes use one of two main types, and knowing which you have is key to understanding the blowout process. The most common are the Pressure Vacuum Breaker (PVB) and the Reduced Pressure Zone (RPZ) assembly.
A Pressure Vacuum Breaker (PVB) is typically a simple brass device with a plastic cap or “bonnet” on top. It uses an internal check valve and an air inlet valve to prevent backflow. The hissing sound during a blowout on a PVB often comes from this top bonnet area.
A Reduced Pressure Zone (RPZ) assembly is a more complex and robust device, often considered the most reliable. It has two independent check valves and a differential pressure relief valve in the middle. This relief valve is designed to discharge water if it detects a backflow condition, and it’s a very common place to see air and water escape during winterization.
The Core Issue: Why Is Air Escaping During a Blowout?
Let’s diagnose the hissing. Air escaping your backflow preventer during a blowout can be attributed to one of three main reasons: it’s operating as designed, the blowout procedure is being done incorrectly, or a part has failed. Determining which one applies to you is the key to a successful winterization.
Cause #1: It’s Just Doing Its Job (Normal Operation)
This is the best-case scenario. The internal mechanics of backflow preventers are designed to react to pressure changes. When you force compressed air into the system, you create a chaotic pressure environment that the device may interpret as a backflow event, especially with RPZ valves.
The relief valve on an RPZ is specifically designed to open and discharge when the pressure on the inlet side drops below a certain threshold compared to the outlet side. During a blowout, this can happen intermittently, causing spurts of air and water. This is a sign the device is working correctly. On a PVB, some air might vent from the bonnet as the internal poppet settles.
Cause #2: Operator Error (Incorrect Blowout Procedure)
This is the most frequent cause of problems. A successful blowout is a delicate balance of air pressure, air volume, and proper valve sequencing. Getting any of these wrong can cause air to vent from the backflow preventer and can even damage your entire irrigation system.
The most common procedural mistake is having the backflow preventer’s own ball valves in the wrong position. If the valves are not set correctly, you can trap air, create extreme pressure spikes, or force air out through the device’s safety vents. Another critical error is using too much air pressure. Never exceed 80 PSI for rigid PVC pipe or 50 PSI for flexible polyethylene pipe. High pressure doesn’t clear lines faster; it breaks fittings and damages sprinkler heads.
Cause #3: Mechanical Failure (A Worn or Broken Part)
If air continuously escapes from a specific point on the backflow preventer and doesn’t stop, you may have a mechanical issue. After years of service and exposure to the elements, the internal seals, O-rings, and springs can wear out or become brittle. Debris can also get lodged in a valve, preventing it from sealing completely.
A common failure point on PVB units is a cracked bonnet, the plastic cap on top, which can easily happen if water was trapped inside during a previous freeze. For all types, the O-rings inside the small test ports can degrade, causing persistent leaks when you try to close them.
The Definitive Guide: How to Properly Blow Out Your Sprinkler System
Following the correct procedure from start to finish is the single best way to prevent issues with your backflow preventer and ensure your system is safely winterized. Do not deviate from these steps.
Step 1: Shut Off the Water Supply
Locate the main shutoff valve for your irrigation system. This is typically in your basement or crawlspace. Turn this valve off completely. This isolates your irrigation system from your home’s potable water.
Step 2: Prepare the Backflow Preventer
Go to your backflow preventer. Using a flathead screwdriver, open the two small test ports. They only need a quarter-turn. This allows trapped water to drain and will let air escape during the blowout. Next, turn the two main ball valves to a 45-degree angle (half-open). This is a critical step that prevents air pressure from getting trapped and damaging the internal components.
Step 3: Connect and Configure Your Air Compressor
It is vital that you use an air compressor with a large enough tank to provide sufficient air volume (CFM), not just high pressure. Set the regulator on your compressor to a low pressure, typically between 40-60 PSI. Connect the air hose to the blowout port on your system, which is usually located after the backflow preventer.
Step 4: Blow Out Each Zone Individually
Go to your sprinkler controller and manually activate the first zone. It’s best to start with the zone that is highest in elevation or furthest from the compressor. Slowly open the valve on your compressor to allow air to flow into the pipes.
You will see water being forced out of the sprinkler heads in that zone. Let the air run until the heads are spraying only a fine mist of air and water. Do not let it run so long that the heads just blow dry air, as the friction can create heat and damage the plastic gears inside. Once a zone is clear, turn it off at the controller and immediately move to the next one to prevent heat buildup.
Step 5: Repeat for All Zones
Continue this process for every single zone in your system. Each zone will take a few minutes to clear completely. Do not rush this process. Once the final zone is complete, turn off the air compressor and disconnect the hose.
Step 6: Final System Configuration for Winter
With the blowout complete, go back to your controller and set it to the “Off” or “Rain” mode for the winter. At the backflow preventer, ensure you leave the test ports open and the ball valves at that 45-degree angle. This prevents any residual water from being trapped, which could freeze, expand, and crack the expensive brass body of the device.
Troubleshooting Your Backflow Preventer During a Blowout
Even with the correct procedure, you might encounter persistent issues. This table outlines the most common symptoms you might see with your backflow preventer during winterization, their likely causes, and how to solve them.
| Symptom | Likely Cause | Solution |
|---|---|---|
| Air and water continuously spray from the top of a PVB. | The bonnet seal (O-ring) is worn, or the plastic bonnet itself is cracked from a previous freeze. | Turn off the air. Inspect the bonnet for cracks. If cracked, it must be replaced. If not, unscrew it and replace the bonnet seal O-ring. These are available in repair kits. |
| A steady stream of air leaks from one of the test ports, even when “closed”. | The internal O-ring seal on the test port has failed. | The test port needs to be replaced. This is a simple threaded part that can be unscrewed and replaced with a new one. Use Teflon tape on the threads. |
| Water and air aggressively discharge from the bottom relief valve of an RPZ. | This can be normal, but if it is constant and violent, the internal check valve may be stuck open due to debris or failure. | First, try opening and closing the main water supply quickly a few times (before the blowout) to flush any debris. If that fails, the device must be disassembled and the check valves cleaned or rebuilt with a repair kit. |
| Air seems to be leaking back toward the house shutoff valve. | The number one check valve inside the backflow preventer has failed and is not creating a seal. | This is a critical failure. The backflow preventer is not working and needs to be rebuilt or replaced by a certified professional. Do not operate the irrigation system until it is repaired. |
Proactive Care: Preventing Future Blowout Problems
The best way to deal with sprinkler blowout problems is to prevent them from ever happening. A little bit of maintenance goes a long way in ensuring your irrigation system, and especially its most important safety component, remains in top condition for years to come.
Annual Inspection Is Non-Negotiable
Make it a habit to visually inspect your backflow preventer in both the spring when you turn the system on and in the fall before you blow it out. Look for any visible cracks in the housing, signs of corrosion, or slow drips from any of the joints or vents. Addressing a small leak in the spring is far easier and cheaper than dealing with a catastrophic failure during a winter freeze.
Operating the ball valves a few times during the season also helps prevent them from seizing up. These simple checks can alert you to a failing O-ring or a potential freeze-damage crack long before it becomes a major headache during your fall blowout.
Know When to Call a Professional
While performing your own sprinkler blowout is a satisfying and cost-effective DIY task, repairing a backflow preventer often is not. These are precision safety devices, and in many municipalities, only a licensed and certified plumber or irrigation specialist is legally allowed to repair or replace them. This is because after any repair, the device must be tested with specialized equipment to certify that it is still protecting the public water supply.
If you suspect you have a faulty check valve or a significant internal failure, the smart and safe choice is to call a professional. They have the expertise and the required tools to do the job correctly and ensure your water remains safe.
Winterizing as Part of Your Total Home Maintenance Plan
Preparing your sprinkler system for winter is just one piece of the larger puzzle of total property preparedness. As you work on your irrigation, it’s a perfect time to assess other areas of your property that need attention before the cold weather sets in. A holistic approach ensures your entire home is secure, not just the lawn.
While you’re outdoors, take a walk around your property’s perimeter. Check the integrity of your fencing and gates. A strong fence is your first line of defense, and its stability often comes down to its foundation. This is especially true in challenging terrain, where knowing the proper technique for setting fence post in bedrock can be the difference between a lasting boundary and a recurring problem.
With outdoor tasks squared away, your focus can shift indoors. The quiet of winter often highlights interior issues, like noise transfer between floors. As you prepare for more time spent inside, you might contemplate projects that enhance your living space, leading many to weigh the pros and cons of drywall vs drop ceiling soundproofing for better acoustic comfort.
Even small, seemingly minor indoor tasks get put on the back burner during the busy summer months. A project as simple as relocating a chime might be on your list, but requires careful planning. Understanding the essentials of moving doorbell wiring is key to completing the task safely and successfully without damaging your walls or electrical system.
Confidence in Your Control
The sound of air coming from your backflow preventer during a sprinkler blowout can be alarming, but it is a problem you can now face with confidence and knowledge. Remember the key principles: this can be a normal function of the device, it is often caused by an incorrect procedure, but it can also signal a failing part.
By following the precise, step-by-step blowout process, using low air pressure, and setting your valves correctly, you can eliminate the most common causes of this issue. You are now equipped to diagnose the difference between a functioning safety valve and a failed seal, empowering you to take the right action. A successful winterization is not just about clearing water from pipes; it’s about protecting a significant investment in your home and landscape, and you have what it takes to do it right.