Snowblower Spark Plug Gap: The Tiny Mistake Costing You Power
The first blizzard of the season hits, blanketing everything in a thick layer of snow. You pull out your trusted snowblower, prime the engine, pull the cord, and… nothing. Or maybe it sputters to life but runs rough, coughing and struggling to throw snow more than a few feet. This frustrating scenario is often caused by one of the smallest, most overlooked components in the engine: the spark plug gap.
This tiny, precise distance—often no wider than a credit card—is the difference between a powerful, reliable machine and a useless hunk of metal in your garage. An incorrect gap can lead to a host of problems, from hard starting and rough idling to a catastrophic loss of power right when you need it most. Understanding and mastering this simple adjustment is a fundamental skill for any snowblower owner.
You'll Learn About
Why the Spark Plug Gap is the Unsung Hero of Your Engine
Think of the spark plug gap as the epicenter of your engine’s power. It is the physical distance between the center electrode and the ground electrode of the spark plug. When the ignition system sends a high-voltage pulse, it must be powerful enough to jump across this gap, creating a hot, intense spark.
This spark is the ignition source for the compressed air-fuel mixture inside the cylinder. A correctly sized gap ensures the spark is strong enough to reliably ignite this mixture every single time, leading to efficient combustion, smooth operation, and maximum power output. It’s a small detail with a massive impact on overall performance.
Symptoms of an Incorrect Spark Plug Gap: Is Your Machine Crying for Help?
An engine can’t tell you what’s wrong, but it will show you through its performance. Both a gap that is too wide and one that is too narrow create distinct, frustrating problems. Recognizing these symptoms is the first step toward a quick and easy fix.
The “Too Wide” Gap Problem
When the spark plug gap is too large, the ignition system’s voltage may struggle to jump the distance. This results in a weak or inconsistent spark, especially under the heavy load of clearing wet, dense snow. Common symptoms include difficulty starting, particularly in cold weather, noticeable engine misfires, and a hesitation or loss of power as you push the machine harder.
The “Too Narrow” Gap Problem
Conversely, a gap that is too small can be just as problematic. It creates a small, weak spark that may not be sufficient to fully ignite the air-fuel mixture, leading to incomplete combustion. This can cause the engine to run rough, foul the spark plug with carbon deposits, and struggle to maintain a smooth idle. In many cases, the machine will start but will lack the power needed for effective snow removal, forcing you to work much harder.
The Ultimate Guide to Finding Your Snowblower’s Spark Plug Gap Spec
Before you can make any adjustments, you must know the correct specification for your specific machine. This isn’t a “one size fits all” measurement. The manufacturer determines the precise gap needed for optimal performance based on the engine’s design and ignition system.
The most reliable source for this information is your owner’s manual. If you’ve misplaced it, the manufacturer’s website is your next best resource, often providing digital copies of manuals. You can also typically find the specification by searching for your snowblower’s engine model number, which is usually found on a sticker or metal plate on the engine housing itself. While many snowblowers use a standard gap, it’s always best to confirm the exact requirement for your model, whether it’s an older workhorse like a Toro 521 snowblower or a newer machine.
| Engine Manufacturer | Common Spark Plug Type | Typical Spark Plug Gap (Inches) | Typical Spark Plug Gap (mm) |
|---|---|---|---|
| Briggs & Stratton | Champion RJ19LM / NGK BPR6ES | 0.030″ | 0.76 mm |
| LCT / Ariens AX | Torch F6RTC | 0.028″ – 0.031″ | 0.70 – 0.80 mm |
| Tecumseh | Champion J19LM / NGK B2-LM | 0.030″ | 0.76 mm |
| Honda (GX Series) | NGK BPR6ES / Denso W20EPR-U | 0.028″ – 0.031″ | 0.70 – 0.80 mm |
| Powermore | Torch F6RTC | 0.024″ – 0.028″ | 0.60 – 0.70 mm |
Tools of the Trade: Gearing Up for the Perfect Gap
You don’t need a professional workshop to perform this crucial maintenance task. The required tools are simple, inexpensive, and readily available at any auto parts or hardware store. Having the right tools makes the job faster, easier, and more precise.
You will need a spark plug socket that fits your specific plug (usually 5/8″ or 13/16″), a socket wrench with an extension, and a dedicated spark plug gapping tool. Gapping tools come in several styles, including ramp-style coin gauges and wire or feeler gauge sets. For the most accurate measurement, a feeler gauge is the preferred choice.
Step-by-Step: How to Check and Adjust Your Snowblower Spark Plug Gap Like a Pro
With the correct specification and the right tools in hand, checking and adjusting the spark plug gap is a straightforward process. Following these steps will ensure your snowblower is ready for peak performance when winter arrives. This simple maintenance applies to all models, from those featured in snowblower reviews from 2011 to the latest machines on the market.
Step 1: Safety First – Disconnect and Secure
Before beginning any work, ensure the snowblower is turned off and the engine is cool. The first and most critical step is to disconnect the spark plug wire (also called the boot). Firmly grip the boot, not the wire, and pull it straight off the tip of the spark plug. This prevents any possibility of the engine accidentally starting while you are working.
Step 2: Accessing and Removing the Spark Plug
Use your socket wrench, extension, and spark plug socket to remove the plug. Place the socket firmly over the plug and turn it counter-clockwise to loosen it. Once it’s loose, you should be able to finish unscrewing it by hand.
Step 3: Inspecting the Old Plug – Clues to Your Engine’s Health
Before you measure the gap, take a moment to inspect the tip of the spark plug. A healthy plug should have a light tan or grayish-brown color. If it’s covered in black, sooty deposits, it could indicate the engine is running too rich. If it’s wet or oily, there may be a more significant internal engine issue.
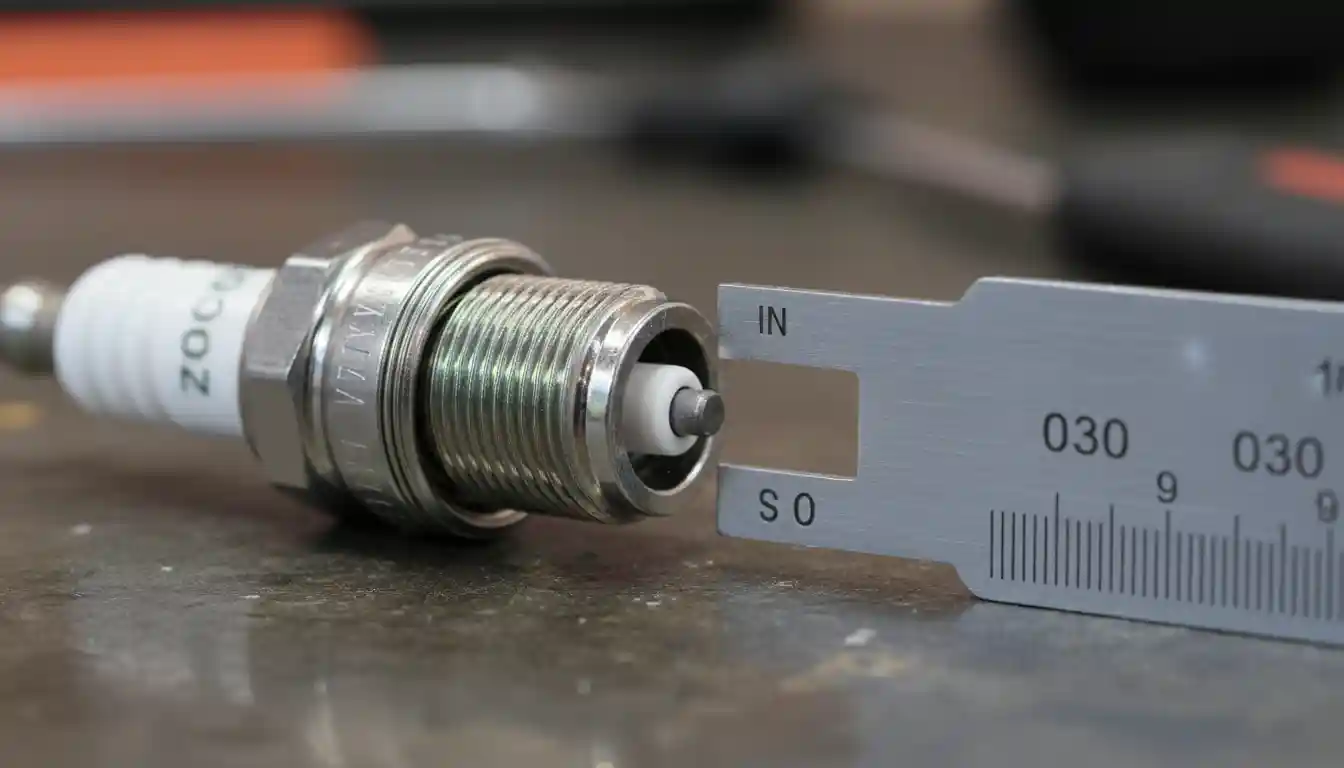
Step 4: Measuring the Gap with Precision
Take your feeler gauge or gapping tool and find the blade or wire corresponding to your manufacturer’s specification (e.g., 0.030″). Carefully slide the gauge between the center and ground electrodes. The correct gap will provide a slight drag or resistance on the gauge as you slide it through; it shouldn’t be loose, nor should you have to force it.
Step 5: The Art of the Adjustment
If the gap is incorrect, you need to adjust it by carefully bending the ground electrode (the L-shaped piece of metal extending over the center tip). Never pry against or put pressure on the fragile center electrode. To narrow the gap, gently tap the ground electrode on a hard surface. To widen it, use the notch on your gapping tool to carefully pry it open. Remeasure after each small adjustment until you achieve the perfect gap.
Step 6: Reinstallation and Correct Tightening
Once the gap is set, carefully thread the spark plug back into the engine by hand to avoid cross-threading. Once it is finger-tight, use the socket wrench to give it a final snug turn—typically about 1/4 to 1/2 turn is all that is needed to compress the washer. Do not overtighten, as this can damage the plug or the engine cylinder head. Reconnect the spark plug boot, ensuring it clicks securely into place.
Beyond the Gap: Advanced Spark Plug Tips for Peak Performance
Setting the correct gap is the most important step, but a few other factors can elevate your engine’s performance and reliability. Paying attention to these details separates a well-maintained machine from one that merely functions. Proper maintenance is key to the longevity of any machine, including a beast like the Yard King Snowblower 8/27.
The Hidden Impact of Winter-Blend Gasoline
Winter-grade gasoline is formulated differently than summer blends to improve engine performance in cold temperatures. However, it can sometimes be more volatile, which can affect combustion. Always use fresh, high-quality fuel (87 octane is sufficient) and treat it with a fuel stabilizer to prevent moisture buildup and varnish, which can foul spark plugs and clog carburetors.
When to Replace vs. Regap
Over time, the electrodes on a spark plug will wear down from the constant high-voltage sparks. This erosion naturally widens the gap. While you can regap a plug several times, you should plan on replacing it every season or after approximately 100 hours of use as a rule of thumb. If you notice the electrodes are rounded, pitted, or covered in stubborn deposits, it’s time for a new one.
Frequently Asked Questions (FAQs)
Can I use a new spark plug right out of the box?
No. Even though new plugs are often gapped to a common specification, you should always verify the gap with a feeler gauge before installation to ensure it matches your engine’s specific requirement.
What happens if I overtighten the spark plug?
Overtightening can damage the threads in the engine’s cylinder head, which is a very expensive repair. It can also crack the spark plug’s porcelain insulator. Always tighten until snug, then give it a final quarter-turn.
How often should I check the spark plug gap?
A good practice is to check the spark plug at the beginning of every winter season as part of your annual tune-up. If you use your snowblower extensively, a mid-season check is also a good idea.
Conclusion: A Small Task with a Big Payoff
Maintaining the correct snowblower spark plug gap is one of the most effective and inexpensive ways to ensure your machine starts easily and runs powerfully all winter long. It’s a simple, 10-minute task that can save you from hours of frustration and the high cost of a professional repair.
By understanding its importance, knowing the symptoms of an incorrect gap, and following the proper steps to adjust it, you can take control of your machine’s reliability. Don’t let a tiny gap stand between you and a clear driveway this winter.