Skim Coat vs Sheetrock: Don’t Replace Walls You Can Rescue
You’re staring at an ugly wall—maybe it’s covered in outdated texture, riddled with cracks, or scarred from old wallpaper. The immediate question is daunting: do you need to tear it all out and start over with new Sheetrock, or can you save it with a skim coat? Making the wrong choice is more than just a headache; it’s a costly mistake that wastes time, money, and effort, leaving you with a finish that’s far from perfect.
Many homeowners confuse these two terms, thinking they are interchangeable solutions for the same problem. This confusion often leads to either unnecessary demolition or a surface repair that fails to address underlying issues. Understanding the fundamental difference is the first step toward a flawless, long-lasting result.
You'll Learn About
What is Sheetrock? The Foundation of Your Walls
Think of Sheetrock as the canvas. Sheetrock is the brand name for a specific type of drywall, a panel made of gypsum plaster pressed between two thick sheets of paper. It is the fundamental building material for most modern interior walls and ceilings. Its purpose is to create the flat, solid structure that defines a room.
When walls are built, large sheets of this material are fastened to the wood or metal studs of the frame. The seams between the panels are then taped and covered with joint compound to create a single, continuous surface. This initial surface is the foundation upon which all finishes, like paint or a skim coat, are applied.
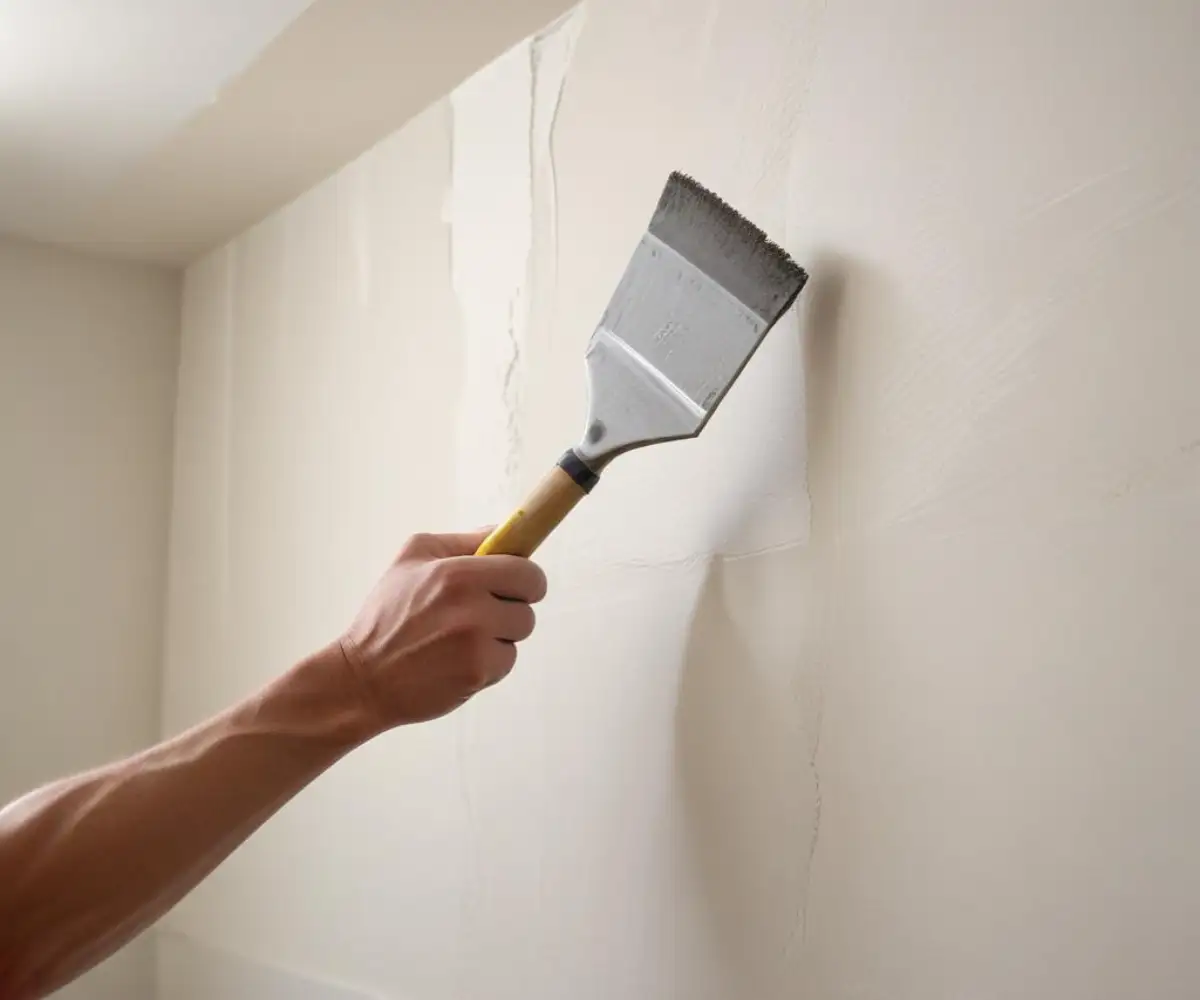
What is a Skim Coat? The Secret to a Flawless Finish
If Sheetrock is the canvas, a skim coat is the gesso that perfects it. A skim coat is a very thin layer of drywall compound, also known as mud, that is applied over an entire existing surface. Its purpose is not to build a wall, but to repair, smooth, and perfect the surface of a wall that is already there.
This process is the go-to solution for covering up widespread but superficial issues. This includes hiding old textures, repairing a network of small cracks, or creating a perfectly uniform surface after wallpaper removal has left the wall damaged. Essentially, it gives an old, tired wall a brand new face without demolition.
The Deciding Factor: When to Skim Coat vs. Replace Sheetrock
Choosing between a skim coat and a full replacement comes down to one critical factor: the structural integrity of the existing wall. A skim coat is a surface-level cosmetic fix, while replacing the Sheetrock is a structural one. You cannot fix a fundamentally damaged wall with a cosmetic layer.
Before you make a decision, a thorough assessment is crucial. An honest evaluation of your wall’s condition will point you directly to the correct, most cost-effective solution. This prevents you from wasting effort on a wall that’s too far gone or spending a fortune on a replacement that was never necessary.
Assess the Damage: A Practical Checklist
Use this checklist to determine the right course of action. The type and severity of the damage are your best indicators.
Go for a skim coat if you have:
- Unfashionable Textures: Heavy knockdown, swirl, or popcorn textures can be smoothed over with one or more skim coats for a modern look.
- Widespread Minor Imperfections: Walls covered in numerous small dings, scuffs, and hairline cracks are ideal candidates for skim coating.
- Wallpaper Removal Damage: After stripping wallpaper, you’re often left with torn drywall paper and stubborn glue residue. A skim coat can make these surfaces smooth again.
- Poorly Finished Drywall Joints: If previous taping and mudding jobs are visible, a skim coat can blend these imperfections into a seamless surface.
You MUST replace Sheetrock if you have:
- Significant Water Damage: If the wall feels soft, spongy, or shows signs of mold and mildew, the drywall’s core is compromised. It must be removed to prevent further issues. Proper moisture prevention, like understanding if a system like Hydroblox can work for your home’s foundation, is key to avoiding future damage.
- Large Holes or Punctures: While small holes can be patched, significant gaps in the drywall panel require a new section or a full sheet replacement.
- Crumbling or Sagging Drywall: If the drywall is bowing, sagging, or crumbling at the edges, it has lost its structural integrity and poses a safety risk.
- Long, Recurring Cracks: Cracks that reappear after patching may indicate structural shifting behind the wall. In these cases, the drywall should be removed to inspect the framing.
–
At-a-Glance Comparison
Sometimes a simple chart can make the decision clearer. Here’s a direct comparison of the key factors involved in each process.
| Feature | Skim Coat (Repair) | Replace Sheetrock (Replace) |
|---|---|---|
| Best For | Cosmetic imperfections, unwanted textures, minor surface damage on a stable wall. | Water damage, mold, large holes, crumbling or structurally unsound walls. |
| Average Cost | $1.10 – $1.30 per square foot. Generally less expensive. | $1.50 – $3.50 per square foot. Includes demolition and installation, making it more expensive. |
| Skill Level (DIY) | Moderate to High. Achieving a perfectly smooth finish is an art. | Moderate. Hanging is physical, but finishing requires the same skill as skim coating. |
| Mess & Disruption | High. Fine dust from sanding gets everywhere. | Very High. Involves demolition debris plus significant sanding dust. |
| Project Timeline | 2-4 days, due to drying time between multiple thin coats. | 3-5 days, including demolition, installation, and multi-stage finishing. |
The Cost Breakdown: Is It Cheaper to Skim or Replace?
For most situations, skim coating is significantly more affordable than replacing drywall. The primary cost in a replacement project is the labor for demolition and installation, along with the price of new drywall panels. Skim coating uses far less material—just joint compound—but can be labor-intensive if multiple coats are needed.
However, if you’re already planning other renovations like electrical work or insulation upgrades, removing the drywall provides easy access to the wall cavity. In this scenario, the added cost of new Sheetrock can be offset by the savings in labor for other trades, making it a more strategic investment.
The Hidden Factor No One Talks About: Wall Integrity
The most critical mistake a DIYer can make is focusing only on what they can see. A wall might look like it only has surface-level blemishes, but the real test is its structural soundness. Before you even consider a skim coat, perform a simple physical check.
Gently press on various areas of the drywall. Does it feel firm and solid, or does it have a slight give and feel soft or spongy? Any softness is a red flag for moisture intrusion that has weakened the gypsum core. Skim coating over a compromised wall is a complete waste of time and money; the problem will inevitably resurface, often worse than before.
Step-by-Step Overview: How Each Process Works
Understanding the workflow for each option can help you gauge the effort and complexity involved, guiding you toward the best choice for your skill level and timeline.
The Skim Coating Process
A successful skim coat is all about patience and technique. The process generally involves cleaning and scuff-sanding the wall to ensure adhesion. Next, a thin layer of diluted joint compound is applied to the entire surface with a roller or trowel and immediately smoothed with a wide knife or squeegee trowel.
This coat must dry completely, which can take up to 24 hours. It’s then lightly sanded before a second, even thinner coat is applied to fill any remaining imperfections. This cycle may be repeated two or three times to achieve a perfectly flat finish. When choosing your materials, understanding the differences in compounds, such as in Easy Sand 45 vs 90, can significantly impact your work and drying times.
The Sheetrock Replacement Process
Replacing Sheetrock is a more disruptive and physically demanding job. It begins with the demolition of the old, damaged drywall, which is a messy process. Once the wall cavity is exposed, it’s the perfect time to address any underlying issues with framing, wiring, or insulation. You might even discover unexpected framing challenges, such as a situation where a door is too big for the frame, which can now be properly addressed.
New sheets of drywall are then measured, cut, and screwed to the studs. After hanging the new board, the finishing process begins. This involves taping the seams between the sheets and filling the joints and screw holes with multiple coats of joint compound, sanding between each coat until the surface is smooth and ready for primer.
Making the Final Call: Your Action Plan
Ultimately, the skim coat vs. Sheetrock debate is not about which is “better,” but which is correct for the situation. A skim coat is a finishing technique, while Sheetrock is a structural component. You apply a finish to a structure; you cannot use a finish to fix a broken structure.
Start with a thorough, hands-on inspection of your walls. If the drywall is solid, dry, and stable, a skim coat is your most efficient path to a beautiful, new-looking surface. If you find any signs of softness, moisture, or crumbling, replacement is the only responsible and long-lasting solution.