Simplicity 860 Problems? Your Ultimate Troubleshooting Guide
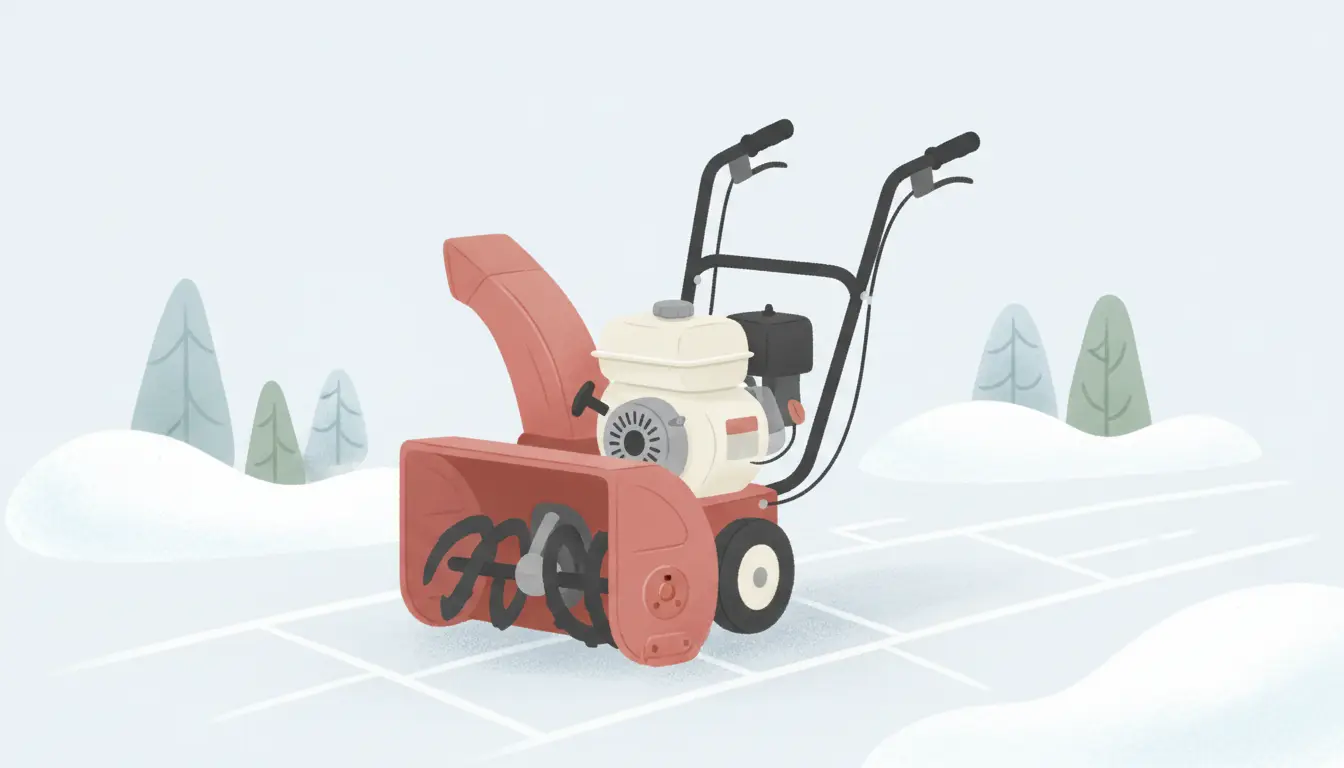
Is your trusted Simplicity 860 snow blower suddenly refusing to start, running rough, or failing to throw snow like it used to? You’re not alone. These robust machines are built to last, but like any piece of hardworking equipment, they face common issues that can halt your snow-clearing efforts right in their tracks.
The core problem often lies in years of wear, aging components, and maintenance schedules that have been overlooked. From a sputtering engine to a stubbornly clogged auger, these symptoms point to underlying issues that need precise solutions. This guide provides an authoritative, step-by-step approach to diagnosing and fixing the most frequent Simplicity 860 problems, helping you restore its power and reliability.
You'll Learn About
Understanding the Legacy of the Simplicity 860
Before diving into repairs, it’s helpful to understand what makes the Simplicity 860 a machine worth fixing. Produced for several years, including models from the early 1980s, the 860 series is known for its heavy-gauge steel construction and powerful Briggs & Stratton or Tecumseh engines. Owners often describe these snow blowers as “tanks” for their durability and solid build quality. However, their age means that specific parts like belts, friction rings, and carburetor components are prone to wear.
The primary challenge for owners today is twofold: diagnosing problems accurately without modern digital sensors and sourcing the correct parts for a vintage machine. Many issues that seem catastrophic, like a complete failure to start, often boil down to simple, fixable causes related to fuel, spark, or air intake.
The Most Common Culprit: Engine Fails to Start or Runs Poorly
The most frequent complaint revolves around the engine. An engine that won’t start, starts hard, or runs rough is incredibly frustrating, especially with a storm approaching. Let’s break down the causes and solutions systematically.
Problem 1: Stale or Contaminated Fuel
The Cause: Fuel left in the tank for more than 30 days, especially ethanol-blended gasoline, can go stale. It degrades, absorbs water, and leaves gummy deposits that clog the carburetor’s tiny jets and passages. This is the single most common reason for starting problems after a period of storage.
The Solution:
- Drain the Old Fuel: Completely drain the fuel tank and carburetor bowl. Safely dispose of the old gasoline.
- Clean the Carburetor: The most effective fix is to remove and thoroughly clean the carburetor. Use a dedicated carburetor cleaner spray to dissolve varnish and blow out all jets and passages with compressed air. For severe clogging, an ultrasonic cleaner may be necessary.
- Replace the Fuel Filter: If your model has an in-line fuel filter, replace it. It’s an inexpensive part that prevents debris from reaching the carburetor.
- Use Fresh, Stabilized Fuel: Always use fresh gasoline (less than 30 days old) and add a quality fuel stabilizer. Stabilizer prevents fuel degradation and keeps the system clean during storage.
Problem 2: No Spark or a Weak Spark
The Cause: A fouled, damaged, or improperly gapped spark plug will fail to ignite the fuel-air mixture. A faulty ignition coil or a disconnected kill switch wire can also prevent a spark from being generated.
The Solution:
- Inspect and Test the Spark Plug: Remove the spark plug and check for black, sooty deposits or a cracked porcelain insulator. You can test for a spark by reattaching the plug wire, holding the plug’s threaded base against a metal part of the engine, and pulling the starter rope. You should see a strong, blue spark jump the gap.
- Clean or Replace the Spark Plug: If the plug is dirty, clean the electrode with a wire brush and brake cleaner. Ensure the gap is set to the manufacturer’s specification (typically found in the operator’s manual). If it’s old or damaged, replace it—it’s a cheap and effective tune-up step.
- Check the Ignition System: Ensure the spark plug wire is securely connected. If there’s still no spark with a new plug, the ignition coil may need to be replaced.
Troubleshooting Mechanical Failures: Auger and Drive System
When the engine runs fine but the machine won’t move snow or propel itself forward, the problem lies in the mechanical systems that transfer power from the engine to the auger and wheels. These issues are often caused by worn belts, broken pins, or improper adjustments.
Problem 3: Auger Does Not Rotate or Throw Snow
The Cause: The most common reason an auger fails to turn is a broken shear pin. These small bolts are designed to snap under extreme stress to protect the far more expensive gearbox from damage when the augers hit a hard object like a rock or thick ice.
Another cause is a worn or broken auger drive belt, or an improperly adjusted clutch cable that fails to engage the belt. Users also report that the chute can clog easily, especially in wet, heavy snow, which stops snow from being thrown effectively.
The Solution:
- Safety First: Before inspecting the auger, ALWAYS stop the engine, remove the key, and disconnect the spark plug wire to prevent accidental starting.
- Inspect Shear Pins: Check the shear pins located on the auger shaft. If one is broken, replace it with an OEM part. Do not use a standard bolt, as it will not break as intended and could lead to severe gearbox damage.
- Check the Auger Drive Belt: Remove the belt cover and inspect the auger drive belt for cracks, fraying, or excessive slack. A slipping belt will not provide enough power to turn the augers under load. Replace it if it shows signs of wear.
- Adjust the Clutch: Consult your operator’s manual to properly adjust the auger drive clutch rod. This ensures the belt tightens correctly when you engage the control lever.
- Prevent Clogging: To improve throwing distance and prevent clogging, some owners modify the impeller by adding rubber paddles to close the gap between the impeller blades and the housing. This modification helps propel wet, heavy snow more effectively.
When organizing your workshop for these repairs, ensure your storage solutions can handle heavy parts. Understanding the principles behind how much weight a nail in drywall can support is crucial for safely mounting shelves for tools and replacement components.
Problem 4: Drive Wheels Do Not Engage
The Cause: The self-propel function on the Simplicity 860 relies on a friction disc drive system. A rubber-edged friction wheel presses against a metal drive plate; as the wheel moves closer to or further from the center of the plate, the ground speed changes. Over time, the rubber on the friction wheel wears down, gets glazed with oil, or cracks, causing it to slip and fail to transfer power to the wheels.
The Solution:
- Inspect the Friction Wheel: Tip the snow blower forward to rest on its auger housing to access the drive system underneath. Inspect the friction wheel for wear, damage, or contamination from oil or grease.
- Replace the Friction Ring: A worn friction ring is a common replacement item. The rubber ring can be purchased separately and installed on the existing wheel. Ensure the surfaces of both the friction wheel and the drive plate are clean and free of any lubricant before reassembly.
- Adjust the Drive System: Refer to the service manual for instructions on adjusting the traction drive system to ensure proper contact and pressure between the friction wheel and the drive plate.
Advanced Solutions and Restoration
For owners dedicated to keeping their vintage Simplicity 860 running for years to come, some issues require more in-depth work. These steps can turn a problematic machine into a reliable workhorse.
Comprehensive Troubleshooting Table
Use this table to quickly diagnose symptoms and identify potential solutions. This organized approach can save you time and frustration by pointing you in the right direction immediately.
| Symptom | Possible Cause | Recommended Solution |
|---|---|---|
| Engine starts then stalls | Clogged fuel cap vent, dirty carburetor, water in fuel | Clear vent, clean or rebuild carburetor, drain and replace fuel |
| Snowblower vibrates excessively | Bent auger, damaged impeller, loose engine bolts | Straighten or replace auger/impeller, tighten all mounting bolts |
| Only one auger spins | Broken shear pin on one side | Replace the broken shear pin with the correct OEM part |
| Difficulty shifting speeds | Worn friction disc, improper linkage adjustment | Replace friction disc, adjust speed selector linkage per manual |
| Leaking fuel | Cracked fuel line, faulty carburetor bowl gasket, stuck float | Replace fuel line, replace gasket, clean and check float needle |
Restoring and Repainting
Rust is a common issue on older snow blowers, particularly on the auger housing and the belt cover panel. Addressing rust not only improves the machine’s appearance but also extends its life by preventing metal fatigue.
For a lasting finish, sand the rusted areas down to bare metal, apply a rust-inhibiting primer, and finish with a durable paint. If you need to match the original Simplicity color, you might need to buy paint by hex code to get a precise match for a professional-looking restoration.
Sourcing Discontinued Parts
Finding parts for a machine that is decades old can be challenging but not impossible. Online auction sites, dedicated forums, and specialized parts suppliers are excellent resources. Many components like bearings, belts, and carburetor kits are standard sizes and can be cross-referenced with modern equivalents. Don’t be afraid to connect with online communities of Simplicity owners who often share part numbers and sources for hard-to-find items.
The powerful engine on the Simplicity 860 can be quite loud. If you perform maintenance in an attached garage or workshop, consider the noise levels. Installing products like Sonopan soundproofing panels can help reduce noise transmission into your home, creating a more pleasant environment for everyone.
Final Thoughts: A Machine Worth Saving
The Simplicity 860 snow blower represents a generation of equipment built with durability in mind. While it may lack the modern conveniences of today’s machines, its straightforward mechanical design makes it highly repairable. The problems it develops are almost always fixable with basic tools, a bit of patience, and the right knowledge.
By systematically addressing issues with the fuel system, ignition, and drive components, you can solve nearly any problem that arises. Proper maintenance, especially diligent fuel management and regular inspections of wearable parts, is the key to ensuring your Simplicity 860 is ready to tackle the next winter storm with unstoppable force.