Sill Gasket Under Bottom Plate: The Tiny Gap Costing You a Fortune?
In the complex world of home construction, it’s often the smallest, most overlooked components that play the most critical roles. Tucked away at the very base of your walls, there is a narrow, often unseen gap between the concrete foundation and the wooden framing of your home. To the untrained eye, it seems insignificant, but this tiny space is a major culprit behind staggering energy bills, hidden moisture damage, and unwelcome pest invasions.
The problem lies in a simple fact of construction: wood is never perfectly flat, and concrete is never perfectly smooth. When these two surfaces meet, they create a network of minuscule gaps and channels. This article explores the powerful, yet simple, solution to this pervasive problem: the sill gasket. Understanding its function is the first step toward building a more durable, efficient, and comfortable home.
You'll Learn About
What Exactly Is a Sill Gasket and Why Is It Non-Negotiable?
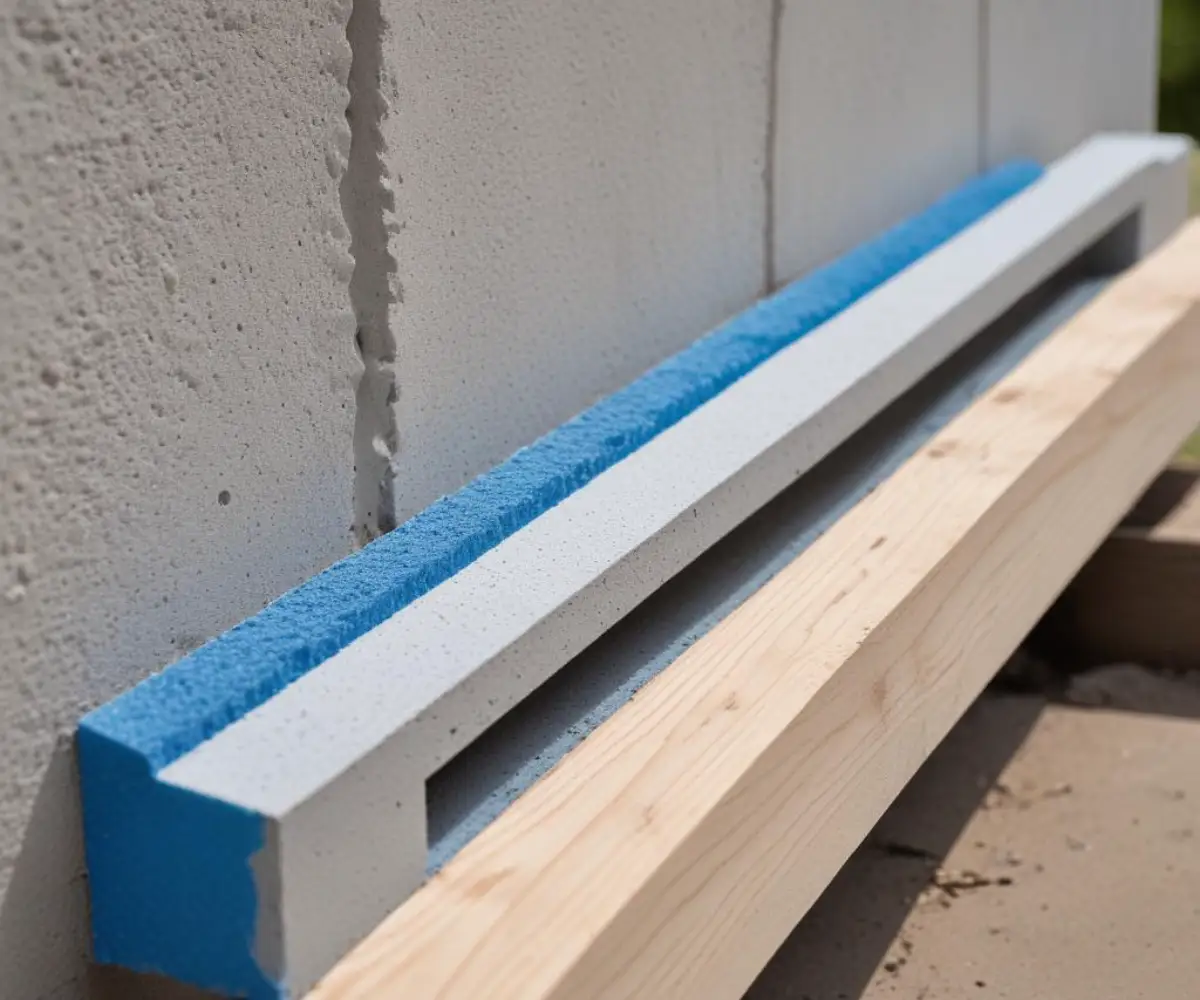
A sill gasket, also known as a sill seal, is a thin roll of flexible foam material, typically made from polyethylene or polyurethane. It is specifically designed to be installed between the top of the concrete or masonry foundation wall and the sill plate—the very first piece of lumber in your wall assembly, upon which the entire wall frame rests. Its primary job is to compress and conform to the irregularities of both surfaces, creating a tight, continuous seal.
Think of it as the ultimate defender of your home’s lowest and most vulnerable connection point. Without this simple barrier, your home is left exposed to a host of issues that can compromise its structural integrity, energy performance, and overall health. For a minimal cost, the sill gasket provides a powerful, multi-faceted defense against the elements.
The Four Hidden Dangers of Skipping the Sill Gasket
Forgoing the installation of a sill gasket under the bottom plate is a seemingly minor omission that can lead to significant and costly problems over time. Each function of this humble foam strip directly counteracts a specific threat to your home’s performance and longevity.
1. Unseen Air Infiltration: The Silent Energy Thief
The most immediate and impactful consequence of a missing sill gasket is air leakage. Due to a phenomenon known as the “stack effect,” warmer air rises and escapes through the upper levels of your home, creating negative pressure that pulls cooler, exterior air in through the lowest available openings. The unsealed gap between the foundation and sill plate becomes a primary entry point for this unwanted air.
This constant infiltration leads to noticeable drafts, making rooms feel colder in the winter and forcing your heating system to work overtime to maintain a comfortable temperature. In the summer, the reverse happens, with hot, humid air being drawn in, placing a greater load on your air conditioner. This continuous, invisible air exchange is a leading cause of inexplicably high energy bills and reduced indoor comfort.
2. Moisture Intrusion: A Slow Path to Rot and Decay
Concrete is a porous material, meaning it can absorb and transmit water through a process called capillary action. Without a barrier, moisture from the damp foundation can wick directly into the wooden sill plate. This persistent dampness creates the perfect conditions for mold, mildew, and, most destructively, wood rot.
A sill gasket acts as a capillary break, a waterproof layer that physically stops this moisture migration. By keeping the wood dry, it preserves the structural integrity of the entire wall frame. A rotted sill plate can compromise the stability of the walls it supports, leading to extensive and expensive structural repairs down the line.
3. Pest and Insect Invasion
That small, unsealed gap is a wide-open door for a variety of pests. Insects like ants, spiders, and even termites can easily find their way into your wall cavities through these tiny openings. Once inside, they can establish nests, cause damage to wooden structures, and become a persistent nuisance within your living space.
The compressed foam of a sill gasket provides a formidable physical barrier that effectively seals these entry points. It is a simple, non-chemical method of pest control that is integral to a well-built home, preventing infestations before they can even begin.
4. Uneven Load Distribution
While the primary roles of a sill gasket are sealing, it also serves a subtle structural function. The top of a concrete foundation is never perfectly level. The compressible foam of the gasket helps to cushion the sill plate, filling small voids and ensuring that the weight of the wall is distributed more evenly across the foundation.
This even distribution prevents pressure points on the lumber, reducing the risk of the wood splitting or cracking under load over time. It ensures a solid, stable connection between the framing and the foundation, which is essential for the long-term stability of the structure.
Choosing Your Champion: Types of Sill Gaskets
While the standard blue or pink polyethylene foam roll is the most common type of sill gasket, several options are available, each with distinct features. The choice often depends on the specific project requirements, budget, and desired level of performance. Understanding the differences will help you select the most appropriate material for your build.
The most common materials are compressible foams, but advanced composite and rubber options offer enhanced durability and sealing for high-performance projects. Your selection should balance cost with the long-term benefits of a superior seal.
| Material Type | Key Features | Best For | Average Cost (per 50′ roll) |
|---|---|---|---|
| Standard Polyethylene Foam | Flexible, waterproof, and easy to install. The most common and cost-effective option. Made of closed-cell foam to prevent water absorption. | Standard residential construction and DIY projects where basic air and moisture sealing is required. | $5 – $15 |
| EPDM Rubber/Composite Gasket | Extremely durable, highly flexible, and provides a superior, long-lasting seal. Often features ribbed or bulb designs for maximum compression. | High-performance or custom homes where achieving maximum airtightness and longevity is a top priority. | $30 – $60+ |
| Self-Adhesive Gasket | Features an adhesive strip on one side for easy placement, preventing movement during sill plate installation. Often made of high-quality foam or butyl rubber. | Projects where installation speed and precision are critical. Helps ensure the gasket stays perfectly aligned. | $20 – $40 |
| Fiberglass | Less common for sill applications but offers excellent thermal resistance and won’t compress over time. Can be more brittle than foam. | Specialty applications where thermal bridging is a major concern and a non-compressible material is desired. | $15 – $25 |
The Definitive Step-by-Step Installation Guide
Properly installing a sill gasket is a straightforward process, but attention to detail is crucial for creating an effective and lasting seal. Following these steps ensures that the gasket performs its function without compromise.
Step 1: Prepare the Foundation Surface
Before you begin, the top of the concrete foundation must be clean and free of debris. Use a stiff brush or a shop vacuum to remove all dust, dirt, and small pieces of loose concrete. A clean surface is essential for the gasket to sit flat and create a uniform seal.
Step 2: Align and Place the Gasket
Unroll the sill gasket directly onto the top of the foundation wall. Align the outer edge of the foam with the outer edge of the concrete. This ensures that the entire width of the sill plate will be supported and sealed. For easy installation, simply punch the foam over the protruding anchor bolts to hold it in place.
Step 3: Mark and Drill for Anchor Bolts
Carefully place the pressure-treated sill plate lumber on top of the sill gasket, aligned with the anchor bolts. Press down firmly on the wood over each bolt to make an impression of the bolt’s location on the underside of the wood. Alternatively, you can tap the wood with a hammer over each bolt to create a more distinct mark.
Remove the sill plate and use these marks as a guide to drill the holes for the anchor bolts. It’s wise to use a drill bit that is slightly larger than the diameter of the bolts (e.g., a 5/8″ bit for a 1/2″ bolt) to allow for minor adjustments during final placement.
Step 4: Secure the Bottom Plate
With the holes drilled, place the sill plate back over the anchor bolts and onto the gasket. Place a washer and then a nut onto each anchor bolt. Tighten the nuts using a socket wrench until they are snug. Be careful not to overtighten, as this can over-compress the foam gasket and reduce its ability to expand and contract with the structure, potentially diminishing the quality of the seal.
Beyond the Basics: Pro Tips for a Flawless Seal
While standard installation provides a good seal, professionals often employ advanced techniques to create a virtually impenetrable barrier at the foundation. These extra steps ensure the highest level of performance, particularly in energy-efficient or high-performance home construction.
Combining with Caulk: The Belt-and-Suspenders Approach
For an absolutely airtight seal, many builders apply two continuous beads of high-quality sealant on top of the foundation before laying down the sill gasket. A flexible, durable sealant like acoustical sealant or a high-grade polyurethane caulk is ideal. One bead is placed near the interior edge and another near the exterior edge.
When the sill plate is tightened down, the gasket compresses into the sealant, filling every microscopic void to create a truly failsafe barrier against both air and moisture. If you find yourself with a stubborn sealant tube, learning how to properly open it can save you time and frustration on the job.
Mind the Corners and Seams
Where one roll of sill gasket ends and another begins, it’s critical to avoid creating a gap. Overlap the ends of the gasket by at least six inches to ensure a continuous seal. At the corners, carefully cut and fit the gasket pieces so they butt up tightly against each other without any open spaces.
Is a Sill Gasket a Code Requirement?
Building codes are constantly evolving to promote greater energy efficiency and durability in homes. While local amendments can vary, many modern building and energy codes now mandate the use of a sill gasket or an equivalent air sealing method at the foundation.
This is because regulatory bodies recognize the significant impact of air leakage at this junction on overall home performance. For a comprehensive overview of the legalities, it’s worth exploring the specific sill seal code requirements in your jurisdiction to ensure your project is compliant.
Frequently Asked Questions (FAQs)
Even with a clear understanding of its importance, homeowners and builders often have specific questions about the application and function of sill gaskets. Here are answers to some of the most common inquiries.
Can I use caulk instead of a sill gasket?
While a thick bead of caulk can provide an air seal, it should not be used as a replacement for a sill gasket. The gasket’s primary advantages are its ability to act as a capillary break against moisture wicking and to provide a compressible cushion that accommodates imperfections. The best practice is to use both—caulk for sealing and the gasket for the capillary break and cushioning.
What happens if the sill gasket gets wet?
Most sill gaskets are made from closed-cell polyethylene foam. This material does not absorb water and is designed to be a moisture barrier. If it gets wet during construction, it will simply dry without losing its effectiveness or promoting mold growth.
How much should the gasket be compressed?
The goal is to tighten the sill plate enough to create a firm, continuous seal without completely crushing the foam. A good rule of thumb is to compress the gasket to about half of its original thickness. This allows the material to remain flexible and effective over the long term.
The Final Verdict: An Indispensable Component for a Healthy Home
The sill gasket under the bottom plate is a testament to the idea that in construction, details matter. This inexpensive and easy-to-install foam strip is one of the hardest-working components in a building envelope, delivering an outsized return on investment.
It saves money on energy bills by stopping air leaks, protects the home’s structure from moisture and rot, and acts as a first line of defense against pests. Skipping this crucial component is a shortcut that can lead to a cascade of expensive and difficult-to-fix problems, proving that the sill gasket is truly a small detail that makes a world of difference.