Semi Rigid Ducting for Rangehoods: Your Ultimate Guide
You'll Learn About
Tired of a Smoky, Greasy Kitchen? The Real Problem Might Be Hiding in Your Walls
You invested in a powerful rangehood, expecting it to whisk away smoke, odors, and grease. Yet, you still find yourself battling lingering cooking smells and a persistent greasy film on your cabinets. The frustrating reality is that even the most expensive rangehood is useless without proper ventilation.
The secret to a fresh and clean kitchen isn’t just the fan; it’s the pathway that smoke and contaminated air must travel. This pathway, the ducting, is the unsung hero of kitchen ventilation. Choosing the wrong type or installing it incorrectly can lead to poor performance, noise, and even serious safety hazards.
Decoding Ducting: What Exactly is Semi-Rigid?
When selecting ductwork, you’ll encounter three main players: flexible, rigid, and semi-rigid. Flexible ducting, often made of foil or vinyl, is easy to bend but is also easily crushed, creates poor airflow, and can be a serious fire hazard due to trapped grease. Rigid ducting, with its smooth interior, offers the best performance but can be incredibly difficult and expensive to install, especially in homes with complex framing.
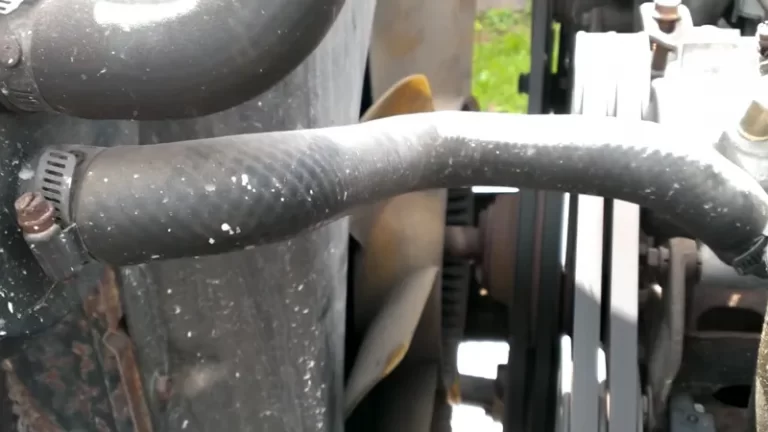
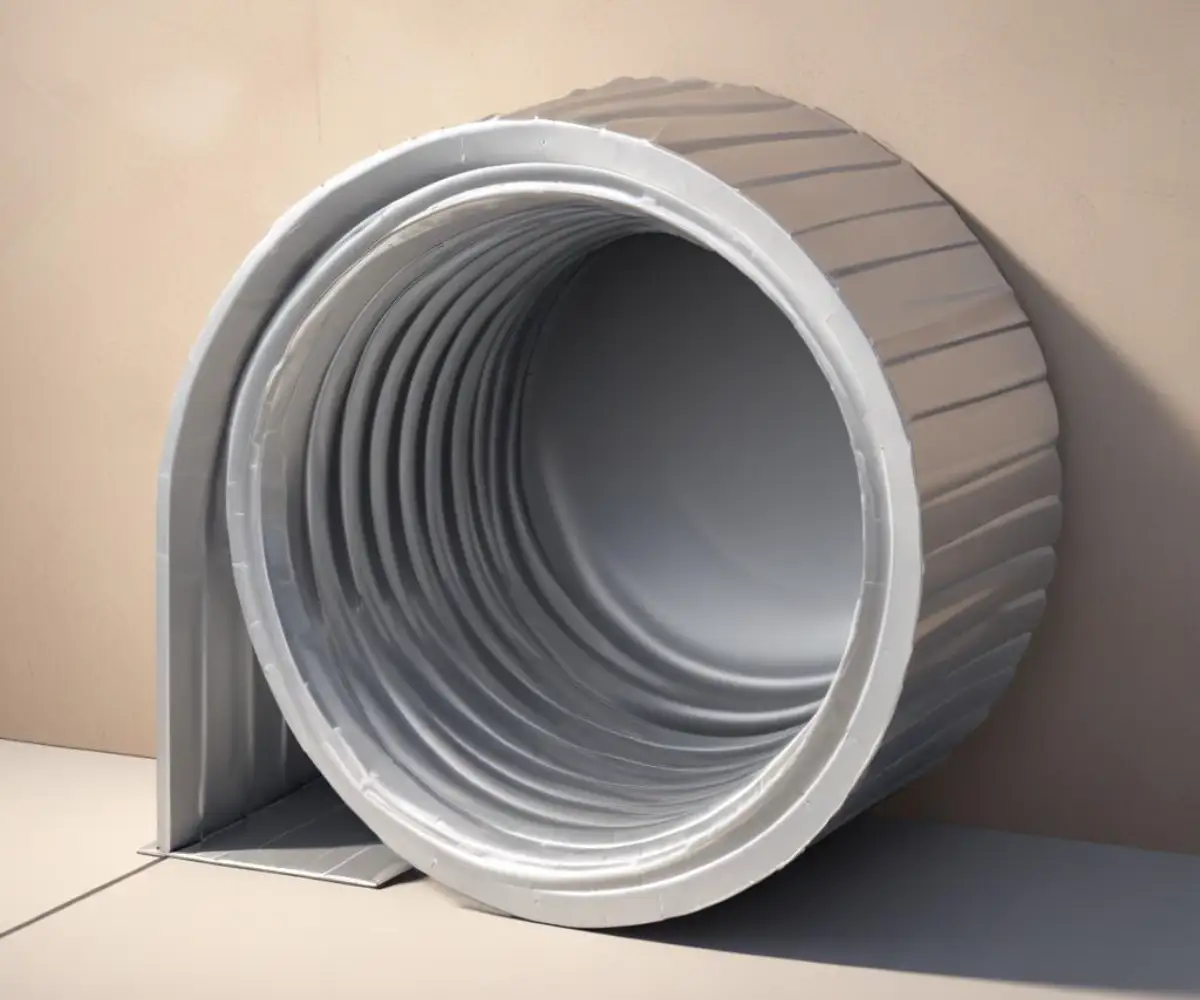
This is where semi-rigid ducting emerges as a superior solution for most residential applications. Typically made from aluminum, this ducting features a corrugated design that allows it to be bent and routed around obstacles while still maintaining its shape and a relatively smooth interior for airflow. It strikes a critical balance between the ease of installation found in flexible ducts and the performance and safety of rigid ducts.
The High Stakes of Improper Ducting: More Than Just a Bad Smell
Using the wrong ducting or poor installation techniques is not a minor DIY mistake. It can have significant consequences for your home and your health. Sub-par ventilation leads to a buildup of grease within the ductwork, creating a hidden and highly flammable fire hazard right inside your walls.
Furthermore, inefficient exhaust allows moisture to become trapped, which can lead to mold and mildew growth. This not only damages your home’s structure but also releases harmful spores into your air. An improperly vented rangehood also fails to remove harmful cooking byproducts and carbon monoxide, degrading your indoor air quality and posing a health risk to your family.
Why Semi-Rigid Ducting Is the Smart Choice for Your Rangehood
For most homeowners, semi-rigid ducting provides the ideal combination of performance, safety, and practicality. It solves the core problem of routing a vent from the kitchen to the exterior of the home without compromising on airflow or safety. Its all-metal construction is non-combustible, meeting critical fire safety codes that flexible ducts often fail.
The key advantage lies in its adaptability. While rigid ducting requires numerous elbows and precise cuts to navigate joists and studs, a single piece of semi-rigid duct can be carefully bent to create a smooth, continuous path. This reduction in joints and sharp turns leads to less air turbulence, quieter operation, and fewer places for grease to accumulate.
Comparing Your Rangehood Ducting Options
Understanding the fundamental differences between ducting types is crucial for making an informed decision. The right choice ensures your rangehood operates at peak efficiency, providing a safe and comfortable kitchen environment. This table breaks down the key characteristics of each option.
| Feature | Flexible Ducting | Semi-Rigid Ducting | Rigid Ducting |
|---|---|---|---|
| Material | Foil or Vinyl | Aluminum | Steel or Aluminum |
| Airflow Efficiency | Poor | Good | Excellent |
| Durability | Low (easily crushed/punctured) | Medium (can be dented) | High (very strong) |
| Fire Resistance | Low (often combustible) | High (non-combustible) | High (non-combustible) |
| Installation Difficulty | Very Easy | Moderate | Difficult |
| Best Use Case | Not recommended for rangehoods | Most residential rangehoods | High-CFM professional ranges |
The Professional’s Guide to Flawless Semi-Rigid Duct Installation
A successful installation is all about careful planning and attention to detail. Following these steps will ensure your rangehood ventilation system is safe, quiet, and effective for years to come.
Step 1: Plan the Optimal Path
Your goal is to create the shortest and straightest path from the rangehood to the outside. Every bend and extra foot of ducting adds resistance, reducing the fan’s effectiveness. Sketch out a route that minimizes the number of turns required to exit through a wall or the roof.
Step 2: Get the Diameter Right
Never reduce the size of the ducting. If your rangehood has a 6-inch exhaust port, you must use 6-inch ducting for the entire run. Using a smaller diameter will choke the airflow, increase noise, and cause the fan motor to burn out prematurely.
Step 3: Handle and Shape with Care
When working with semi-rigid ducting, gently stretch it out to its full length to smooth out the interior ridges as much as possible. Form wide, sweeping bends instead of sharp, crimped corners. A crushed or sharply bent duct will severely restrict airflow, defeating the purpose of your ventilation system.
Step 4: Master the Art of Airtight Sealing
This is the most critical step. Every single joint must be completely sealed to prevent grease-laden air from leaking into your walls or attic. Use high-quality aluminum foil tape (not cloth duct tape, which will dry out and fail) to wrap every connection, including the points at the rangehood collar and the exterior wall or roof cap.
Step 5: Secure the Ductwork Properly
Proper support prevents the duct from sagging over time. A sagging duct can create low spots where grease and condensation can pool, leading to blockages and potential fire hazards. Use metal straps to support the duct run every few feet. Properly supporting your ductwork is as important as learning how to secure a shelving unit to a wall; in both cases, it prevents future problems and ensures long-term stability.
Critical Mistakes That Sabotage Rangehood Performance
Even with the right materials, common installation errors can ruin your project. Avoiding these pitfalls is essential for achieving professional-level results.
Mistake 1: Using Screws at Connections
Many DIY guides incorrectly advise using sheet metal screws to fasten ducting. Never use screws to join rangehood duct sections. The screw tips penetrate the duct’s interior, creating snag points that catch lint and grease, forming a dangerous buildup over time. Use clamps and foil tape exclusively.
Mistake 2: Neglecting the Exterior Cap
The system is only as good as its weakest point. A cheap, flimsy exterior cap with a poorly designed damper can let in cold drafts and pests. Invest in a high-quality wall or roof cap with a spring-loaded damper that seals tightly when the fan is off. Preventing this kind of unwanted air exchange is similar in principle to understanding how to block heat from a sliding glass door to maintain your home’s climate.
Mistake 3: Creating Unnecessary Bends
While semi-rigid ducting is flexible, it’s not an excuse to create a convoluted path. Each bend adds static pressure, which is a measure of airflow resistance. Too many bends can reduce your fan’s effective power by more than 50%, leaving it unable to properly ventilate your kitchen.
Advanced Techniques for a Whisper-Quiet System
One of the biggest complaints about rangehoods is noise. While much of the sound comes from the fan motor itself, the ductwork can amplify it through vibration. By focusing on smooth airflow, you can dramatically reduce the noise level in your kitchen.
The key is to minimize turbulence. Ensure the duct is stretched as smooth as possible and that all bends are gradual. Additionally, check that the exterior cap’s damper opens freely when the fan is on; a stuck damper is a primary cause of excessive noise and poor performance.
Long-Term Care: Protecting Your Investment
Your ventilation system requires minimal but important maintenance. Regularly clean the rangehood’s grease filters, as clogged filters restrict airflow and force the motor to work harder. At least once a year, inspect the exterior vent cap to ensure the damper isn’t stuck and that it’s clear of nests or debris.
If you notice a decrease in performance or persistent odors, it may be time to have the ductwork professionally cleaned. Just as neglecting surface preparation can make your first coat of paint look uneven, neglecting your ductwork leads to poor results and potential hazards down the line.
Your Path to a Fresher, Safer Kitchen
Choosing and correctly installing semi-rigid ducting is one of the most impactful upgrades you can make for your kitchen’s environment. It is the vital link that allows your rangehood to perform its job effectively, protecting your home from fire hazards, poor air quality, and moisture damage.
By understanding the principles of proper airflow and prioritizing meticulous, airtight installation, you can create a ventilation system that operates quietly and efficiently. This ensures a cleaner, safer, and more enjoyable cooking experience for years to come.