Rotate Outlet 90 Degrees: Stop Blocking Plugs With This Simple Fix!
It’s a modern annoyance we’ve all faced. You reach for an empty electrical outlet, only to find it’s already occupied by a bulky power adapter that completely blocks the second receptacle. This frustrating scenario, often caused by chargers for laptops, phones, and smart devices, turns a useful duplex outlet into a single-use plug.
What if there was a simple, built-in solution that didn’t require purchasing special power strips or extenders? By rotating your electrical outlet 90 degrees, you can orient the receptacles horizontally, providing ample space for even the most cumbersome plugs to coexist peacefully. This guide will walk you through everything you need to know to safely and effectively make this practical home improvement.
You'll Learn About
Why Standard Vertical Outlets Cause Problems
In most homes, electrical outlets are installed vertically as a matter of convention. For decades, this standard orientation worked perfectly fine for standard two- or three-prong plugs. However, the design of modern electronics has introduced a wide array of “wall warts”—large, boxy AC adapters that house transformers and other circuitry—that jut out and obstruct anything nearby.
This design flaw isn’t just an inconvenience; it can limit the functionality of your home’s electrical system. You may find yourself constantly unplugging one device to charge another or resorting to clumsy power strips that clutter your floors and walls. A horizontal outlet provides a permanent and elegant solution to this common problem.
Is It Safe and Code-Compliant to Rotate an Outlet?
Before beginning any electrical project, safety and code compliance are the top priorities. The good news is that the National Electrical Code (NEC) does not specify a required orientation for receptacles in most residential settings. You can legally and safely install an outlet vertically, horizontally, or even upside down.
The main exception to this rule is for outlets installed in countertops or work surfaces, which cannot be installed in a face-up position. For a standard wall outlet, the choice is yours. However, when installing an outlet horizontally, electricians recommend a specific orientation for safety: the neutral slot (the wider of the two vertical slots) should be on top. The reasoning is that if a plug were to become loose and a metal object were to fall on it, it would contact the neutral prong rather than the hot one, reducing the risk of a short circuit.
While this project is well within the capabilities of a knowledgeable DIYer, remember that you are working with electricity. If you are ever unsure or uncomfortable, do not hesitate to call a licensed electrician. Your safety is always worth more than the cost of a professional service call.
Tools and Materials for the Job
Completing this project requires only a few basic tools that you likely already have. Having everything ready before you start will ensure the process goes smoothly and safely.
| Tool/Material | Purpose |
|---|---|
| Non-Contact Voltage Tester | Absolutely essential for verifying that the power to the outlet is completely turned off. |
| Phillips and Flathead Screwdrivers | Needed to remove the faceplate and the receptacle from the electrical box. |
| Wire Strippers/Cutters | Useful for trimming wires if the ends are damaged or need to be reshaped. |
| Pliers | Helpful for bending wires to fit properly around terminal screws. |
| New Receptacle (Optional) | While you can reuse the old one, it’s a good opportunity to upgrade to a new, more modern outlet. |
| New Faceplate | You will likely need a new cover plate, often a “decorator” or Decora style, to fit the new horizontal orientation. |
A Step-by-Step Guide to Rotating Your Outlet
Follow these instructions carefully to ensure a safe and successful installation. The entire process should take less than 30 minutes for a single outlet.
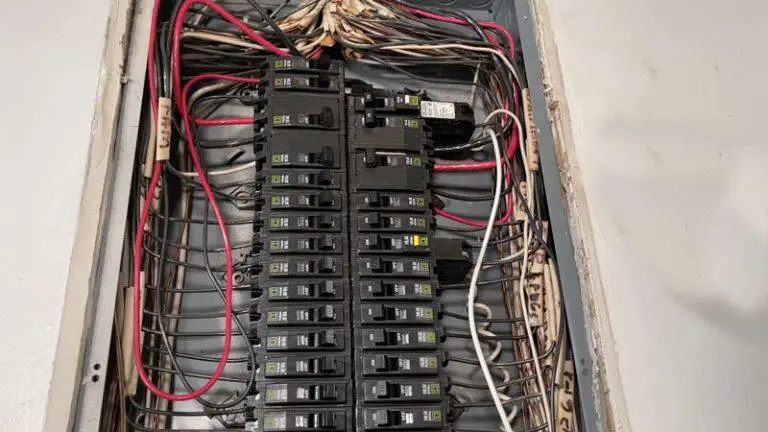
Step 1: Shut Off the Power Completely
This is the most important step for your safety. Go to your home’s main electrical panel or breaker box. Locate the circuit breaker that controls the outlet you plan to work on and switch it to the “OFF” position.
After flipping the breaker, return to the outlet and use your non-contact voltage tester to confirm there is no power. Insert the tip of the tester into both slots of the receptacle. The tester should not light up or make any sound. It’s a good practice to test a known live outlet first to ensure your tester is working correctly.
Step 2: Remove the Faceplate and Unscrew the Outlet
Using a screwdriver, remove the screw holding the outlet’s faceplate in place and set the plate aside. Next, you will see two longer screws at the top and bottom of the receptacle that mount it to the electrical box. Unscrew both of these, but don’t remove them completely from the outlet just yet.
Step 3: Pull Out and Inspect the Outlet and Wires
Gently pull the outlet straight out from the electrical box. The wires attached to it should have enough slack to allow you to work. Take a moment to look at the wiring configuration. You will typically see three wires:
- Hot Wire: Usually covered in black insulation, connected to a brass or gold-colored screw terminal.
- Neutral Wire: Covered in white insulation, connected to a silver-colored screw terminal.
- Ground Wire: Either a bare copper wire or covered in green insulation, connected to a green screw terminal.
Step 4: Disconnect the Wires
Using your screwdriver, loosen the terminal screws on the side of the outlet and unhook each wire. If the wires were inserted into push-in holes on the back of the outlet, you may need to insert a small screwdriver into the release slot to free them. Many electricians advise against using these “backstab” connections as they can be less reliable over time.
Step 5: Reposition and Reconnect the Outlet
Now, rotate the outlet 90 degrees. Remember the safety guideline: the neutral (silver) terminal should be on top, and the hot (brass) terminal should be on the bottom. Carefully bend the wires into a hook shape with your pliers and wrap them clockwise around the appropriate terminal screws.
Tighten the screws securely, ensuring that the wire insulation is flush with the terminal and no bare wire is exposed beyond the screw head. Give each wire a gentle tug to confirm it’s firmly connected.
Step 6: Secure the Outlet in the Box
Carefully fold the wires and push the newly oriented outlet back into the electrical box. The mounting tabs on the outlet should now align with the screw holes on the side of the box. Use the two mounting screws to secure the outlet firmly in place.
The final installation should be solid and not move when you plug something in. Properly securing the outlet is a detail as important as knowing how to fill the gap between a hearth and hardwood for a polished and professional finish in your home projects.
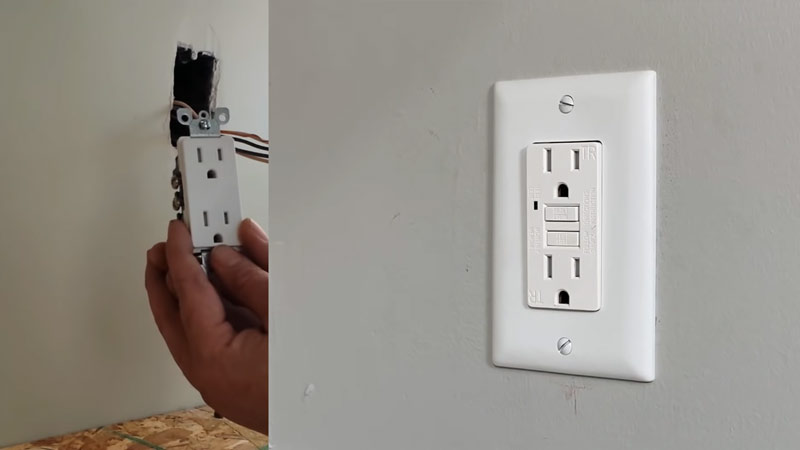
Step 7: Attach the New Faceplate and Restore Power
Position your new faceplate over the outlet and secure it with its screw. Once everything is assembled, you can return to your breaker box and switch the circuit back to the “ON” position. Test the outlet with your voltage tester or by plugging in a lamp to confirm it’s working correctly.
Potential Challenges and Solutions
In most cases, rotating an outlet is a straightforward process. However, you might encounter a couple of issues depending on your home’s wiring and construction.
Issue 1: Short Wires
If the wires in the electrical box are too short, you may not have enough slack to easily rotate and reconnect the outlet. Do not try to stretch them. Instead, you can add short extension wires, called “pigtails,” to make the connection easier. This involves connecting a new, 6-inch piece of same-gauge wire to the existing wire with a wire nut, and then connecting the other end of the pigtail to the outlet.
Issue 2: The Electrical Box
Standard rectangular electrical boxes are designed for vertical mounting. When you rotate the outlet, the mounting screws may not line up. Some metal boxes are square (“4S” boxes) and use a “mud ring” that can be oriented vertically or horizontally, making this job simple. If you have a standard box, you may need to replace it with an “old work” or “remodel” box that can be secured to the drywall in any orientation.
Alternatives to Rotating an Outlet
If you’re not comfortable with DIY electrical work or if you’re looking for a less permanent solution, there are several excellent alternatives that can solve the problem of bulky plugs.
- Outlet Adapters and Extenders: Small, plug-in devices are available that can rotate or provide extra space.
- Surge Protectors with Rotating Outlets: Many modern power strips feature outlets that can be individually rotated to accommodate large adapters.
- Flat-Plug Extension Cords: These cords have a low-profile plug that sits flush against the wall, allowing furniture to be placed in front of it while providing extra outlets.
Considering these alternatives is part of a holistic approach to home improvement. Just as achieving a professional look can be as simple as learning how to flush mount a frameless mirror, choosing the right electrical solution can solve a daily annoyance with minimal effort.
Conclusion: A Small Change for a Big Impact
Rotating an electrical outlet 90 degrees is a simple, low-cost project that can make a surprisingly big difference in your daily life. It eliminates the frustration of blocked receptacles and restores the full functionality of your home’s outlets. By prioritizing safety and following the steps outlined in this guide, you can confidently tackle this project and enjoy the convenience of a clutter-free connection.
As you think about other ways to improve your home’s functionality, consider projects that also enhance efficiency. For example, learning how to insulate skylights for winter is another practical upgrade that can deliver significant benefits. Taking on these small but impactful DIY projects empowers you to create a more comfortable and functional living space.