Rim Joist Insulation Cost: The #1 Home Upgrade to Stop Wasting Money
Are your energy bills creeping up month after month? Do you feel persistent drafts and cold floors in the winter, no matter how high you set the thermostat? The culprit might not be your windows or attic; it could be a hidden, uninsulated part of your home’s structure silently draining your wallet: the rim joist.
Many homeowners overlook this critical area, leading to significant energy loss and discomfort. Addressing this problem is one of the most cost-effective upgrades you can make, offering a substantial return on investment through lower energy bills and a more comfortable home.
You'll Learn About
What is a Rim Joist and Why Is It a Hidden Energy Vampire?
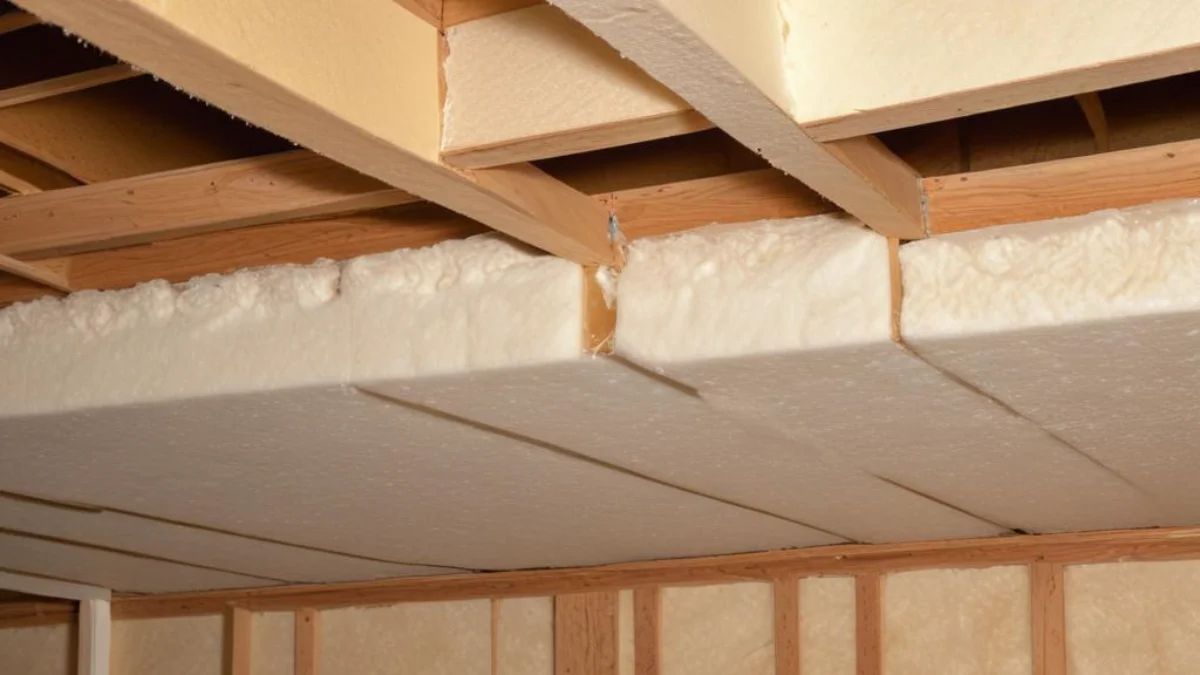
The rim joist, also known as a band joist, is the wooden board that caps the ends of the floor joists, forming the perimeter of your floor framing. You can typically see it at the top of your basement or crawlspace walls, sitting directly on top of the foundation. While structurally essential, it’s also a major source of thermal bridging and air leakage.
Because the rim joist is a relatively thin piece of wood separating your conditioned indoor space from the harsh outside elements, it allows heat to escape easily in the winter and enter in the summer. This inefficiency forces your HVAC system to work overtime to maintain a comfortable temperature.
The Sneaky Ways Uninsulated Rim Joists Cost You Money
The primary problem with uninsulated rim joists is massive energy loss. Studies have shown this small area can account for 15% or more of a home’s total heat loss. This happens because there is often nothing but a thin layer of wood and siding protecting it.
This direct path for heat transfer means you are constantly paying to heat or cool the outdoors. The financial drain adds up significantly over the years, making the initial rim joist insulation cost a wise long-term investment.
Beyond Bills: Other Problems Caused by Bare Rim Joists
The issues extend beyond high utility bills. Uninsulated rim joists create a host of other problems that can affect your home’s health and your family’s comfort. These problems often go unnoticed until they become severe.
These issues include moisture and mold growth, as warm, humid indoor air condenses on the cold surface of the joist, leading to potential wood rot. Furthermore, small gaps and cracks serve as an open invitation for pests like insects and rodents to enter your home.
Decoding the Costs: A Breakdown of Rim Joist Insulation Prices
Understanding the cost of insulating your rim joists involves looking at several factors, from the size of your home to the type of insulation you choose. A typical professional installation can range from $1,200 to over $3,000, but this can vary widely.
For DIY enthusiasts, the material costs are much lower, often falling between $120 and $250 for an average-sized basement. However, it’s crucial to weigh the savings against the performance and potential pitfalls of a DIY job compared to professional work.
Factors That Influence Your Final Bill
Several key variables determine the final price tag for your rim joist insulation project. The total linear footage of the rim joist is the primary factor, as more area requires more material and labor.
Accessibility is another major driver of cost. If your basement or crawlspace is cluttered or has complex mechanical systems blocking the rim joists, contractors will charge more for the extra time and effort required. Finally, the type and thickness of the insulation material selected will significantly impact the overall expense.
The choice of insulation material is critical not only for performance but also for the total project cost. Each option has a different price point, R-value (a measure of thermal resistance), and installation complexity.
To help you decide, we’ve broken down the most common materials, comparing their costs and features. This information will empower you to choose the best solution for your budget and home’s needs.
| Insulation Type | Average Material Cost (Per Linear Foot) | Average Professional Install Cost (Per Linear Foot) | R-Value (Per Inch) | Pros | Cons |
|---|---|---|---|---|---|
| Spray Foam (Closed-Cell) | $0.75 – $2.00 (DIY Kits) | $2.00 – $4.00+ | 6.0 – 7.0 | Excellent air seal, moisture barrier, high R-value | Higher cost, requires professional installation for best results |
| Rigid Foam Board (XPS/Polyiso) | $1.20 – $3.70 | $3.00 – $6.00 | 4.5 – 6.0 | Good R-value, moisture resistant, DIY-friendly | Requires separate sealing of seams with canned foam |
| Fiberglass Batts | $0.80 – $2.60 | $2.00 – $4.50 | 3.0 – 3.5 | Low upfront cost, widely available | Poor air seal, susceptible to moisture and mold, loses R-value when compressed |
Choosing Your Weapon: The Best Insulation Materials for Rim Joists
Selecting the right insulation is the most critical step in this process. The three main contenders are spray foam, rigid foam board, and traditional fiberglass batts. Each has distinct advantages and disadvantages that make them suitable for different situations and budgets.
Your decision should be based on your desired performance, long-term goals, and whether you plan to tackle the project yourself or hire a professional. Let’s delve into the specifics of each material.
Spray Foam Insulation: The Premium Seal
Closed-cell spray foam is widely considered the gold standard for rim joist insulation. When applied, it expands to fill every crack and crevice, creating a monolithic air and vapor barrier. This comprehensive seal is unmatched by any other insulation type.
This airtightness stops drafts and moisture intrusion completely. While it’s the most expensive option, its superior performance often provides the best long-term value. If you’re wondering why spray foam insulation is so expensive, it’s due to its complex chemical composition and the specialized equipment needed for installation, which combine to deliver unparalleled performance.
Rigid Foam Board: The DIY Champion
For homeowners looking for a balance of high performance and affordability, rigid foam board is an excellent choice. Available in large sheets of extruded polystyrene (XPS) or polyisocyanurate (polyiso), it offers a high R-value per inch and is highly resistant to moisture.
This material is the favorite for DIY projects because it’s easy to cut and fit into the joist bays. To achieve a proper air seal, it’s essential to seal the edges of each foam board piece with canned spray foam, ensuring no gaps remain for air to penetrate.
Fiberglass & Mineral Wool: The Traditional (But Tricky) Choice
Fiberglass batts are the cheapest insulation material and are commonly found in older homes. While inexpensive, fiberglass is a poor choice for rim joists because it does not stop air movement. Air can easily pass through it, negating much of its insulating value.
Furthermore, if fiberglass gets damp from condensation, it can become a breeding ground for mold and will lose its R-value. While it may seem like a budget-friendly option, its poor performance in this specific application often makes it a wasted investment.
The Ultimate DIY Guide to Sealing Your Rim Joists
For those ready to take on the project, insulating your rim joists with rigid foam board is a manageable and highly rewarding weekend task. With careful preparation and the right materials, you can achieve a professional-quality result and start saving money immediately.
This step-by-step guide will walk you through the process, from preparing the area to creating a perfect, airtight seal. Follow these instructions closely for a successful installation.
Step 1: Preparation is Everything
First, clear the area around the basement perimeter to ensure you have easy access to all the rim joist cavities. Remove any old, ineffective insulation, like fiberglass batts. Thoroughly clean the rim joist and surrounding wood with a shop vacuum to remove dust, cobwebs, and debris.
Inspect the wood for any signs of moisture or rot. If you find any damp areas, you must address the source of the water intrusion before proceeding with insulation.
Step 2: Cutting and Fitting Rigid Foam
Measure the height and width of each joist bay. Using a utility knife or table saw, cut pieces of 2-inch thick rigid foam board to fit snugly within each cavity. It’s best to cut the pieces about 1/4-inch smaller than the actual dimensions to leave a small gap around the perimeter for the sealant foam.
Press each piece of foam board firmly into place against the rim joist. The friction fit should hold it in place temporarily until you apply the sealant.
Step 3: Sealing the Gaps for an Airtight Barrier
Using a can of low-expansion spray foam with a straw applicator or a professional foam gun, carefully apply a bead of foam in the gap around the entire perimeter of each foam board piece. This step is absolutely crucial as it creates the airtight seal that makes the system effective.
The foam will expand to fill any remaining voids, bonding the rigid board to the wood framing and stopping all air leakage. Once cured, this combination provides a robust and permanent insulation solution.
Professional Installation vs. DIY: Making the Right Call
Deciding between a DIY approach and hiring a professional contractor depends on your budget, timeline, and comfort level with home improvement projects. Both paths have their merits, and the right choice is a personal one.
A professional installation guarantees a perfect application, especially with spray foam, but comes at a higher price. A DIY project can save you a significant amount of money but requires careful work to achieve the necessary airtight seal.
When to Hire a Pro
If you opt for closed-cell spray foam insulation, hiring a certified professional is non-negotiable. The equipment is specialized, and the chemical process requires expertise to ensure safety and effectiveness. A pro will complete the job quickly and efficiently, often in just a few hours.
Even if you’re considering foam board, hiring a pro can be worthwhile if you have a very large or complex basement, or if you simply lack the time or confidence to do it yourself. They can also identify and address underlying moisture issues you might miss.
The Rewards of a Weekend DIY Project
The biggest advantage of a DIY rim joist project is the cost savings. For just a few hundred dollars in materials, you can achieve a massive improvement in your home’s energy efficiency. It’s one of the few home improvement projects with such a high and immediate return on investment.
Completing the project yourself also provides a great sense of accomplishment. Once finished, you can feel the difference in comfort almost immediately, with warmer floors and fewer drafts.
The Long-Term Payoff: Is Rim Joist Insulation Worth The Cost?
Absolutely. Insulating your rim joists is one of the highest-impact, fastest-payback energy efficiency upgrades a homeowner can make. The initial investment, whether for DIY materials or a professional job, is quickly recouped through lower heating and cooling bills.
Beyond the direct financial savings, the benefits of increased comfort, moisture control, and improved indoor air quality add tremendous value to your home. It’s an investment that pays dividends for decades to come.
Calculating Your Return on Investment
Many homeowners report seeing their energy savings pay for the cost of the project in just a few years. By sealing off a major source of air leakage, you not only reduce energy consumption but also improve the overall performance of your entire home envelope.
When considering your home’s insulation as a complete system, the rim joist is a critical component. A well-sealed rim joist complements other insulation efforts. For instance, if you are planning a full basement finishing project, properly sealing the rim joists first is a crucial step before you begin framing over basement blanket insulation. Similarly, for those aiming for maximum efficiency with high-performance systems like R80 insulation in their attic, neglecting the rim joists would be a significant oversight, leaving a major weak point in the home’s thermal boundary.