Replace Hardwood With Tile? Avoid This #1 Structural Mistake
That classic hardwood floor, once the pride of your home, is starting to look a little tired. Scratches from pets, dents from dropped toys, and a general sense of weariness have you dreaming of something new, something more durable and stylish. Tile flooring, with its endless design possibilities and robust nature, seems like the perfect upgrade.
But this isn’t like repainting a room. Tearing out a hardwood floor is a permanent decision with significant structural implications. Many homeowners dive into this project only to face catastrophic issues down the line, from cracked tiles to a bouncy, unstable floor that telegraphs every footstep.
The number one mistake is failing to understand what lies beneath your hardwood. Your home’s subfloor was likely designed for the weight and flexibility of wood, not the heavy, rigid nature of tile. Making the switch without proper preparation is a recipe for costly repairs and profound regret.
You'll Learn About
Why Ripping Out Hardwood Is a Point of No Return
Before prying up the first plank, it’s crucial to appreciate the gravity of the decision. Unlike considering whether to refinish hardwood or install vinyl, where options exist, removing a solid hardwood floor is irreversible. That character, that warmth, and that specific value proposition are gone for good.
Hardwood floors are a timeless feature that many homebuyers actively seek. While tile is fantastically durable, ripping out original wood can sometimes detract from a home’s classic charm and potential resale value. This isn’t just a style choice; it’s a fundamental change to the character of your home.
The Unseen Enemy: Subfloor Deflection
Here is the critical issue that derails countless projects: subfloor deflection. In simple terms, this is the amount of bounce or flex your floor has when you walk across it. Wood is a flexible material and can handle a fair amount of deflection without any issue.
Tile and grout, however, are extremely rigid. When installed on a subfloor that flexes too much, the grout will crack and the tiles will eventually pop loose or break. The Tile Council of North America (TCNA) sets strict standards, limiting deflection to L/360 for ceramic and porcelain tile—meaning the floor cannot flex more than 1 inch over a 360-inch (30-foot) span.
The Brutal Reality of Hardwood Removal
Removing a nailed-down hardwood floor is a labor-intensive and messy job. It requires more than just a pry bar and determination. To do it efficiently, you’ll need to make perpendicular cuts across the planks with a circular saw, being careful to set the blade depth just enough to cut the hardwood and not the subfloor.
Once you’ve created sections, you can begin prying up the boards. Expect a barrage of dust, splinters, and stubborn nails. Disposing of the old flooring can also be a challenge, as many waste services have specific rules for construction debris.
Subfloor Prep: The Foundation of a Lasting Tile Floor
Once the hardwood is gone, your real work begins. You’ll be looking at either a plywood/OSB subfloor or a concrete slab. In either case, it must be impeccably clean, flat, and structurally sound before a single tile is laid.
For a wood subfloor, your primary mission is to eliminate that deflection we talked about. Removing the 3/4-inch hardwood has significantly reduced the floor’s overall stiffness. You must now build it back up to meet the standards for tile.
Beefing Up Your Subfloor
The standard solution is to add another layer of 1/2-inch or 5/8-inch exterior-grade plywood on top of the existing subfloor. This new layer should be glued and screwed down securely, with fasteners driven into the floor joists. The seams of the new plywood layer must be offset from the seams of the original subfloor to maximize rigidity.
After strengthening the subfloor, the next step is installing an appropriate underlayment. While cement backer board is a common choice, a superior option is a decoupling membrane. These membranes, often looking like dimpled plastic sheets, create an uncoupling layer that absorbs stress from subfloor movement, providing essential protection against cracking.
Cost and Value: A Head-to-Head Comparison
Before committing to this project, a clear-eyed look at the costs and long-term value is essential. The initial investment to replace hardwood with tile can be substantial, especially when accounting for the intensive labor of removal and subfloor preparation.
While high-quality tile can be a fantastic investment, remember that hardwood often has a higher return on investment, with some reports showing new wood floors can boost a home’s sales price significantly. It is a detail worth noting, just as you would when reading Casabella Hardwood Reviews to understand a product’s value.
| Factor | Hardwood Flooring | Tile Flooring |
|---|---|---|
| Material Cost (per sq. ft.) | $5 – $15 | $2 – $30 |
| Installation Labor Cost (per sq. ft.) | $4 – $8 | $5 – $15 (plus removal/prep) |
| Maintenance | Requires refinishing every 7-10 years; susceptible to scratches and water damage. | Highly durable; resistant to water and scratches. Grout may need periodic sealing/cleaning. |
| Lifespan | 25-100+ years (can be refinished multiple times) | 50+ years if installed correctly |
| Resale Value ROI | Often 70-80% or higher. Highly desired by homebuyers. | Generally lower ROI than hardwood, but very desirable in kitchens and baths. |
| Comfort | Warmer underfoot, more forgiving on joints. | Cold and hard underfoot. |
Choosing the Right Tile and Managing Transitions
Your choice of tile has implications beyond aesthetics. Pay attention to the PEI rating, which indicates hardness and durability—a rating of 4 or 5 is ideal for high-traffic floors. Porcelain is denser and more water-resistant than ceramic, making it a better choice for kitchens and entryways.
The layout pattern is also important. A common mistake is using a 50% offset, or “brick pattern,” with large format tiles. This can lead to lippage (uneven tile height) because large tiles often have a slight crown in the center. Exploring options like a 1/2 vs 1/3 tile offset is crucial for a professional look.
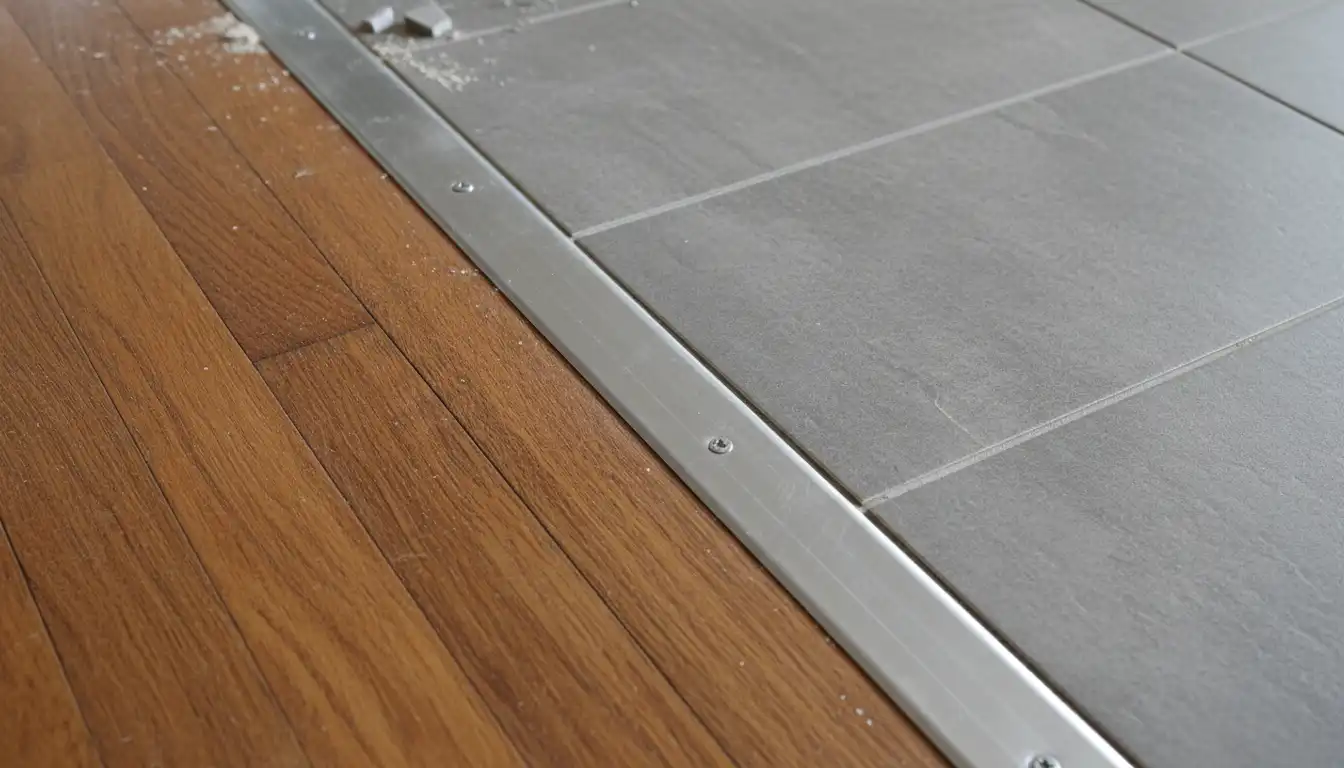
The Transition Challenge
You must also plan how your new, thicker tile floor will meet existing flooring in adjacent rooms. The combined thickness of the reinforced subfloor, membrane, mortar, and tile will almost certainly create a height difference. This is where transition strips (T-molding or reducers) become necessary.
For a clean, professional finish, door jambs and casings must be undercut to allow the new tile to slide underneath. Planning these details, including how to handle trim like quarter round around fireplace hearths, prevents ugly gaps and ensures a seamless look.
Frequently Asked Questions
Is it possible to lay tile directly over a hardwood floor?
While it is possible, it is generally not recommended to install tile directly over hardwood. Hardwood floors expand and contract with changes in temperature and humidity, which can cause the tile and grout to crack or loosen over time. Proper preparation, such as installing a backer board, is crucial to create a stable and suitable surface for the tile.
What are the main advantages of replacing hardwood with tile?
Tile flooring offers superior durability and longevity, with a lifespan of 50 years or more with proper care. It is also highly resistant to moisture, making it an excellent choice for kitchens, bathrooms, and other areas prone to spills. Additionally, tile is easy to clean and maintain, and comes in a vast array of styles and designs.
What is the average cost to replace hardwood floors with tile?
The cost of replacing hardwood with tile can vary significantly based on the type of tile, the size of the area, and labor costs in your region. Material costs for tile can range from $2 to $30 per square foot. Installation labor can add an additional $5 to $25 per square foot, and removing the old hardwood floor will also contribute to the overall expense.
Will replacing hardwood floors with tile affect my home’s value?
Both hardwood and tile are considered premium flooring options that can increase a home’s value. While hardwood is often praised for its warm and classic look, tile offers a modern and durable alternative that is highly sought after in many markets. The impact on your home’s value will ultimately depend on the quality of the installation and the preferences of potential buyers in your area.
What are the potential problems with installing tile over hardwood?
One of the main concerns is the natural movement of the wood, which can lead to cracked tiles and grout. Another issue is the increased floor height, which may require you to trim doors and create awkward transitions between rooms. Trapped moisture between the tile and the wood subfloor can also lead to mold, mildew, and damage to the wood.
Does the subfloor need any special preparation before tiling over hardwood?
Yes, significant preparation is necessary to ensure a long-lasting tile installation. The hardwood floor must be structurally sound, level, and free of any loose boards or damage. It is highly recommended to install a cement backer board or an uncoupling membrane over the hardwood to create a stable and appropriate surface for the tile adhesive.
The Final Verdict: Is It the Right Choice for You?
Replacing hardwood with tile is a major undertaking that can yield a beautiful, durable, and waterproof floor perfect for modern life. However, it is not a simple swap. Success hinges entirely on your commitment to properly reinforcing and preparing the subfloor to handle the weight and rigidity of tile.
The project is absolutely worth it for areas like kitchens, bathrooms, and mudrooms where moisture and durability are paramount. For main living areas, carefully weigh the loss of the warmth and resale value of hardwood against the benefits of tile.
If you proceed, do not cut corners on subfloor preparation. Reinforce the structure, use a decoupling membrane, and ensure the surface is perfectly flat. By avoiding the common mistake of ignoring your home’s structure, you can ensure your new tile floor remains beautiful and crack-free for decades to come.