Remove Sprinkler Stains From Fence: Your Ultimate Guide to a Spotless Barrier
There’s nothing more frustrating than looking at your otherwise beautiful fence, only to see it marred by unsightly white, brown, or reddish stains. You take pride in your property’s appearance, but those persistent marks left by your own sprinkler system can make your fence look old and neglected. It’s a common problem that leaves many homeowners scratching their heads, wondering where they went wrong.
The good news is that you’re not alone in this battle, and the solution is well within your reach. Those stubborn blemishes are not a permanent fixture. With the right knowledge and a little bit of elbow grease, you can restore your fence to its former glory and prevent those ugly stains from ever coming back.
You'll Learn About
What Exactly Causes Those Ugly Sprinkler Stains?
Understanding the enemy is the first step to victory. The stains on your fence are not from the water itself, but from what’s in the water. Day after day, your sprinklers spray the fence, the water evaporates under the sun, and tiny mineral deposits are left behind to build up over time.
The Main Culprit: Hard Water Explained
The primary cause of white or chalky stains on your fence is hard water. This term simply means your water has a high concentration of dissolved minerals, mainly calcium and magnesium. While perfectly safe for your lawn, these minerals cling to surfaces as water dries, creating a crusty, layered deposit that can be incredibly tough to remove.
This is the same type of buildup you might see on your shower doors or faucets. Over weeks and months, each cycle of the sprinkler adds another microscopic layer, resulting in very visible and stubborn stains that detract from your fence’s appeal.
Iron and Rust Stains: A Deeper Problem
If the stains on your fence are reddish-brown and look like rust, the culprit is likely a high concentration of iron in your water. This is especially common for homes that use well water for irrigation. When the iron particles in the water are exposed to air and moisture, they oxidize—the chemical process better known as rusting.
These iron stains can be particularly challenging because they can penetrate the surface of porous materials like wood. Simply scrubbing them often isn’t enough to lift the deep-seated discoloration, requiring a more targeted approach to break down the rust chemically.
Why Your Fence Material Matters
The type of fence you have will influence both how stains appear and the best methods for removing them. A porous, untreated wood fence will absorb mineral and iron deposits, making stains deeper and harder to clean. On the other hand, a non-porous vinyl or PVC fence will hold the stains on its surface, which often makes them easier to clean but also more noticeable.
Metal fences, like chain-link or aluminum, are less likely to show hard water stains but are highly susceptible to the direct rusting effects of iron-rich water. Knowing your fence material is crucial before you start any cleaning project to ensure you don’t cause accidental damage.
Before You Begin: Essential Prep Work for Success
Jumping into a cleaning project without proper preparation can lead to disappointing results or even damage to your fence. A few minutes of prep work will ensure the process is safe, effective, and efficient. Don’t skip these crucial first steps.
Safety First: Gear Up!
Even when using natural cleaning solutions, it’s vital to protect yourself. Some commercial cleaners, especially those containing acids, can be harsh. Always wear protective gloves to shield your hands from chemicals and prolonged water exposure, and safety goggles to protect your eyes from accidental splashes.
If you’re working with strong chemicals or creating fine dust by scrubbing, a simple dust mask is also a good idea. Ensure the area is well-ventilated and keep pets and children away while you are actively cleaning the fence.
Test in an Inconspicuous Area
This is the golden rule of stain removal. Before you apply any cleaning solution to a large, visible section of your fence, always test it on a small, hidden spot first. Choose a low-profile area, perhaps behind a bush or near the ground, apply the cleaner, and let it sit for the recommended time before rinsing.
This simple test will show you how the solution reacts with your specific fence material. It allows you to check for any discoloration, damage, or other adverse effects, saving you from a costly and heartbreaking mistake. This is especially important for stained or painted wood fences.
Gather Your Cleaning Arsenal
Having all your tools and materials ready before you start will make the job go much smoother. Depending on the method you choose, you may need a combination of the following items. Prepare your workspace and lay out everything you need for easy access.
Your basic toolkit might include buckets, spray bottles, a garden hose with a spray nozzle, various scrub brushes (stiff for tough surfaces, soft for vinyl), and clean rags or towels. For tougher jobs, you might need a pressure washer or specific chemical cleaners.
Battle Plan: How to Remove Sprinkler Stains from Any Fence
With your prep work done, it’s time to tackle the stains. The best method will depend on the severity of the staining and your type of fence. It’s often best to start with the gentlest method and work your way up to more aggressive solutions only if needed.
Method 1: The Natural Approach (White Vinegar)
For light to moderate hard water stains, especially on vinyl or painted surfaces, a simple vinegar solution can work wonders. The acetic acid in vinegar is excellent for dissolving the calcium and magnesium deposits that cause white, chalky stains. This is a great, eco-friendly starting point.
Create a solution by mixing equal parts white vinegar and water in a spray bottle. Thoroughly spray the stained areas of the fence, ensuring they are completely saturated. Let the solution sit for at least 15-20 minutes to allow the acid to break down the mineral deposits, but do not let it dry completely on the fence.
After letting it dwell, use a medium-stiff brush to scrub the stains in a circular motion. You should see the deposits start to loosen and dissolve. Once you’ve scrubbed the area, rinse it thoroughly with clean water from your garden hose. For very stubborn spots, you may need to repeat the process.
Method 2: Commercial Cleaners for Tougher Jobs
When vinegar isn’t enough, it’s time to step up to a commercial hard water and rust stain remover. Products like CLR (Calcium, Lime, Rust) or other specialized cleaners are formulated to tackle heavy mineral buildup and rust stains more effectively than household remedies. Always read and follow the manufacturer’s instructions carefully.
Apply the cleaner as directed, which usually involves spraying it on the surface and letting it sit for a specific amount of time. These products are more powerful, so it’s crucial not to let them sit for too long, as they can potentially damage certain surfaces. After the designated dwell time, scrub the area with a brush and rinse completely with water.

These cleaners are often the best choice for stubborn rust stains on vinyl, metal, and concrete surfaces. Remember to wear your safety gear, as these are stronger chemical solutions. As with any project, if you’re ever in doubt about complex tasks, such as understanding how to handle wiring, it’s best to seek professional guidance on how to cover exposed romex_gem1 to ensure safety and compliance.
Method 3: The Power of Oxalic Acid (Wood Fences)
For rust stains that have penetrated a wood fence, oxalic acid is the secret weapon. Often sold as “wood bleach,” it’s not a bleach that removes color, but rather a chemical that specifically reacts with and removes iron stains and watermarks, brightening the wood back to its natural tone. It’s a professional’s choice for wood restoration.
You can buy oxalic acid in crystal form, which you’ll need to dissolve in water according to the package directions. Apply the solution evenly to the stained wood with a brush or sprayer. Let it sit for 15-30 minutes; you’ll often see the stains begin to disappear before your eyes. Lightly scrub if needed, and then rinse the fence thoroughly. It’s critical to neutralize the acid afterward with a solution of baking soda and water (about one cup per gallon) to stop its effect on the wood fibers.
Method 4: Pressure Washing – Use With Extreme Caution!
A pressure washer can be a highly effective tool for blasting away surface-level mineral deposits, especially from durable surfaces. However, it can also cause irreversible damage if used incorrectly. High pressure can etch vinyl, shred wood, and strip paint in an instant, so approach this method with extreme care.
Start with the lowest pressure setting and use a wide-angle nozzle (40-degree is often recommended). Keep the nozzle at least 12-18 inches away from the fence surface at all times. Work in broad, sweeping motions and never concentrate the spray in one spot for too long. Forcing something when it’s stuck can lead to bigger problems, a lesson that’s true whether you’re cleaning a fence or dealing with a snow blower pull cord stuck what to do_gem1.
Stain Removal for Specific Fence Types
Different fence materials require slightly different approaches to cleaning and care. Tailoring your method to your fence type will yield the best results and prevent unintended damage, ensuring a clean and pristine look for years to come.
Treating a Wood Fence
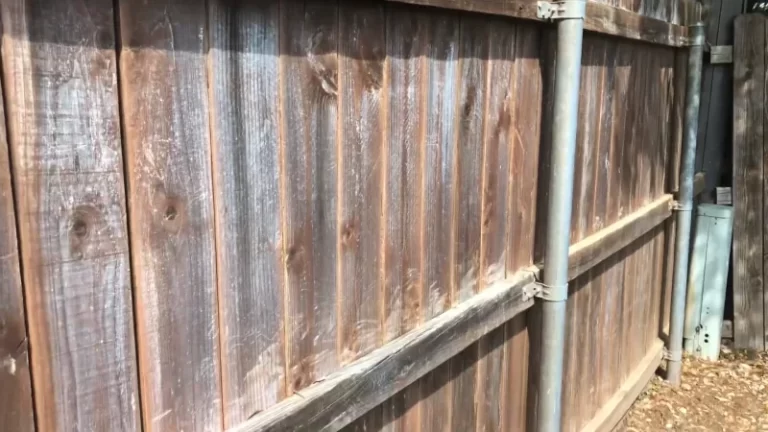
Wood is porous and sensitive, so it requires a careful touch. For general hard water stains, the vinegar solution or a gentle commercial cleaner is best. For stubborn rust stains, oxalic acid is the most effective choice. After cleaning, it is crucial to let the wood dry completely for a few days and then apply a high-quality sealant or stain. This will not only restore its beauty but also create a protective barrier against future water intrusion and staining.
Cleaning a Vinyl (PVC) Fence
Vinyl is a durable, non-porous material, which makes it relatively easy to clean. Most sprinkler stains are on the surface and can be removed with a vinegar solution or a non-abrasive commercial cleaner. Use a soft-bristled brush or a magic eraser sponge to gently scrub away the stains without scratching the surface. The durability of PVC is well-known, which is why it’s used in many applications, but it’s always interesting to learn about its various uses and modifications, such as the debate over whether you should you fill pvc pipe with concrete pros cons_gem1 for added strength.
Managing Stains on Metal Fences
For aluminum or painted metal fences, most hard water stain removers will work well. The primary concern with metal is rust. If you have a chain-link or wrought iron fence, rust stains are a sign of the fence itself corroding. In this case, you will need to remove the rust with a wire brush, apply a rust-converting primer, and then repaint the fence to protect it from further corrosion.
| Cleaning Method | Best For | Pros | Cons | Safety Level |
|---|---|---|---|---|
| White Vinegar Solution | Light hard water stains on vinyl, painted wood, and metal. | Eco-friendly, affordable, readily available. | May not be effective on heavy buildup or deep rust stains. | High (Generally Safe) |
| Commercial Stain Removers | Moderate to heavy hard water and rust stains. | Highly effective, fast-acting formulas. | Can be more expensive, contains harsher chemicals. | Medium (Requires Gloves/Goggles) |
| Oxalic Acid (Wood Bleach) | Rust and water stains specifically on wood fences. | Extremely effective at brightening wood and removing iron stains. | Requires careful handling and a neutralization step. Not for other materials. | Low (Requires Full PPE) |
| Pressure Washing | Surface-level mineral deposits on durable surfaces. | Quickly covers large areas, chemical-free. | High risk of damaging wood, vinyl, and paint if done incorrectly. | Medium (Requires Caution/Proper Technique) |
The Best Defense: Preventing Future Sprinkler Stains
Removing stains is only half the battle. Once your fence is clean, you’ll want to take steps to prevent them from coming back. A few strategic adjustments can save you a lot of cleaning time in the future and keep your fence looking its best year-round.
Adjust Your Sprinkler Heads
The most direct and effective solution is to stop the water from hitting the fence in the first place. Take the time to adjust your sprinkler heads. Change their spray pattern, angle, or rotation to ensure they water your lawn and garden beds, not your fence line. You can install sprinkler guards or risers to help control the spray. This simple fix is the number one way to prevent future stains.
Install an Iron Filter or Water Softener
If you have consistently hard water or high iron content, treating the water at its source is a more permanent solution. Installing a whole-system water softener can remove the calcium and magnesium before it ever reaches your sprinklers. For rust issues, an iron filter can be added to your irrigation system to specifically remove the iron particles, solving the problem for good.
Apply a Protective Sealant
For wood fences, a high-quality waterproof sealant or stain is your best friend. After thoroughly cleaning your fence, apply a generous coat of sealant. This creates a hydrophobic barrier, causing water to bead up and run off rather than soaking in. This prevents minerals from gaining a foothold and makes the surface much easier to clean in the future.
Perform Regular, Gentle Cleaning
Don’t wait for stains to become a major project. Make a habit of rinsing your fence down with a regular garden hose every few weeks. This can wash away fresh mineral deposits before they have a chance to bake in the sun and build up into a stubborn, crusty layer. A little bit of routine maintenance goes a long way.
Your Questions Answered: FAQs on Fence Stain Removal
Many homeowners face similar questions when dealing with this issue. Here are expert answers to some of the most common queries about removing sprinkler stains from fences, helping you proceed with confidence and clarity.
Can I just use household bleach to clean my fence?
It’s best to avoid chlorine bleach for this task. While it might seem like a powerful cleaner, it is not effective at dissolving mineral deposits or rust. On wood, bleach can damage the fibers and break down the lignin that holds them together, causing long-term harm. It can also discolor certain types of vinyl and is harmful to surrounding plants and soil.
How long will it take to remove the stains?
The time required depends entirely on the severity of the staining and the size of the affected area. A light cleaning with a vinegar solution might only take an hour. A deep clean of a large, heavily stained fence using commercial products or pressure washing could be a full weekend project. Always allow ample time and don’t rush the process.
Will these cleaning solutions harm my lawn and plants?
This is a valid concern. Natural solutions like vinegar are generally safe in moderation but can harm plants if applied directly in high concentrations. To be safe, it’s a great practice to pre-rinse and saturate any nearby plants and grass with fresh water before you start cleaning. This ensures that any chemical runoff is diluted and less likely to be absorbed by the plants. After you’re done, give the plants another good rinsing with clean water.
Conclusion: Reclaim Your Fence and Your Curb Appeal
Sprinkler stains on your fence can be a persistent annoyance, but they don’t have to be a permanent problem. By understanding that the true culprits are hard water minerals and iron, you can choose the right cleaning method for your specific fence material and stain type. From gentle vinegar solutions to powerful wood brighteners, a solution exists for every situation.
Remember that the key to long-term success lies in prevention. Adjusting your sprinklers, sealing your fence, and performing regular maintenance will protect your investment and keep your property looking sharp. With this comprehensive guide, you now have the knowledge and confidence to effectively remove those ugly stains and restore your fence to its rightful, spotless condition.


