Quarter Round Without Baseboard: The Minimalist’s Risky Shortcut
You’ve just installed beautiful new flooring, but now there’s an unsightly gap between the floor and the wall. The conventional wisdom says to install a baseboard and then a piece of quarter round molding to hide the gap, but you’re drawn to a cleaner, more minimalist look. This raises the critical question: Can you skip the baseboard and use quarter round by itself?
While technically possible, installing quarter round without a baseboard is a risky shortcut that can lead to a host of problems, from a cheap-looking finish to damaged walls. Before you commit to this minimalist approach, it’s crucial to understand the challenges and proper techniques to avoid a DIY disaster.
You'll Learn About
The Problem: Why Bypassing Baseboards is Tempting but Tricky
The allure of using only quarter round is understandable. Homeowners often desire a modern, uncluttered aesthetic where bulky baseboards feel intrusive. Others may see it as a cost-saving measure, reducing material and installation expenses. However, this method is not a standard practice for a reason.
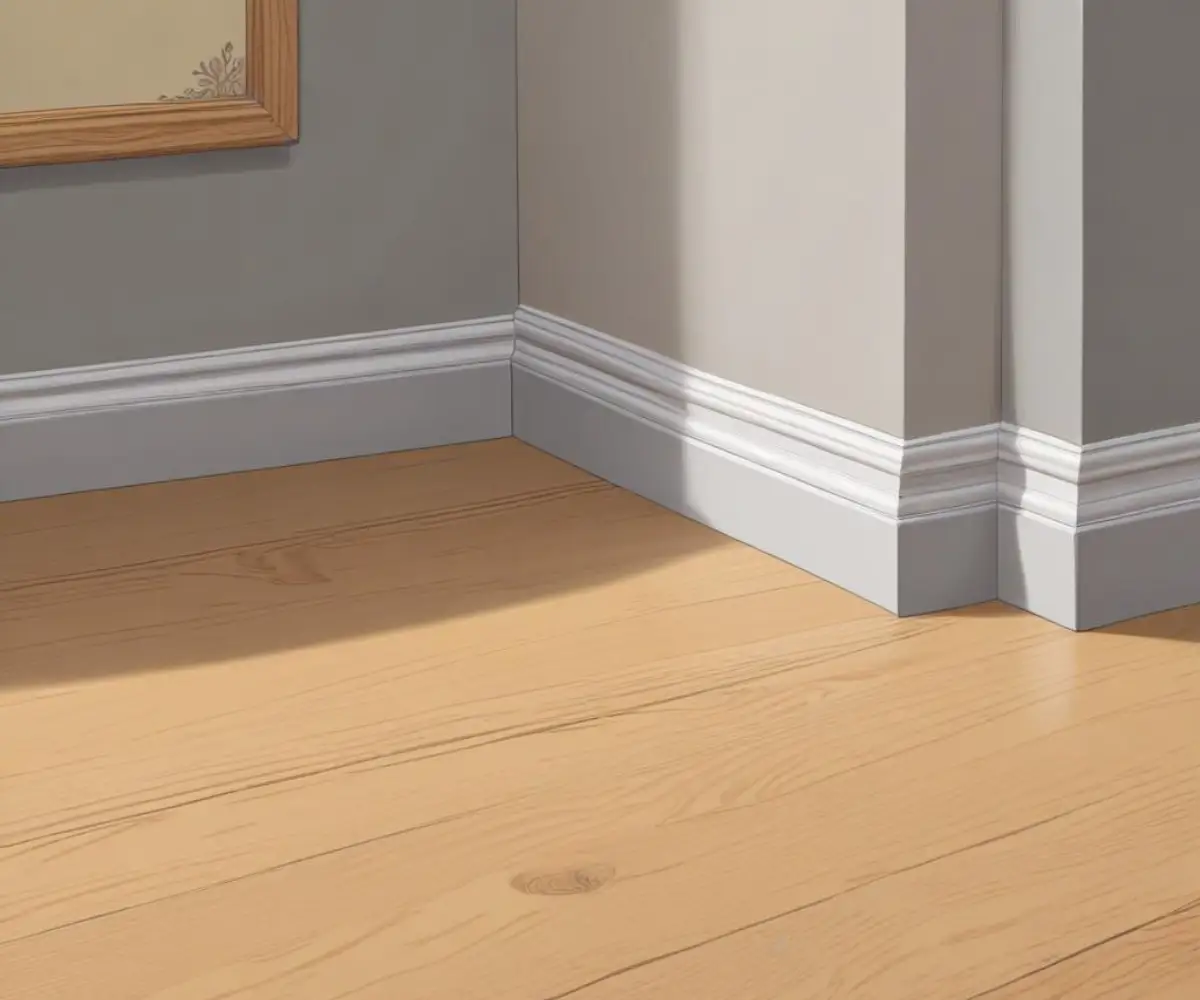
Baseboards serve a dual purpose: they protect the bottom of the drywall from damage from vacuum cleaners, furniture, and foot traffic, and they conceal the often uneven finish of drywall near the floor. Quarter round alone offers minimal protection and may not be substantial enough to hide imperfections in the wall’s finish, potentially resulting in a less-than-professional appearance.
Can You Install Quarter Round Directly to Drywall?
Yes, you can attach quarter round directly to the drywall, but it requires careful execution. The primary function of quarter round in this context is to cover the expansion gap required for floating floors like laminate or vinyl plank. Without this gap, your flooring could buckle or warp with changes in temperature and humidity. If you’ve ever dealt with bouncy vinyl plank flooring, an inadequate expansion gap could be the culprit.
However, nailing quarter round directly to the wall is not as straightforward as it seems. The bottom of the drywall can be fragile, and nailing into it can cause it to crumble or crack. To do it successfully, you must nail into the wall studs or the bottom plate of the wall framing for a secure attachment.
Step-by-Step Installation Guide for a Clean Finish
If you’re committed to the no-baseboard look, following a precise installation process is key to achieving a clean and durable result. This isn’t a project to rush; patience and the right tools will make all the difference.
1. Preparation and Material Selection
Before you begin, gather your materials. You’ll need quarter round molding, a tape measure, a miter saw for precise cuts, finishing nails, a nail gun (or a hammer and nail set), wood filler, and paintable caulk. When selecting quarter round, consider the material. MDF (Medium-Density Fiberboard) is a cost-effective and smooth option for painting, while solid wood offers a classic look that can be stained to match your floors.
Measure the perimeter of the room carefully and purchase about 10-15% extra molding to account for mistakes and bad cuts. It’s also wise to paint or stain your quarter round before installation, as this is much easier than doing it once it’s attached to the wall.
2. Making Accurate Cuts
The secret to professional-looking trim work lies in the corners. For inside corners, a coped joint provides a tighter fit than a simple miter. However, for DIYers, well-executed 45-degree miter cuts can still yield excellent results. For outside corners, miter cuts are the standard.
When cutting pieces to length, remember the old carpenter’s adage: “measure twice, cut once.” A miter saw will be your best friend for achieving crisp, accurate angles. For areas where the molding ends abruptly, such as near a doorway, creating a “return” provides a finished look. This involves a 45-degree cut on the end of the main piece and then cutting a tiny triangular piece to cap it off. Getting this right is especially important when dealing with tricky areas, a topic we explore further in our guide to quarter round around a door frame.
3. Nailing and Securing the Molding
This is the most critical step. You must nail the quarter round to the wall, never to the floor. Nailing into the floor restricts the natural expansion and contraction of your flooring, which can cause it to buckle. Use a stud finder to locate the wall studs and the bottom plate. Aim your nails slightly downward to ensure they securely bite into the wood framing behind the drywall.
A brad nailer or pin nailer is the ideal tool for this job, as it drives small nails that leave minimal holes. If you’re using a hammer, pre-drill pilot holes to prevent the wood from splitting and use a nail set to sink the nail heads just below the surface.
4. Finishing Touches for a Seamless Look
Once the quarter round is installed, the finishing details will elevate the look from amateur to professional. Use wood filler to cover all the nail holes. Once it’s dry, lightly sand it smooth.
Apply a thin bead of paintable caulk along the top edge of the quarter round where it meets the wall. This will fill any slight gaps and create a seamless transition. Smooth the caulk line with a damp finger or a caulking tool. After the caulk has dried, you can do any final paint touch-ups.
Quarter Round vs. Shoe Molding: Is There a Better Option?
When considering a minimalist trim, it’s worth comparing quarter round and shoe molding. While often used interchangeably, they have distinct profiles. Quarter round is a perfect quarter circle, while shoe molding is slightly taller and less deep. Many professionals prefer shoe molding for its more refined and less bulky appearance.
Shoe molding’s slightly more vertical profile makes it a bit more elegant and can be a better choice when you’re forgoing a baseboard. It provides a similar function of covering the expansion gap but with a more subtle look. The choice between the two often comes down to personal aesthetic preference and the size of the gap you need to cover.
| Molding Type | Profile Shape | Common Use | Best For |
|---|---|---|---|
| Quarter Round | Perfect quarter-circle (e.g., ¾” x ¾”) | Covering larger gaps between flooring and baseboards or walls. | Traditional look, situations requiring more coverage. |
| Shoe Molding | Taller than it is deep (e.g., ¾” tall x ½” deep) | Covering smaller, more subtle gaps between flooring and baseboards. | A more modern, refined aesthetic with a less intrusive profile. |
| Baseboard | Flat, often with decorative profiles on top | Protecting the wall and providing a substantial visual anchor. | Classic room finishing, protecting drywall from damage. |
Minimalist Alternatives to Quarter Round
If the idea of using quarter round alone still doesn’t feel right, or if you’re concerned about potential damage to your walls, there are other minimalist alternatives to traditional baseboards. These options can provide a clean, modern finish while still offering some protection and covering the necessary gaps.
1. Slim, Modern Baseboards
You don’t have to use bulky, ornate baseboards. A simple, flat, rectangular baseboard that’s only a few inches high can provide a clean, modern look. This style protects the wall and covers the expansion gap without drawing too much attention. Painting it the same color as the wall can make it blend in even more, creating a seamless feel.
2. Reglet or Reveal Trim
For a truly high-end, minimalist look, you can use a reglet or reveal trim. This involves creating a small, recessed channel between the wall and the floor. This technique gives the illusion that the walls are “floating” just above the floor. While this creates a stunning architectural detail, it is a more complex and expensive option that is best planned during construction or a major renovation.
3. Taller Shoe Molding
As mentioned, shoe molding offers a slimmer profile. Opting for a taller version of shoe molding can give you a bit more wall coverage and protection than standard quarter round, while still maintaining a minimalist aesthetic. This can be a good compromise, offering a clean line that is more substantial than quarter round but less bulky than a full baseboard.
The Final Verdict: Is Quarter Round Without a Baseboard a Good Idea?
Ultimately, installing quarter round without a baseboard is a design choice that prioritizes a minimalist aesthetic over the functional protection of a traditional baseboard. It can be done successfully if you are meticulous with your installation, ensuring the molding is securely fastened to the wall framing and not the floor.
However, be aware of the trade-offs. You will have less protection for your drywall, and the final look may not appear as polished or “finished” as a traditional baseboard installation. If you’re considering selling your home in the future, be aware that some potential buyers might see it as an unconventional or cheap shortcut.
For those committed to this clean, modern look, careful planning and execution are paramount. If you’re hesitant about your DIY skills, consulting with a professional is always a wise investment. The cost of hiring a pro can be a small price to pay to avoid damaging your walls or ending up with a finish you’re not happy with. To get an idea of professional costs, you might look into what major retailers charge, as seen in discussions about Lumber Liquidators installation costs, to benchmark your project.