Quarter Round on Carpet: Your Ultimate Guide to a Flawless Finish
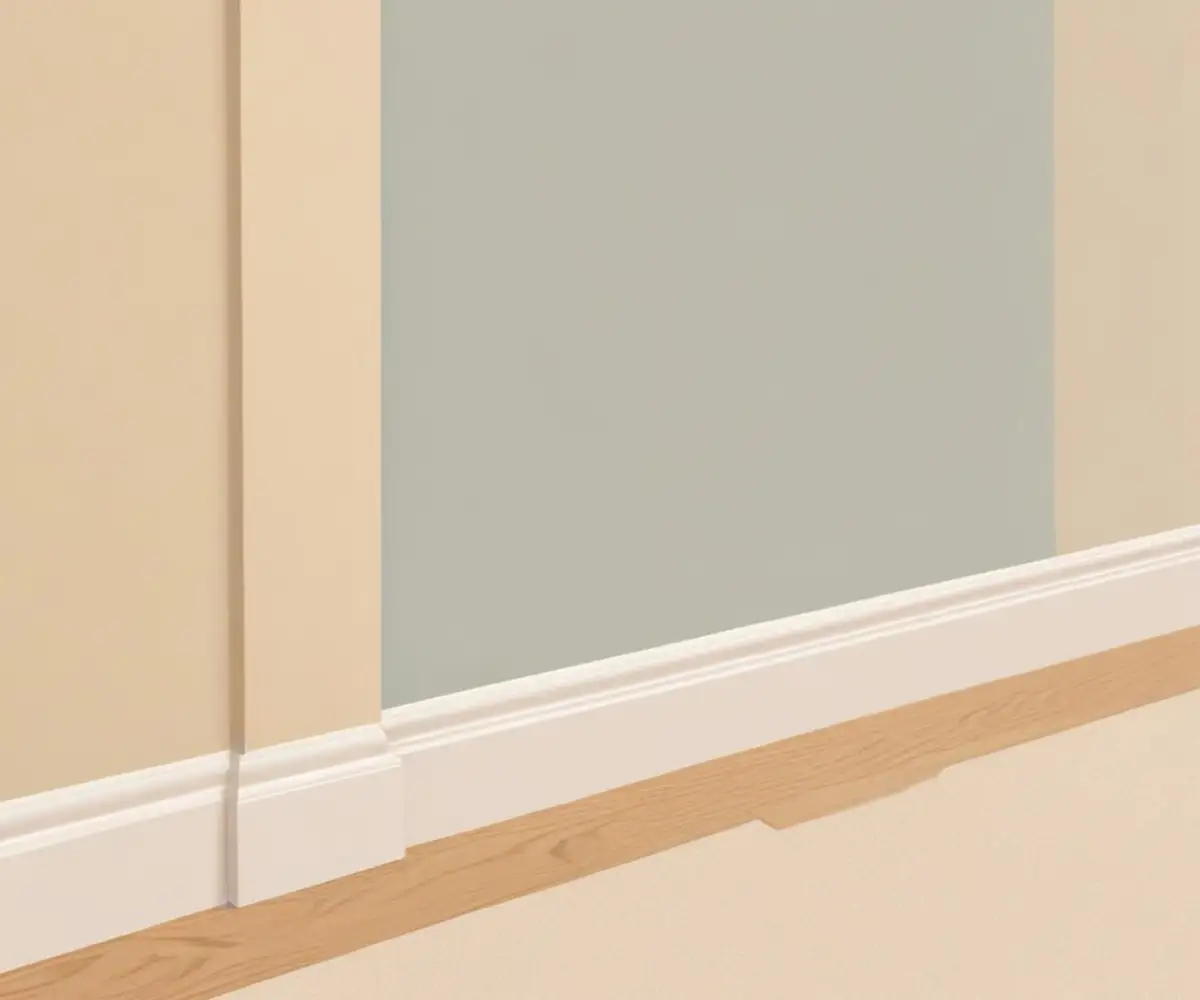
You’ve installed beautiful new carpet, the room feels cozy, but something is off. Along the walls, there’s a small, inconsistent gap between the bottom of your baseboards and the plush carpet fibers. This tiny imperfection can make an otherwise perfect room feel unfinished and messy.
This gap is a common issue that leaves many homeowners frustrated. It collects dust, creates a jagged visual line, and detracts from the clean, polished look you want. Fortunately, there is a simple, elegant, and professional solution: installing quarter round molding.
This guide will walk you through every step of using quarter round on carpet to achieve a seamless, high-end finish. We’ll cover why it’s necessary, how to choose the right materials, and a detailed installation process that anyone can master.
You'll Learn About
Why Is Everyone Talking About Quarter Round on Carpet?
The conversation around quarter round on carpet stems from its ability to solve a universal problem in home finishing. It serves as the perfect transitional piece between the vertical baseboard and the horizontal floor, creating a clean, deliberate edge that elevates the room’s overall aesthetic.
Functionally, quarter round is a problem-solver. It masterfully conceals the expansion gaps required for some flooring types and hides any unevenness where the subfloor meets the wall. For carpet, it provides a crisp boundary, preventing fraying edges and giving the installation a truly complete look.
Aesthetically, it adds a subtle layer of architectural detail. This small addition can make baseboards appear more substantial and intentional. It’s the kind of detail that separates a standard DIY job from a professional-grade renovation.
The Real Problem: Understanding the Gap
That gap between your baseboard and carpet isn’t necessarily a mistake; it’s often an unavoidable result of how homes are constructed and how carpet is installed. Several factors contribute to its existence, and understanding them is key to appreciating the solution quarter round provides.
Carpet requires a tack strip around the room’s perimeter, which is nailed to the subfloor slightly away from the wall. The carpet is stretched over this strip and tucked into the space, but variations in carpet pile height and subfloor level can create an inconsistent line. Over time, a home’s foundation can settle, or the subfloor itself may not be perfectly level, leading to visible gaps.
In some cases, underlying issues with the foundation can worsen these gaps. If you notice growing spaces under your baseboards, it might be wise to investigate for issues like cracks in the slab under your carpet, as this could indicate a more serious problem.
Quarter Round vs. Shoe Molding: Making the Right Choice for Carpet
When you head to the hardware store, you’ll see two similar types of trim: quarter round and shoe molding. While they serve a similar purpose, their profiles are slightly different, and one is often better suited for carpet applications. Understanding this distinction is crucial for getting the best result.
Quarter round, as its name suggests, has a profile that is a perfect quarter of a circle. It’s symmetrical, with its height and depth being equal. This pronounced curve is excellent for covering larger gaps and works especially well with thicker, high-pile carpets, as it can gracefully rest on top without looking out of place.
Shoe molding has a slightly flatter, less symmetrical profile. It’s generally taller than it is deep, giving it a more rectangular shape with a softened top edge. While shoe molding provides a sleek look on hard surfaces, its less pronounced curve may not cover gaps as effectively with plush carpeting.
Choosing Your Weapon: The Best Materials for the Job
The material you choose for your quarter round will impact its durability, cost, and ease of installation. Each option has its own set of pros and cons, especially in a carpeted environment where it may be subject to bumps from vacuums and foot traffic.
Solid Wood: The Classic Choice
Solid wood quarter round, often available in oak, pine, or poplar, is the premium choice. It’s durable, holds paint and stain beautifully, and offers a timeless look. Pine and poplar are excellent for painting to match your baseboards, while oak is perfect for staining to match other wood elements in the room.
MDF (Medium-Density Fiberboard): The Budget-Friendly Option
MDF molding is an engineered wood product that comes pre-primed and ready for paint. It’s less expensive than solid wood and provides a very smooth finish. However, MDF is susceptible to water damage, so it’s not ideal for basements or bathrooms, and it can be more brittle during cutting and nailing.
PVC/Vinyl: The Waterproof Wonder
For areas with potential moisture, like basements or entryways, PVC or vinyl quarter round is the ultimate solution. It is 100% waterproof, flexible, and resistant to dents and scratches. It typically comes in a standard white finish but can be painted to match your trim.
Step-by-Step Installation: From Novice to Pro
With the right tools and a methodical approach, installing quarter round is a project any DIY enthusiast can tackle in a weekend. Follow these steps for a professional-looking installation that will transform your room.
Step 1: Gather Your Tools and Materials
Before you begin, assemble everything you need to avoid interruptions. You will need a miter saw (or a miter box and hand saw), a tape measure, a pencil, a brad nailer with 1.5-inch nails (or a hammer and finish nails), a nail set, wood filler or caulk, and sandpaper.
Step 2: Measure Twice, Cut Once
Start in one corner of the room and work your way around. Measure the length of the first wall where the quarter round will be installed. Always remember the old adage: measure twice, cut once to prevent wasteful errors.
Step 3: The Art of the Miter Cut
For clean corners, you’ll need to make 45-degree miter cuts. For an inside corner, the long point of the miter will be on the back of the molding. For an outside corner, the long point will be on the front, visible side of the molding. A power miter saw will make these cuts quick and precise.
Step 4: The Perfect Placement – To Float or Not to Float?
This is the most critical step for installing quarter round over carpet. You have two primary techniques, and the one you choose affects the final look. One method is to let the molding “float” just above the carpet pile, while the other involves slightly compressing the fibers.
For a clean, long-lasting look, it is often best to position the quarter round so it rests lightly on top of the carpet fibers without compressing them. This allows the carpet to move and settle naturally over time without creating a pinched look. Press the molding snugly against the baseboard and let its bottom edge just kiss the top of the carpet.
Step 5: Nailing it Down (The Right Way)
The golden rule of installing quarter round is to nail it to the baseboard, NOT the floor. This allows the flooring to expand and contract independently. Use a brad nailer to drive nails at a slight downward angle through the quarter round and into the baseboard, placing a nail every 18 inches or so.
If you’re using a hammer, drill pilot holes first to prevent the wood from splitting. Use a nail set to sink the nail head just below the surface of the wood for a clean, professional finish that’s easy to hide.
Step 6: Finishing Touches
Once all the pieces are nailed in place, it’s time for the finishing work. Fill all nail holes and corner seams with a small amount of paintable wood filler or caulk. Once dry, lightly sand the filler smooth and apply a final coat of paint to match your baseboards for a seamless, built-in look.
Navigating Tricky Spots and Transitions
Rooms are rarely perfect rectangles. You’ll likely encounter doorways, vents, and transitions to other types of flooring. For doorways, you can end the quarter round with a “return,” which is a small, mitered piece that neatly caps off the end.
When your carpet meets another flooring type, such as vinyl plank, managing the height difference is key. Learning how to master transitions to different floors can ensure a smooth and safe connection between spaces. The techniques for installing quarter round in these areas are similar, but require careful planning.
It’s also important to note that this guide focuses on flat surfaces. If you’re looking for guidance on a more complex project, the principles for installing quarter round on stairs are quite different and require specialized techniques.
Common Mistakes and How to Avoid Them
Even a seemingly simple project can go wrong. Being aware of common pitfalls can save you time, money, and frustration. Here’s a quick troubleshooting guide to keep your project on track.
| Problem | Common Cause | Solution |
|---|---|---|
| Quarter round appears wavy or uneven. | Nailing the molding too tightly against a wavy wall or unevenly compressing the carpet. | Let the molding follow the baseboard, not the floor. Use paintable caulk along the top edge to fill any small gaps between the quarter round and the baseboard for a straight look. |
| Gaps are visible at the mitered corners. | Walls are not a perfect 90-degree angle, or cuts were slightly inaccurate. | Use a protractor to find the true angle of the corner and divide by two for your miter saw setting. Minor gaps can be filled with wood filler before painting. |
| The wood split when nailing. | Nails were placed too close to the end of the board, or no pilot holes were drilled (if hand-nailing). | Always drill pilot holes when nailing by hand, especially with hardwood moldings. With a nailer, avoid placing nails within an inch of the end of a piece. |
| Paint cracks at the seam between the baseboard and quarter round. | Using wood filler instead of flexible caulk along the top seam. | Always use a flexible, paintable caulk for the top seam. This allows for slight movement between the two pieces of wood as the house settles and temperatures change. |
The Long-Term View: Maintenance and Upkeep
Your newly installed quarter round will give your room a fantastic finish, and a little maintenance will keep it looking great for years. Regularly vacuum along the edge with a brush attachment to prevent dust buildup. For scuffs or marks, a simple wipe-down with a damp cloth is usually sufficient.
Over time, you may need to touch up the paint, especially in high-traffic areas. Keep a small amount of your trim paint handy for quick fixes. If your carpet ever needs to be re-stretched, the quarter round can be carefully removed and reinstalled afterward.
Is Quarter Round Always the Answer?
While quarter round is an excellent solution for finishing the edge of a carpet installation, there are alternatives. Shoe molding offers a slightly different profile that some prefer. In other cases, opting for taller baseboards during a renovation can eliminate the need for additional trim altogether.
However, for most situations involving existing baseboards and new carpet, quarter round provides the most effective, economical, and aesthetically pleasing solution to hide gaps and create a polished, professional look. It’s a small detail that makes a world of difference, turning a good installation into a great one.