Pedestal Sink Plumbing Through Floor: Your 5-Minute Fix
The pedestal sink stands as a timeless icon of bathroom design. It offers clean lines and a space-saving silhouette that can make even the smallest powder room feel open and airy. Yet, this elegant fixture presents a unique challenge that can intimidate many homeowners: plumbing that runs directly through the floor.
Unlike a traditional vanity that cleverly hides a tangle of pipes, the pedestal sink exposes everything. This leaves no room for error. The primary problem homeowners face is achieving a clean, professional-looking installation where the drain and water lines are perfectly placed, sealed, and visually appealing.
This guide provides a comprehensive, step-by-step solution to master the art of floor-based pedestal sink plumbing. We will break down the process from the critical planning stages to the final connections, ensuring you have the confidence to achieve a flawless, leak-free result that enhances your bathroom’s style.
You'll Learn About
Why Floor Plumbing is the Designer’s Choice
Opting for plumbing that routes through the floor rather than the wall is a deliberate design decision. It’s favored for its ability to create a truly minimalist and classic aesthetic. This approach hearkens back to traditional plumbing designs, offering a touch of historical authenticity to period-style bathrooms.
The most significant advantage is the visual openness it creates. With no visible pipes on the wall, the area around the sink feels less cluttered and more spacious. This makes it an ideal choice for small bathrooms, half-baths, and powder rooms where every inch of visual real estate matters.
The Critical First Step: Perfect Rough-In Planning
The success of your entire project hinges on the rough-in stage. This is where the drain and water supply pipes are positioned before any finished flooring or walls are in place. Mistakes made here are incredibly difficult and costly to fix later.
Measure Twice, Cut Once: The Golden Rule
Before a single pipe is cut, you must have the exact specifications for your chosen pedestal sink. These “spec sheets” are available from the manufacturer and provide the precise measurements needed for plumbing placement. Do not attempt to guess or use a generic template.
You need to identify the centerline of the sink, the distance of the drain from the finished wall, and the exact locations for the hot and cold water supply lines. Mark these positions directly on the subfloor with a pencil. This visual guide is your blueprint for a perfect installation.
The High Stakes of Drain and Supply Placement
For a pedestal sink, the drain pipe must be positioned to align perfectly with the sink’s drain opening. Being off by even half an inch can make it impossible to connect the P-trap without awkward, unattractive extensions that ruin the clean aesthetic. The same precision is required for the water supply lines.
A little-discussed aspect of this installation is the “forgiveness factor” of your chosen hardware. While a standard P-trap requires near-perfect alignment, a bottle trap can sometimes offer a small amount of play. However, you should never rely on this; always aim for dead-on accuracy in your rough-in.
From the Ground Up: A Step-by-Step Installation Guide
With your planning complete and pipes roughed in, you can proceed with the installation. This process requires patience and attention to detail at every stage. A well-executed plan ensures a smooth and successful outcome.
Prepping the Finished Floor
Once your bathroom floor is installed, you will need to cut precise holes for the pipes to pass through. Use a hole saw bit that is slightly larger than the diameter of your pipes to allow for a little wiggle room. This is a critical step, and the quality of your flooring installation can impact the entire project; understanding details like whether to tile under fixtures is foundational knowledge.
After cutting, test-fit the sink’s pedestal and basin to ensure everything aligns as planned. This is your last chance to make minor adjustments before securing the fixture permanently. Now is also the time to ensure the floor is perfectly level; use shims under the pedestal if necessary to prevent any wobbling.
Installing the Drain Assembly and P-Trap
The P-trap is the curved piece of pipe that holds water, preventing sewer gases from entering your home. For an exposed installation, always choose a decorative metal P-trap, such as one made of polished chrome or brushed nickel. Avoid using standard white PVC, as it will detract from the sink’s appearance.
Begin by installing the sink’s pop-up drain assembly according to the manufacturer’s instructions. Then, connect the vertical tailpiece to the drain. Finally, assemble the P-trap, connecting it to the tailpiece and the drain stub-out coming from the floor. Hand-tighten all connections first, then give them a final quarter-turn with a wrench.
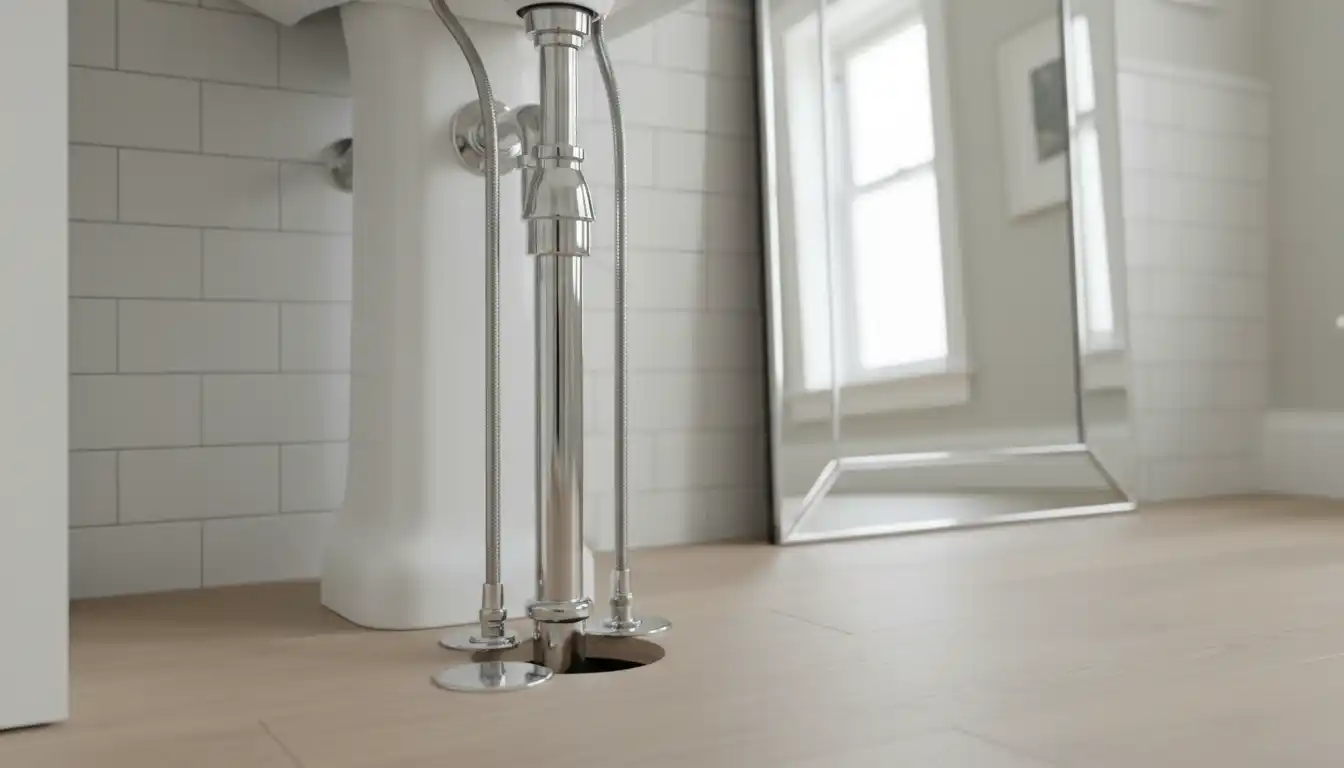
Connecting the Water Supply Lines
The water supply lines are another highly visible component. Use high-quality, braided stainless steel lines or decorative rigid supply tubes that match your P-trap and faucet finish. Connect one end to the faucet’s hot and cold inlets and the other to the shut-off valves at the floor.
Ensure your shut-off valves are fitted with decorative escutcheons (also called floor flanges). These small plates cover the hole in the floor, providing a clean, finished look. The placement of your faucet is also a key consideration for usability, and principles from other installations, such as understanding the optimal faucet placement on a double sink, can inform your choices here for maximum comfort and functionality.
Troubleshooting Common Installation Problems
Even with careful planning, you may encounter challenges. Most issues are minor and can be resolved with simple adjustments. Understanding these potential pitfalls ahead of time can save you from frustration.
A methodical approach to troubleshooting is key. Always start by identifying the specific problem before attempting a solution. The table below outlines common issues and their most effective fixes.
| Problem | Likely Cause | Solution |
|---|---|---|
| Sink wobbles or feels unstable. | Uneven floor or loose mounting bolts. | Use shims under the pedestal base to level it. Ensure the lag bolts securing the sink to the wall are tightened securely into solid blocking. |
| Small leak at a drain connection. | Loose compression nut or missing washer. | Double-check that all washers are correctly seated. Hand-tighten the nut, then use a wrench for a final quarter-turn. Do not overtighten. |
| Water seeps from the base of the faucet. | The faucet’s base gasket is not sealed. | Tighten the mounting nuts under the sink basin. If leaking persists, remove the faucet and apply a thin bead of plumber’s putty under the gasket. |
| Low water pressure from the faucet. | Debris in the supply line or aerator. | Turn off the water and disconnect the supply lines to check for blockages. Unscrew the aerator from the faucet spout and clean its screen. |
The Problem of Unattractive Pipes
The most common complaint with pedestal sinks is the appearance of the plumbing. The solution lies in treating the pipes as a design feature, not an afterthought. Invest in decorative plumbing kits that include a matching P-trap, water supply lines, and shut-off valves.
Finishes like matte black, brushed gold, and oil-rubbed bronze can elevate the look of your sink. Pair these with matching floor flanges to create a cohesive and polished installation that looks intentional and high-end.
Solving Leaks at the Floor
A leak at the point where a pipe meets the floor can be alarming. This is almost always due to an improperly sealed compression fitting on the shut-off valve or a poor connection at the drain. The key is to ensure every threaded connection is properly sealed.
For water supply lines, use plumber’s tape wrapped clockwise around the male threads before attaching the valve. For drain pipes, ensure the compression nuts are tight and the beveled washers are facing the correct direction. This creates a watertight seal that will last for years.
Advanced Insights for a Flawless Finish
Moving beyond the basic installation steps, there are several advanced considerations that separate a good installation from a great one. These details focus on longevity, maintenance, and handling unexpected structural challenges.
Future-Proofing Your Plumbing
Think about future maintenance during the installation. Using high-quality quarter-turn ball valves for your shut-offs is a wise investment. They are far more reliable and easier to operate than older multi-turn valves, making future repairs or faucet replacements much simpler.
For long-term peace of mind, consider what is needed to maintain all aspects of your home’s systems. Proper upkeep extends from indoor plumbing to outdoor power equipment. For instance, ensuring your tools are ready for seasonal challenges, like having the correct oil capacity for your snowblower, is part of a holistic approach to home maintenance that prevents future headaches.
The Impact of Material Choices
While chrome-plated brass is the standard for decorative traps, solid brass options offer superior durability. They will not pit or flake over time. While the upfront cost is higher, the longevity and premium feel can be worth the investment, especially in a high-use bathroom.
Pay close attention to the quality of all components, from the supply lines to the angle stops. A chain is only as strong as its weakest link, and a single low-quality part can lead to failure. Stick with reputable brands known for their manufacturing quality.
The Unspoken Challenge: Floor Joist Interference
What happens when your perfect drain location lands directly on top of a floor joist? This is a common and frustrating problem. You have two primary solutions, and one of them is not to simply drill through the joist, which can compromise its structural integrity.
The first and easiest solution is to slightly adjust the sink’s position to the left or right to avoid the joist. If this is not possible, a more advanced solution involves using plumbing fittings to offset the pipe under the floor before it comes up through the subfloor. This requires more complex work below but allows you to keep the sink perfectly centered.
Your Path to a Perfect Pedestal Sink
Installing a pedestal sink with plumbing through the floor is a project that rewards precision and careful planning. By treating the exposed plumbing as a design element and focusing on a meticulous rough-in, you can achieve a result that is both beautiful and functional.
Remember that the key to success is in the details: accurate measurements, high-quality materials, and a patient approach. With the insights from this guide, you are now equipped to tackle this project with confidence, creating a timeless focal point in your bathroom that you can be proud of for years to come.
The Final Polish: Master the Pedestal Sink Installation
The pedestal sink’s exposed plumbing, while initially intimidating, is the very feature that demands precision and results in its clean, elegant appeal. By focusing on meticulous planning and accurate execution, you can overcome the challenge of floor-mounted pipes and achieve a truly professional installation.
Final Steps for a Flawless Finish:
-
Precision is Paramount: Always verify and measure your rough-in locations multiple times. The limited space under the basin means there is zero tolerance for error in where your water lines and drain pipe emerge from the floor.
-
Aesthetic Plumbing: Since the pipes are visible, choose attractive, high-quality chrome or finished P-traps and stop valves. These visible components are not flaws, but deliberate design details.
-
Solid Anchoring: Ensure the basin and pedestal are securely anchored to the wall and floor, providing the necessary stability since they offer no hidden storage.
By treating the plumbing beneath the pedestal sink not as a mess to be hidden, but as an integral part of the design, you successfully complete the installation, achieving a timeless, space-saving fixture that elevates the sophistication of any bathroom