Patio Slope in Two Directions: Ensuring Proper Drainage and Functionality
When designing and constructing a patio, proper drainage is a crucial consideration to prevent water pooling, which can lead to structural damage, slippery surfaces, and mosquito breeding grounds. One effective method to achieve this is by sloping the patio in two directions.
This comprehensive guide will explain the importance of patio slope, how to determine the correct slope, and the steps to implement a dual-direction slope for optimal drainage and functionality.
You'll Learn About
Understanding the Importance of Patio Slope
Why Slope a Patio?
- Prevent Water Accumulation: A properly sloped patio ensures that water runs off instead of pooling on the surface, which can cause damage and create unsafe conditions.
- Maintain Structural Integrity: Water pooling can lead to the deterioration of patio materials, especially if the patio is made of porous materials like certain stones or concrete.
- Enhance Usability: A well-drained patio remains dry and safe to use, reducing the risk of slipping and making it more comfortable for activities.
- Reduce Maintenance: Proper drainage minimizes the need for frequent cleaning and maintenance due to moss, algae, and mildew growth in standing water.
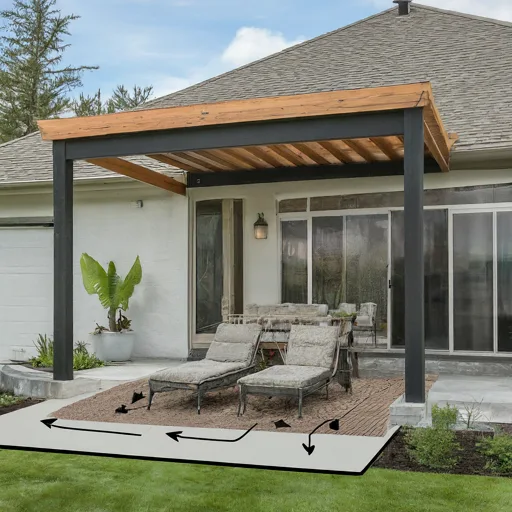
Why Patios Slope in Two Directions?
Patios are essential outdoor living spaces that provide a place for relaxation, entertainment, and enjoyment of the outdoors. One common feature of patios is their sloped surface, which serves several practical purposes. Here are ten reasons why patios often slope in two directions:

- Effective Drainage: A dual-sloped patio allows water to drain efficiently in two directions, preventing pooling and standing water, which can lead to erosion, water damage, and slip hazards.
- Prevents Water Accumulation: By sloping the patio in two directions, water is less likely to accumulate in low spots, reducing the risk of flooding and water damage to the patio surface and adjacent structures.
- Minimizes Ponding: Dual slopes help minimize ponding, which occurs when water collects in depressions on the patio surface. Ponding can create breeding grounds for mosquitoes and other pests, as well as promote algae growth.
- Enhanced Aesthetic Appeal: The subtle slope of a dual-direction patio adds visual interest and dimension to the outdoor space, creating a more dynamic and aesthetically pleasing environment.
- Improved Accessibility: A gently sloped patio is more accessible to individuals with mobility issues or disabilities, allowing for easier navigation without the need for ramps or lifts.
- Better Rainwater Harvesting: Dual-sloped patios can be designed to direct rainwater towards specific areas, such as rain gardens or storage tanks, for harvesting and reuse in landscaping or irrigation systems.
- Prevents Soil Erosion: Proper drainage provided by dual slopes helps prevent soil erosion around the patio’s perimeter, preserving the integrity of the surrounding landscape and reducing maintenance requirements.
- Reduces Slip and Fall Risks: Sloping the patio surface in two directions promotes rapid water runoff, minimizing the risk of slippery surfaces and reducing the likelihood of slip and fall accidents, especially during inclement weather.
- Preserves Structural Integrity: By directing water away from the patio and surrounding structures, dual slopes help preserve the structural integrity of the patio foundation and prevent moisture-related damage, such as cracking and shifting.
- Longevity and Durability: Proper drainage facilitated by dual slopes extends the lifespan of the patio surface and underlying materials by minimizing exposure to water infiltration, freeze-thaw cycles, and other environmental stressors.
The dual slope design of patios serves multiple practical purposes, including effective drainage, prevention of water accumulation and soil erosion, improved accessibility, and enhanced aesthetic appeal.
By incorporating dual slopes into patio construction, homeowners can create functional, durable, and visually appealing outdoor living spaces that enhance their enjoyment and use of the property.
Determining the Correct Slope
General Guidelines
The general rule for patio slope is to allow for a slope of 1/4 inch per foot. This slope ensures efficient water drainage without making the surface noticeably uneven.
Calculating the Slope
- Measure the Length and Width: Determine the dimensions of your patio. For example, if your patio is 20 feet long, the slope should be 20 feet * 1/4 inch = 5 inches.
- Determine the Direction: For a patio sloped in two directions, you’ll divide the slope between the two directions to ensure balanced drainage.
Example Calculation
For a 20 feet by 15 feet patio:
- Long Side (20 feet): Slope 5 inches over 20 feet.
- Short Side (15 feet): Slope 3.75 inches over 15 feet.
The slope should be evenly distributed along both the length and the width to create an efficient drainage system.
Implementing the Dual-Direction Slope
Planning the Layout
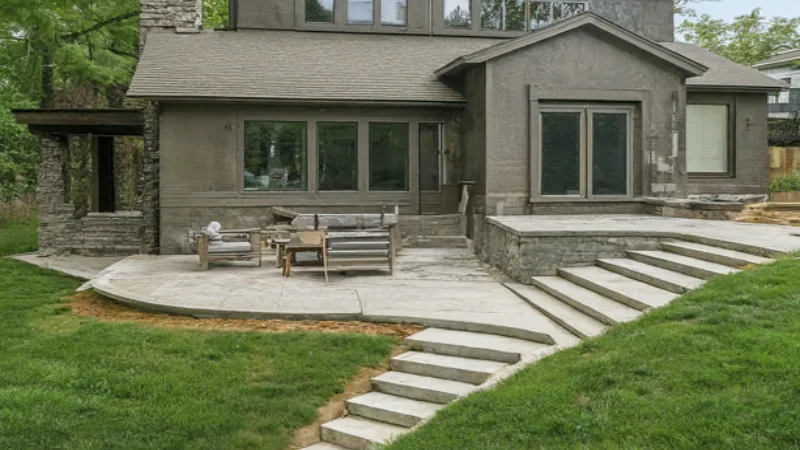
- Choose the Low Points: Decide where the water will exit the patio. Typically, you’ll want the lowest points to be at the corners or along the edges furthest from the house.
- High Points: The highest points should be closest to the house or central high point if the patio is freestanding.
Marking the Slope
- Use Stakes and String: Place stakes at the corners of the patio and use string to create a guideline for the slope. The string should be tied at the desired height difference according to your slope calculations.
- Check the Slope: Use a level to ensure the string follows the correct slope. Adjust as necessary to get the desired angle.
Excavation and Base Preparation
- Excavate the Area: Dig out the area to the required depth, considering the thickness of the base material and the patio surface.
- Install the Base: Lay a solid base layer, typically gravel, and compact it firmly. The base should follow the sloped guideline.
Laying the Patio Surface
- Lay the Edge Restraints: Place edge restraints around the patio perimeter to maintain the shape and provide stability.
- Install the Surface Material: Begin laying the patio surface material (pavers, concrete, tiles) from the highest point, ensuring each section follows the sloped guideline.
- Check Regularly: Continuously check the slope with a level as you work to ensure it remains consistent.
Maintenance and Adjustments
Regular Inspection
- Visual Check: Periodically inspect the patio for water pooling or uneven areas.
- Address Issues Promptly: If you notice water pooling, adjust the affected area by lifting and re-leveling the surface material.
Cleaning and Sealing
- Keep the Patio Clean: Regularly clean the patio to prevent debris buildup, which can impede drainage.
- Seal the Surface: Use a sealant appropriate for your patio material to protect against water penetration and staining.
Informative Table: Common Slope Scenarios and Solutions
| Scenario | Slope Calculation | Solution |
|---|---|---|
| Small rectangular patio (10×8 feet) | 2.5 inches slope along the length, 2 inches along the width | Use stakes and string to mark the slope. Excavation and base preparation should follow these guidelines. |
| Large square patio (20×20 feet) | 5 inches slope along each side | Ensure even distribution of slope on all sides. Regularly check levels during installation. |
| Irregular shape patio | Calculate slope for each section individually | Use flexible guidelines (stakes and string) to accommodate the shape. |
Conclusion
Creating a patio with a dual-direction slope is essential for effective water drainage and long-term durability.
By understanding the importance of proper slope, accurately calculating the necessary angles. Carefully implement the slope during construction, you can ensure your patio remains functional and visually appealing for years to come.
Regular maintenance and prompt adjustments will help keep your patio in optimal condition, providing a safe and enjoyable outdoor space.
Whether you’re a DIY enthusiast or hiring a professional, following these guidelines will help you achieve a well-drained, stable, and attractive patio.