Guide to Installing Flush-Mount Wall Outlets: The #1 Mistake That’s a Major Fire Hazard
In the quest for a clean, modern, and uncluttered home, visible cables and bulky plugs are public enemy number one. You’ve mounted your beautiful flat-screen TV, arranged your furniture perfectly, only to be thwarted by a power cord that forces your console inches from the wall. This common frustration leads many to wonder: can you put an outlet inside the wall for a truly seamless look?
The answer is a resounding yes, but it comes with a critical warning. Done correctly, an outlet inside the wall, known as a recessed outlet, is a game-changer for home aesthetics and functionality. Done incorrectly, it’s a hidden danger that could have devastating consequences.
You'll Learn About
What Exactly Is an Outlet Inside the Wall?
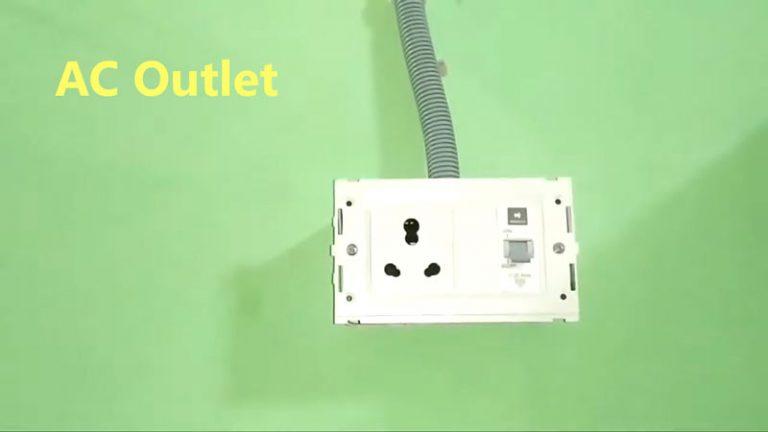
An outlet inside the wall, or a recessed outlet, is an electrical receptacle designed to sit deeper into the wall cavity than a standard outlet. This creates a sunken space where plugs and even bulky power adapters can be housed without protruding from the wall’s surface. This simple design shift is what allows furniture and appliances to sit flush against the wall.
These specialized outlets are not just a single product but a category of solutions. You might encounter in-wall power kits designed specifically for TVs, which often include a pass-through for low-voltage cables like HDMI, or simple recessed duplex outlets that look like a standard outlet, just set back into a protected housing.
Why You Should (and Shouldn’t) Put an Outlet Inside a Wall
The motivation behind installing a recessed outlet is clear, but it’s crucial to weigh the benefits against the potential risks before starting any project.
The Benefits:
- Superior Aesthetics: The most obvious advantage is the clean, professional finish it provides. Hiding cords behind a TV or a bookshelf creates an organized and high-end look.
- Space Optimization: Gaining back those few inches between your furniture and the wall can make a surprising difference in a room’s layout and feel, eliminating awkward gaps where dust collects.
- Enhanced Safety: With cords tucked away, the risk of tripping over them is significantly reduced, making your home safer for children, pets, and everyone else.
- Better Organization: They are perfect for creating dedicated charging stations inside cabinets or powering smart home hubs discreetly within a closet.
The Dangers:
- Code Violations: The biggest risk comes from attempting a DIY solution without the right parts. Simply covering a standard electrical box is a major code violation.
- Fire Hazard: Improper installations can lead to overheating, arcing, and loose connections hidden within your wall—a perfect storm for an electrical fire.
- Accessibility Problems: If not installed correctly, accessing the outlet for future repairs or resets can become a major headache.
The Critical Mistake You Must Avoid: Never Hide a Standard Junction Box
Here is the most important piece of advice in this entire article: You can never, under any circumstances, install a standard electrical box and then cover it with drywall or any other building finish. This is a direct violation of the National Electrical Code (NEC) and creates a serious fire hazard.
The NEC, specifically section 314.29, mandates that all junction boxes must be accessible without having to remove any part of the building’s structure or finish. The reason is simple: the connections inside a junction box are the most common point of failure in a circuit. Electricians need to be able to access these points for inspection, maintenance, and troubleshooting. If a connection becomes loose, it can arc and generate intense heat. Inside an enclosed, inaccessible box, this heat has nowhere to go, potentially igniting surrounding wood and insulation.
This is why you cannot just use a regular outlet and sink it into the wall. You must use a product specifically designed and listed for this purpose—a recessed outlet kit.

Choosing the Right Recessed Outlet Kit for the Job
Fortunately, manufacturers have created a variety of safe, code-compliant solutions. These kits are designed to be installed flush with the drywall while keeping all electrical connections properly housed and accessible.
When shopping for a kit, look for a “UL Listed” mark, which indicates it has been tested and certified for safety. The two main types you’ll encounter are “new work” boxes, which are nailed to a stud before drywall is installed, and “old work” or “remodel” boxes, which are designed to be installed in existing drywall using clamps that grip the back of the wall.
Comparing In-Wall Outlet Solutions
Not all recessed outlets are the same. The right choice depends entirely on your specific needs, from hiding TV wires to creating a clean charging station in a kitchen cabinet.
| Solution Type | Best For | Key Features | Average Cost (Kit) |
|---|---|---|---|
| Recessed TV Box Kit | Wall-mounted TVs, soundbars, and media players | Often includes a power outlet and a separate, isolated opening for low-voltage cables (HDMI, Ethernet, etc.). | $30 – $70 |
| Recessed Duplex Outlet | Behind furniture like couches, beds, and dressers | Provides a single or double standard power receptacle set back into the wall. | $15 – $30 |
| In-Cabinet/Drawer Outlet | Creating hidden charging stations inside cabinets or drawers | Often includes USB ports and is designed for safety within enclosed spaces. | $50 – $150 |
| Clock Hanger Outlet | Hanging electric wall clocks | A simple, single recessed outlet with a hook to hang the clock from, hiding the entire unit. | $10 – $20 |
| Recessed Floor Box | Providing power in the middle of a room away from walls | A durable box installed flush with the flooring, often with a protective cover. | $40 – $100 |
Step-by-Step Guide: How to Safely Install an Outlet Inside a Wall
This guide provides the general steps for installing an “old work” recessed outlet. However, electrical work can be dangerous. If you are not completely comfortable and knowledgeable about working with electricity, hire a licensed electrician. Safety is always the top priority.
Step 1: Planning and Preparation
Turn off the power. This is non-negotiable. Go to your breaker panel and shut off the circuit for the area where you’ll be working. Use a voltage tester at the outlet you’re tapping into to confirm the power is off.
Choose your location carefully. Use a stud finder to locate the wall studs. You want to place your new box in an empty cavity between two studs. Be mindful of potential plumbing or other wiring in the wall.
Step 2: Cutting the Opening
Most recessed outlet kits come with a paper template. Trace the outline of the template onto the wall. Use a drywall saw to carefully cut along the lines you traced. A clean, snug cut will make for a more secure installation.
Step 3: Running the Electrical Wire
The most common DIY approach is to run power from a nearby existing outlet on the same circuit. You will run a new piece of Romex (non-metallic) cable from the existing outlet box to your newly cut hole. This process, known as “fishing,” can sometimes be tricky but is achievable with a fish tape tool.
Step 4: Installing the Box
Once you have fished the new wire to your opening, pull several inches of cable through. Knock out one of the tabs on the back of your new recessed electrical box and feed the wire through. Insert the box into the hole in the drywall. Most “old work” boxes have wings that flip out and tighten against the back of the drywall as you turn the screws on the front, securing the box firmly in place.
Step 5: Wiring the New Outlet
Carefully strip the outer sheathing from the Romex cable to expose the black (hot), white (neutral), and bare copper (ground) wires. Strip about 3/4 of an inch of insulation from the ends of the black and white wires.
Connect the wires to the corresponding terminals on the receptacle:
- Bare Copper Wire goes to the Green ground screw.
- White (Neutral) Wire goes to the Silver terminal screw.
- Black (Hot) Wire goes to the Brass terminal screw.
Loop the wires clockwise around the screws so that they tighten as you turn the screw. Ensure all connections are tight and secure.
Step 6: Finishing Up
Gently fold the wires into the back of the electrical box and push the receptacle into place. Secure it to the box with the provided screws. Attach the faceplate, turn the power back on at the breaker, and use a receptacle tester to confirm your outlet is wired correctly and working safely.
Outlets Inside Cabinets and Closets: Special Considerations
Placing an outlet inside a cabinet to create a charging station or power small appliances is an increasingly popular and practical home upgrade. However, enclosed spaces introduce a unique concern: heat buildup. Chargers for laptops, phones, and power tools generate heat, and without proper ventilation, that heat can become a fire risk.
When planning an in-cabinet outlet, ensure there is adequate airflow. Avoid piling flammable materials like papers or fabrics directly against charging devices. For high-power applications, consider installing vents in the cabinet. It’s also wise to consult local electrical codes, as some jurisdictions have specific rules for outlets in enclosed spaces like closets. For some custom built-in installations, such as those around a fireplace, special considerations for heat and code are paramount, making projects like installing an electrical outlet near a fireplace a job best left to professionals.
When to Call a Professional Electrician
While replacing an outlet can be a straightforward DIY task, installing a new one presents more challenges. You should always call a licensed electrician if:
- You have never done electrical work before.
- Your home has older aluminum wiring.
- You need to add a new circuit directly from the breaker panel.
- You are unsure about your local electrical code requirements.
- You discover any existing issues like scorched outlets, buzzing sounds, or frequently tripping breakers.
The cost of hiring an electrician is a small price to pay for the safety of your home and family. An improperly installed outlet is a hidden danger that you can’t afford to risk.
Conclusion
An outlet inside the wall is an elegant solution to the common problem of cord clutter. It can elevate the look of your space, improve functionality, and even enhance safety by removing trip hazards. The key to a successful project lies in understanding the risks and using the right materials.
By avoiding the critical mistake of covering a standard junction box and instead using a UL-listed recessed outlet kit, you can achieve that clean, flush-mounted look safely and effectively. Whether you’re a seasoned DIYer or choose to hire a professional, a properly installed recessed outlet is an upgrade you’ll appreciate every day.