Nest No Power to Y1 Wire [Meaning, Causes, Fixes]
The Nest thermostat is a popular smart home device that allows you to easily control the temperature in your home. It works by connecting to your HVAC system and using various wires to communicate with and control the system.
One of these wires is the Y1 wire, which is responsible for activating the first stage of your air conditioning. When the Nest reports “no power to the Y1 wire,” it means it has detected a break in the electrical circuit that controls your cooling system, preventing it from turning on.
In this article, we will explore some possible causes of this error and how to troubleshoot them.
You'll Learn About
Nest No Power to Y1 Wire
If you see a “no power to Y1” error on your Nest thermostat, it could be due to a few different things. Here are a few possibilities to consider:
Check the Breaker Box
Make sure that the circuit for your HVAC system is not tripped.
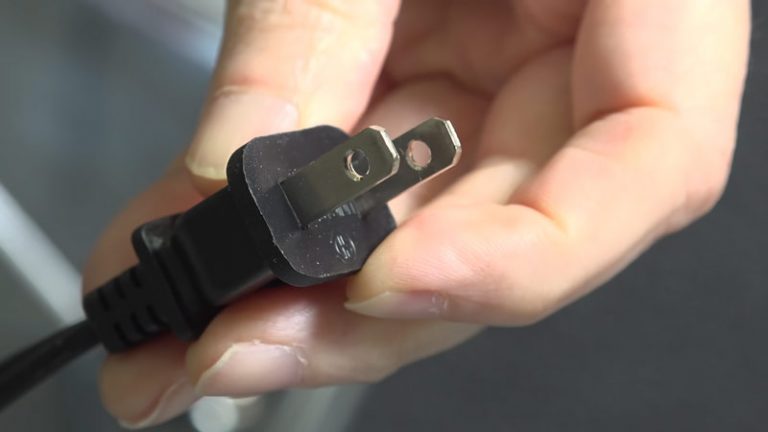
Check the Wiring
Make sure that the Y1 wire is securely connected to both the Nest thermostat and the HVAC system. It’s also a good idea to check for any visible damage to the wire itself.
Check the Hvac System
If the Y1 wire is not receiving power, it could be due to an issue with the HVAC system itself. Make sure that the system is turned on and that all components are functioning properly.
Check for a Blown Fuse
If your HVAC system has a fuse, make sure that it is not blown. If it is, you will need to replace it before the Y1 wire will receive power.
If you’ve checked all of these things and the Y1 wire is still not receiving power, it’s possible that there is a deeper issue at play. In this case, it may be best to call a professional HVAC technician to diagnose and fix the problem.
Possible Causes of a Power Outage to the Y1 Wire
Tripped Circuit Breaker
A circuit breaker is a safety device that cuts off power to a circuit if it becomes overloaded. If the circuit breaker for your HVAC system has been tripped, it could be causing a power outage to the Y1 wire. To fix this issue, you will need to locate the circuit breaker box and reset the breaker. Be careful, it should have good voltage.
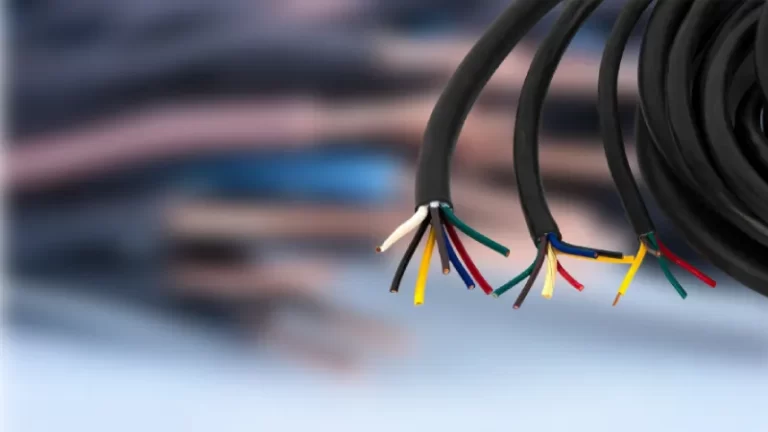
Loose or Damaged Wiring
The Y1 wire must be securely connected to both the Nest thermostat and the HVAC system’s control board to properly signal the air conditioner to turn on. If the wire has become loose or damaged, it could be causing the error. To fix this issue, you will need to check the connections and, if necessary, repair or replace the wire.
Issues With the Hvac System
If the HVAC system itself is not functioning properly, it could be causing a power outage to the Y1 wire. Make sure that the system is turned on and that all components are functioning properly.
Blown Fuse
Some HVAC systems have fuses that protect the system from power surges. If the fuse has blown, it will need to be replaced in order for the Y1 wire to receive power again.
Steps to Troubleshoot a Power Outage to the Y1 Wire
Check the Breaker Box
The first step in troubleshooting a power outage to the Y1 wire is to check the circuit breaker box. Make sure that the circuit for your HVAC system is not tripped. If it is, simply reset the breaker and see if this resolves the issue.
Check the Wiring
Next, you will want to check the Y1 wire itself to make sure it is securely connected to both the Nest thermostat and the HVAC system. It’s also a good idea to visually inspect the wire for any visible damage.
Check the Hvac System
If the Y1 wire and its connections are in good condition, it’s possible that the issue is with the HVAC system itself. Make sure that the system is turned on and that all components are functioning properly.
Check for a Blown Fuse
If your HVAC system has a fuse, make sure that it is not blown. If it is, you will need to replace it before the Y1 wire will receive power.
Check the Thermostat’s Settings
It’s always a good idea to double check the settings on your Nest thermostat to make sure that everything is set up correctly. For example, make sure that the thermostat is set to “Cool” and that the desired temperature is set correctly.
Check for Updates
If your Nest thermostat is not functioning properly, it’s possible that there is an update available that could fix the issue. To check for updates, go to the “Settings” menu on the thermostat and look for the “Software update” option. If an update is available, follow the prompts to install it.
Check for Blockages
A very common cause for a Y1 power error is a clogged AC condensate drain line. This trips a safety float switch, which cuts power to the cooling circuit to prevent water damage. Check this drain line and switch first. Other blockages in the air filter, the vents, or even the outdoor unit can also cause the system to overheat and trip a safety switch.
Check the Batteries
A “no power to Y1” error is not caused by the thermostat’s batteries. However, if the Nest’s internal or replaceable batteries are dead (and you have no C-wire), the thermostat itself will shut down and be unable to control your HVAC system or report any errors at all.
Check for Loose Connections
It’s always a good idea to check for loose connections when troubleshooting any electrical issue. Also look for the terminals. Make sure that all of the connections between the Nest thermostat, the HVAC system, and the breaker box are secure and properly connected. Loose connections can cause all sorts of issues, so it’s important to make sure everything is tightened up.
How Do I Get Power to My Nest?
To reliably power your Nest thermostat and avoid issues related to power-stealing, the best method is a C-wire (common wire) from your HVAC system. If a C-wire is not available, the Nest Power Connector is an accessory that can be installed on your HVAC control board to provide the thermostat with consistent power. It is compatible with the Nest Thermostat, Nest Thermostat E, and the 3rd generation Nest Learning Thermostat.
To enable the Nest Power Connector, follow these steps:
- On your Nest Thermostat: Go to the Settings menu by turning the dial.
- Select Equipment: In the Equipment menu, you’ll see options for the various components of your heating and cooling system.
- Select Power Connector: From the Equipment menu, select the Power Connector option.
- Check the Power Status: Here, you’ll see the status of the Nest Power Connector, either Enabled or Disabled.
- Enable the Power Connector: If the Power Connector is disabled, select Enable. Then select Continue to proceed.
- Done: Once the Power Connector is enabled, select Done to complete the process.
It’s important to note that if you previously disabled the Nest Power Connector, you’ll need to re-enable it in order for your Nest thermostat to receive power. Also, if you’re having trouble with the Nest Power Connector, you may want to try resetting it. To reset the Nest Power Connector, unplug it from the wall and wait for 15 seconds before plugging it back in.
In conclusion, the Nest Power Connector is an essential tool for powering your Nest thermostat when a C-wire is not present. To enable the Power Connector, go to the Settings menu on your Nest thermostat, select Equipment, select Power Connector, check the Power Status, and enable the Power Connector if it’s disabled. If you’re having trouble with the Nest Power Connector, resetting it may resolve the issue.
What to Do if the Issue Persists
Consider Calling a Professional
If you’ve followed the troubleshooting steps and the Y1 wire is still not receiving power, it’s possible that there is a deeper issue at play. In this case, it may be best to call a professional HVAC technician to diagnose and fix the problem. A technician will have the knowledge and expertise to identify the root cause of the issue and come up with a solution.
Importance of Proper Functioning
It’s important to remember that a properly functioning HVAC system is essential for both comfort and energy efficiency in your home. An HVAC system that is not working properly can lead to discomfort and high energy bills. By properly maintaining and troubleshooting your Nest thermostat and HVAC system, you can ensure that they are working optimally and providing the maximum benefit to your home.
Letting Your HVAC System Tell You the Problem
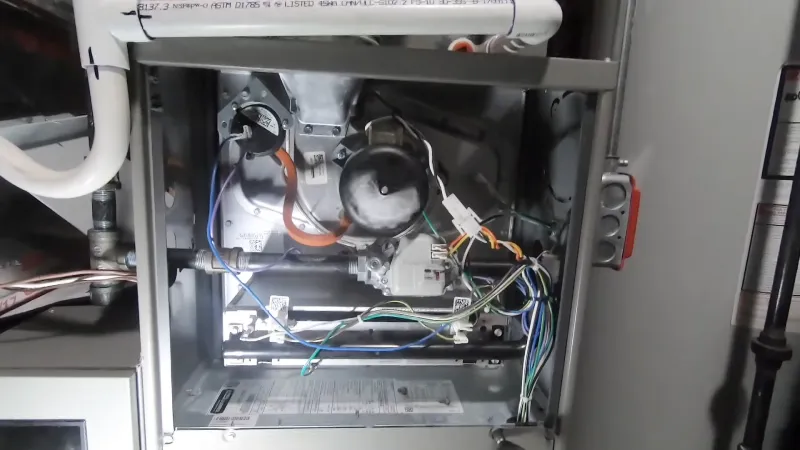
The “No Power to Y1” error on your Nest is a symptom, not the disease. Your smart thermostat is simply the messenger telling you that somewhere between its request for cooling and the air conditioner itself, the signal was lost. While you check for common culprits, your HVAC system often has its own, more precise way of telling you the root cause: a diagnostic LED.
Almost every modern furnace or air handler has a control board with a small LED light that acts as a status indicator. This light provides error codes through a series of flashes, offering a level of diagnostic detail your thermostat can’t see.
How to Read the Signs from Your HVAC Control Board:
- Safety First: Turn off all power to your HVAC system at the breaker box. You are dealing with high voltage and must ensure the system is completely de-energized before proceeding.
- Locate the Control Board: Remove the main service panel on your indoor furnace or air handler unit. The control board is the circuit board with a web of low-voltage wires connected to it (including the Y1 wire you’ve been troubleshooting).
- Look for the LED: Find the small LED light on the board. There is often a small peephole in the service panel door that allows you to see this light without removing the panel, but you may need to remove it to get a clear view.
- Restore Power and Observe: With the panel removed so you can see the board, carefully restore power at the breaker. Do not touch anything inside. Watch the LED. A steady, solid light or a slow, consistent blink usually means everything is normal. If there is a problem, it will flash in a specific sequence (e.g., three short flashes followed by two long flashes).
- Decode the Message: The error code legend is almost always on a sticker attached to the inside of the service panel you just removed. Match the blinking pattern you see to the chart. It might point directly to the problem, with codes for:
- “Condensate float switch open” (confirms your clogged drain line theory).
- “High-limit switch open” (indicates an overheating issue, likely from a dirty filter).
- “Pressure switch stuck open” (an issue with the unit’s venting).
Final Words
A “no power to Y1” error on your Nest thermostat can be caused by several factors within your HVAC system. These include a tripped circuit breaker, loose or damaged wiring, a tripped safety switch from a clogged drain line, or a blown fuse on the control board.
By following the troubleshooting steps outlined in this article, you should be able to identify and fix the issue. It’s important to properly maintain both the Nest thermostat and your HVAC system in order to ensure optimal performance and comfort in your home.
By taking the time to troubleshoot and fix any issues that arise, you can ensure that your Nest thermostat and HVAC system are working together effectively. This will keep your home comfortable and energy efficient.