MTD Tiller Transmission Problems? Your Ultimate Repair Guide
There’s nothing more frustrating than preparing for a day of gardening only to have your MTD tiller refuse to cooperate. When the engine roars to life but the tines won’t turn or the wheels won’t move, the transmission is often the prime suspect. These complex gearboxes are the heart of your tiller, responsible for turning engine power into dirt-churning force.
Transmission problems can stop your project cold, but they don’t have to mean a costly trip to the repair shop or abandoning your trusty machine. This guide will walk you through diagnosing the most common MTD tiller transmission problems, from simple fixes to more complex repairs, empowering you to get your garden’s workhorse back in action.
You'll Learn About
Decoding Your Tiller’s Transmission
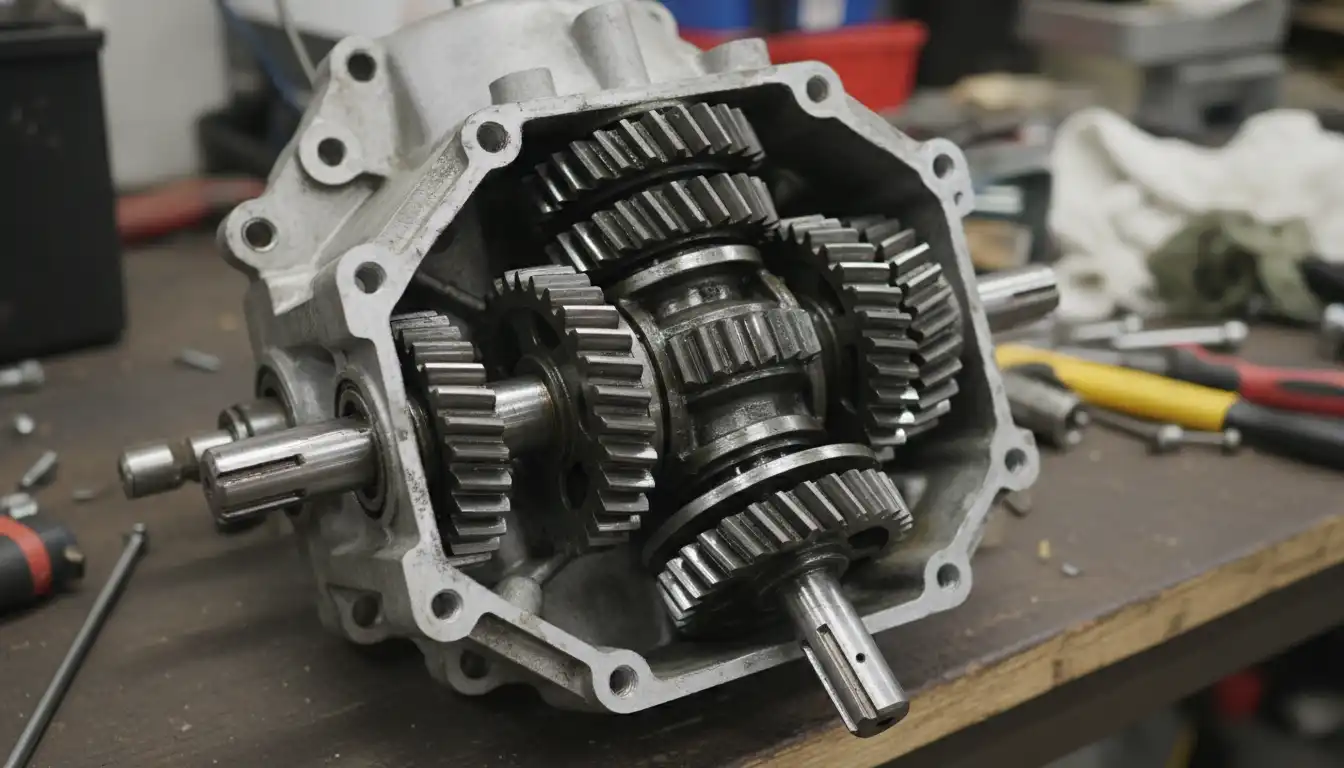
Before diving into repairs, it’s helpful to understand what the transmission does. In the simplest terms, it’s a system of gears, shafts, and sometimes chains or belts that controls the speed and direction of the tines and wheels. It allows the engine to run at a consistent speed while providing the torque needed to break through tough soil.
MTD has used various transmission designs over the years, including gear-driven and chain-driven systems. Regardless of the specific type, the core principles are the same, and so are many of the potential failure points. Proper lubrication and avoiding operational stress are the two most critical factors in its longevity.
Symptoms of a Failing MTD Transmission: A Diagnostic Checklist
When your tiller acts up, it provides clues to the underlying issue. Identifying the specific symptom is the first step toward a successful repair. Pay close attention to exactly what the machine is—and isn’t—doing.
Tiller Won’t Move Forward or Reverse
One of the most common complaints is a tiller that starts and runs but won’t budge. The engine sounds fine, but engaging the drive lever does nothing. This points to a problem in the link between the engine and the transmission input.
Potential Causes & Solutions:
- Broken or Slipping Drive Belt: The primary drive belt is the most likely culprit. Over time, belts stretch, crack, and eventually break. A visual inspection will quickly reveal if the belt is damaged, glazed, or simply too loose to grip the pulleys.
- Worn or Misadjusted Clutch/Idler Assembly: The clutch mechanism, often an idler pulley that applies tension to the drive belt, can wear out or fall out of adjustment. If the idler doesn’t create enough tension when you engage the drive, the belt will slip, and no power will reach the transmission.
- Internal Gear Failure: This is a more serious issue. If the input shaft of the transmission is turning but the wheels are not, a gear inside the transmission may have stripped or broken. This is often accompanied by grinding noises.
Tines Aren’t Turning, But Wheels Move
Another frequent issue is when the tiller can propel itself forward and backward, but the tines remain stationary. This indicates that the main part of the transmission is functional, but the power isn’t reaching the tine shaft.
Potential Causes & Solutions:
- Broken Shear Pins: This is the most common and easily fixed cause. Shear pins are designed to break if the tines hit a large rock or root, protecting the transmission from catastrophic damage. Always check these small pins first.
- Failed Tine Engagement Lever or Cable: The mechanism that engages the tines, whether a lever or a cable, can become disconnected, stretched, or broken. Ensure the linkage is intact and properly adjusted.
- Stripped Tine Shaft Gear: Inside the transmission case, a specific gear or chain assembly is responsible for driving the tine axle. If this component fails, the tines will not receive power even if the wheels do.
Grinding Noises, Jerking, or Difficulty Shifting
Loud, unusual noises are a clear sign of internal trouble. Grinding, whining, or clunking sounds should never be ignored, as continued operation can lead to complete failure.
Potential Causes & Solutions:
- Low or Contaminated Lubricant: The gears inside the transmission require a specific type of heavy-duty lubricant to function. If the level is low or if water and dirt have contaminated the fluid, the gears will wear rapidly, causing noise and damage.
- Damaged or Worn Gears: Chipped or broken gear teeth are a common source of grinding sounds. This can happen from hitting an obstruction or from long-term wear. Unfortunately, this requires a full transmission teardown to repair.
- Bent Shift Fork or Worn Linkage: If you’re having trouble selecting gears or the tiller jumps out of gear, the internal shift fork that moves the gears may be bent. This is often caused by trying to force the shifter without using the clutch properly.
A Step-by-Step Guide to Common Transmission Repairs
With the problem diagnosed, it’s time to get your hands dirty. Always begin with safety in mind: disconnect the spark plug wire to prevent accidental starting before performing any maintenance. Work on a flat, stable surface.
The First Check: Transmission Lubricant
Before any major disassembly, checking the transmission fluid or grease is a vital first step. The condition of the lubricant can tell you a lot about the health of the internal components. Many MTD tillers do not have a simple dipstick; you may need to locate a check/fill plug on the side of the transmission housing.
To check the level, position the tiller on level ground and remove the plug. The lubricant should be level with the bottom of the hole. If it’s low, top it off with the manufacturer-recommended fluid, often an SAE 80W-90 gear oil or a specific type of Bentonite grease. Using the wrong lubricant is a critical error that can cause premature failure.
Replacing a Worn Drive Belt
Replacing a drive belt is one of the most common DIY repairs and can often solve the “won’t move” problem. You will typically need a basic socket set and screwdrivers.
- Access the Belt Guard: Locate and remove the belt guard, which is a metal or plastic cover that protects the pulleys and belt.
- Release Tension: Loosen the idler pulley or engine mounting bolts to create slack in the belt system. Take a photo or make a sketch of the belt routing before removal.
- Remove the Old Belt: Carefully slip the old belt off the engine and transmission pulleys.
- Install the New Belt: Route the new belt according to your photo or diagram. Ensure it is seated correctly in the V-groove of each pulley.
- Apply Tension and Reassemble: Re-tension the system by adjusting the idler or engine position, and then reinstall the belt guard. Proper tension is key; it should be taut but have a small amount of deflection when pressed.
Inspecting and Replacing Shear Pins
If your tines aren’t turning, immediately check the shear pins. These are located where the tines slide onto the tine shaft and are usually held in place with a cotter pin or clip.
Simply remove the clip and slide the pin out. If it is broken or sheared, replace it with an identical, manufacturer-approved shear pin. Never substitute a regular bolt for a shear pin. The bolt will not break as intended, potentially causing hundreds of dollars in transmission damage if you hit an obstacle.
Advanced Insights: Beyond the Basics
Sometimes the problem lies deeper within the transmission housing. While a full rebuild is a complex job, understanding some less-common failure points can be valuable. A frequent issue that is often misdiagnosed is a problem with the shift keys or a bent shifter fork.
Inside many MTD gearboxes, small metal “keys” slide along a shaft to engage different gears. These keys can wear down or break, leading to a situation where a gear seems to be selected, but no power is transferred. Similarly, a bent shift fork may not push the gears far enough to fully engage, causing them to pop out under load or not engage at all. Recognizing this requires opening the transmission case, a task that demands patience and a clean workspace.
Preventative Maintenance: Your Best Defense
The most effective way to handle transmission problems is to prevent them from happening in the first place. A consistent maintenance schedule will dramatically extend the life of your tiller.
When considering the build quality of replacement parts, it’s wise to apply the same diligence as you would for home fixtures. Just as you might research home improvement products and wonder is Miseno a good brand for your kitchen, choosing high-quality, OEM (Original Equipment Manufacturer) parts for your tiller is crucial for reliability and a proper fit.
Your Tiller’s Maintenance Schedule
A little proactive care goes a long way. Following a simple schedule can help you catch small issues before they become major, expensive repairs.
| Maintenance Task | Frequency | Why It’s Important |
|---|---|---|
| Check Transmission Lubricant Level | Every 25 hours of use or annually | Ensures gears are protected from friction and heat. Low levels are a leading cause of failure. |
| Inspect Drive Belts for Wear | Before each season | Catches cracks, glazing, and stretching before a belt fails in the middle of a job. |
| Clean Debris from Tine Shaft | After each use | Prevents vines, string, and roots from wrapping around the shaft and damaging the oil seals. |
| Check for Oil Leaks | Before each use | Early detection of failing seals or gaskets can prevent catastrophic oil loss and gear damage. |
| Tighten All External Bolts | Annually | Engine vibration can loosen housing and mounting bolts, leading to misalignment and stress on the transmission. |
DIY vs. The Repair Shop: Knowing Your Limits
Many common MTD tiller transmission problems are well within the grasp of a home mechanic. Issues related to belts, cables, and shear pins are excellent DIY projects that can save you significant money.
However, it’s also important to recognize when a problem is too complex. If your diagnosis points to internal gear damage, a bent shift fork, or a cracked transmission housing, the repair can become very involved. These jobs often require specialized tools like gear pullers and bearing presses, as well as a detailed understanding of how the internal components fit together. If you hear loud grinding or the transmission case is leaking large amounts of oil, seeking a professional opinion is often the most cost-effective and safest choice.
Conclusion: Empowering Your Garden Prep
An MTD tiller with transmission problems can be a major roadblock in your gardening plans, but it’s rarely a death sentence for the machine. By starting with a systematic diagnosis, you can pinpoint the exact cause of the issue. From there, many repairs—like replacing a belt or a shear pin—are straightforward and require only basic tools.
By embracing regular maintenance and understanding the warning signs of transmission trouble, you can ensure your tiller remains a reliable partner for seasons to come. A well-maintained transmission is the key to turning hard soil into a perfect garden bed, and with this knowledge, you are well-equipped to keep your machine churning.