Marble Backsplash Behind Stove: The #1 Mistake That Ruins Your Kitchen
The allure of a marble backsplash behind the stove is undeniable. It promises a touch of timeless elegance, a whisper of luxury that can elevate an entire kitchen from merely functional to absolutely stunning. Yet, this coveted design choice harbors a significant secret: it can quickly become a homeowner’s biggest regret.
The very heart of the kitchen—the stove—is a battleground of heat, grease, and acidic splatters. For a porous and delicate stone like marble, this environment is a perfect storm for staining, etching, and irreversible damage. The dream of a pristine, veined masterpiece can devolve into a nightmare of discoloration and costly repairs.
This isn’t just about aesthetics; it’s about making a smart, long-term investment in your home. The fundamental problem lies in a misunderstanding of marble’s inherent properties and the brutal reality of a high-use cooking area. Before committing to this beautiful but demanding material, it’s crucial to understand the risks and the rigorous maintenance required to keep it looking flawless.https://fixitinthehome.com/sink-contact-paper_gem1/
You'll Learn About
Why Marble is a High-Stakes Choice Behind the Stove
Marble is, at its core, a soft, porous natural stone. This means it has a natural tendency to absorb liquids, making it highly susceptible to stains from common cooking ingredients like oil, wine, and tomato sauce. Unlike harder stones such as granite or quartzite, marble is also rich in calcite, which reacts strongly with acids.
A single splash of lemon juice or vinegar can cause “etching”—a subtle dulling of the surface that looks like a watermark and cannot be wiped away. In the intense environment behind a stove, where splatters are a daily occurrence, the risk of both staining and etching is magnified tenfold. Without diligent care, the pristine surface can quickly become a permanent record of every meal cooked.
The Hidden Dangers: Staining, Etching, and Heat Damage
The primary threats to a marble backsplash are clear and present in any active kitchen. Staining is the most common issue. Hot oil can splatter from a pan and quickly seep into the marble’s pores, leaving behind dark, persistent spots. Similarly, the vibrant pigments in tomato-based sauces or curries can permanently discolor the stone if not wiped away immediately.
Etching is a more insidious problem. It’s not a stain but a chemical reaction that corrodes the stone itself, removing its polish and leaving a dull mark. This is particularly noticeable on polished marble finishes. While honing the marble can make etching less obvious, the surface remains vulnerable to acidic ingredients.
Finally, while marble is generally heat-resistant, extreme and direct temperature fluctuations can pose a risk. Constant high heat from a powerful gas range could, over time, lead to discoloration or even yellowing, particularly in white marbles that contain natural iron deposits that can oxidize. Acknowledging these vulnerabilities is the first step toward protecting your investment.
The Proactive Defense: A Deep Dive into Sealing
The single most important step in protecting a marble backsplash is sealing. However, “sealing your marble” is advice that’s often given without crucial context. Not all sealers are created equal, and the application process is far more nuanced than a simple wipe-on-wipe-off job. Understanding the science behind sealing is what separates a protected backsplash from a future problem.
Sealers don’t make marble stain-proof; they make it stain-resistant. They work by penetrating the stone’s pores and creating a protective barrier that slows down the absorption of liquids. This gives you a critical window of time to clean up spills before they can cause a permanent stain.
Impregnating vs. Topical Sealers: Choosing Your Armor
There are two main categories of stone sealers: impregnating (or penetrating) and topical. For a natural stone like marble, an impregnating sealer is the only correct choice. These sealers are formulated with a resin dissolved in a solvent (either water or a chemical) that allows them to soak deep into the stone’s pores. As the solvent evaporates, the resin is left behind, clogging the pores and blocking liquids from entering.
Topical sealers, on the other hand, create a film that sits on the surface of the stone. These are unsuitable for marble backsplashes as they can easily be scratched, may yellow over time, and can trap moisture, potentially harming the stone. Always opt for a high-quality impregnating sealer specifically designed for marble.
How to Seal Your Marble Backsplash Like a Pro
Proper sealing is a meticulous process that should be done upon installation and repeated regularly—typically every 6 to 12 months, depending on the sealer and how heavily the kitchen is used. First, the surface must be impeccably clean and completely dry. Any dirt or moisture trapped under the sealer can lead to discoloration.
Apply the sealer evenly with a clean, lint-free cloth, paintbrush, or specialized applicator. The goal is to saturate the surface so the stone can absorb as much sealer as it needs. Let it sit for the manufacturer-recommended time, usually 3-5 minutes, allowing it to penetrate. Crucially, before it dries on the surface, wipe away all excess sealer with a clean, dry cloth. If sealer dries on the surface, it can leave a hazy, streaky residue that is difficult to remove.
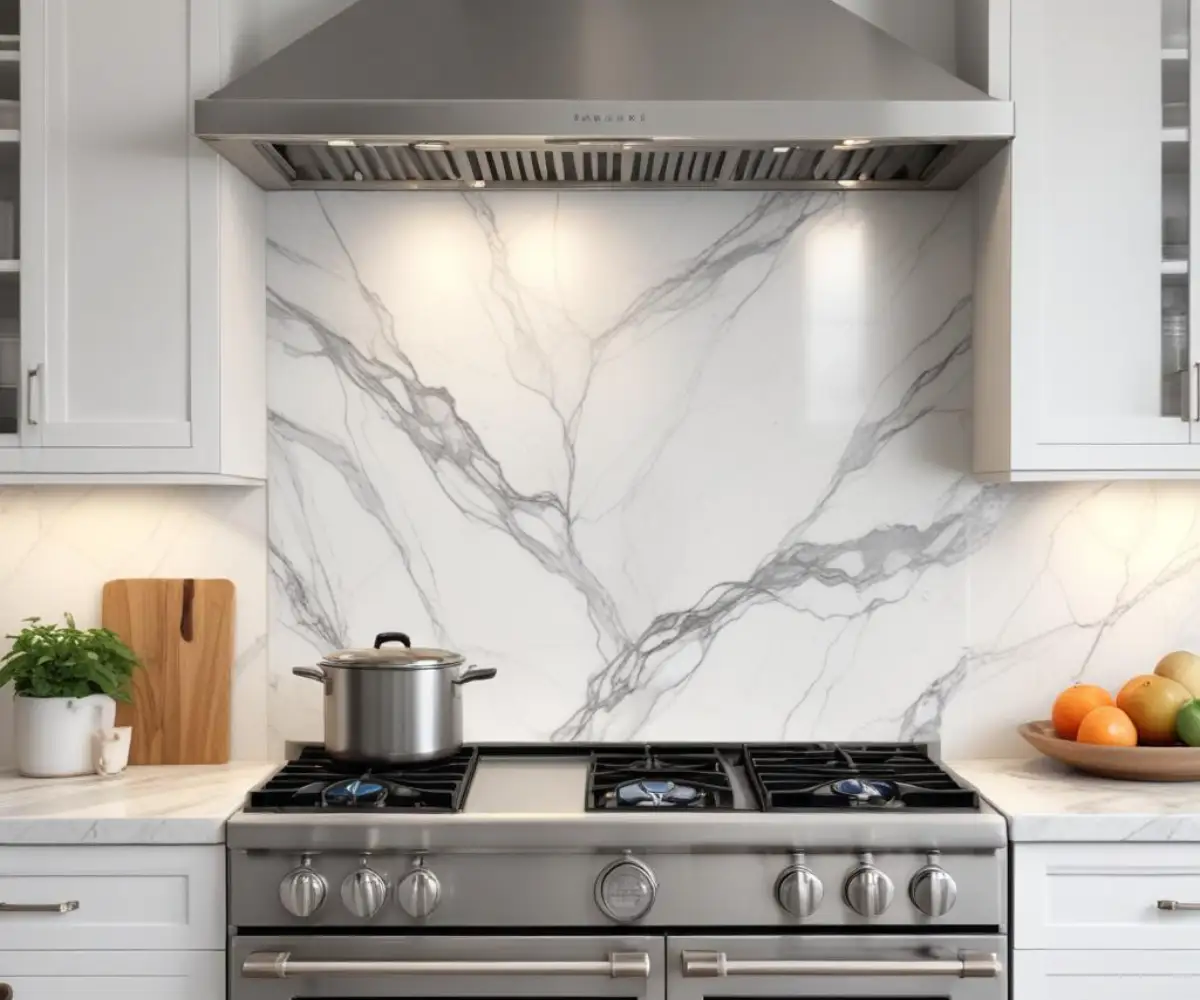
Slab vs. Tile: A Decision with Lasting Consequences
When planning a marble backsplash, one of the most significant choices you’ll make is between a solid slab and individual tiles. While they may seem like purely aesthetic options, the functional differences are dramatic, especially in the high-impact zone behind a stove. This decision will profoundly affect your maintenance routine and the long-term durability of your design.
A solid marble slab offers a seamless, grout-free surface. This is its single biggest advantage. Grout is porous and notoriously difficult to keep clean, acting as a magnet for grease and food splatters. By eliminating grout lines, a slab backsplash presents a smooth, continuous surface that is far easier to wipe down and maintain. This sleek, modern look is not just beautiful; it’s a practical choice for minimizing cleaning headaches.
Marble tiles, on the other hand, introduce a grid of grout lines that can become a weak point in your defense against stains. While you can and absolutely should seal the grout, it will still require more diligent cleaning than a solid slab. However, tiles offer greater design flexibility with patterns like herringbone or subway and are often a more budget-friendly option.
Comparing Your Options: Slab vs. Tile Behind the Stove
Choosing between a slab and tile involves weighing aesthetics, budget, and your tolerance for maintenance. A solid slab provides a luxurious, high-end look that is unmatched. The absence of grout lines not only simplifies cleaning but also showcases the uninterrupted, natural beauty of the marble’s veining.
If you’re considering tile, you might explore options that minimize the impact of grout, such as using larger format tiles to reduce the number of lines. When you’re dealing with the complexities of tile installation, knowing how hard is it to redo a backsplash can help you appreciate the value of getting it right the first time. The ultimate choice depends on balancing the seamless beauty of a slab with the cost and design versatility of tile.
| Feature | Marble Slab Backsplash | Marble Tile Backsplash |
|---|---|---|
| Maintenance | Low. No grout lines to clean or maintain. Easy to wipe down. | High. Grout lines are porous and can trap grease and stains, requiring regular scrubbing and sealing. |
| Aesthetics | Seamless, luxurious, and modern. Showcases continuous veining. | Versatile. Allows for various patterns (herringbone, subway, etc.). Grout lines create a grid pattern. |
| Cost | High. More expensive material and fabrication costs. | Lower. Generally more affordable for both materials and installation. |
| Installation | Requires specialized professionals due to weight and size. Complex cutouts for outlets. | Can be a DIY project for those with experience, but professional installation is recommended for best results. |
| Vulnerability | Extremely low vulnerability to grout staining. | High vulnerability at grout lines, which can become discolored if not properly sealed and maintained. |
The Overlooked Threat: Intense Heat and Discoloration
While much of the focus is on stains and etches, a more subtle but equally damaging threat exists: the intense, sustained heat from your stove. Many modern professional-style ranges, particularly gas models, generate significant heat that vents directly towards the backsplash. This constant thermal exposure can have long-term consequences for marble that are rarely discussed.
Over time, high heat can cause the minerals within the marble, particularly iron deposits, to oxidize. This process can lead to a gradual yellowing or browning of the stone, an issue that is irreversible and not solved by cleaning or sealing. The risk is highest with powerful cooktops that are installed without a built-in backguard, leaving the marble to absorb the full force of the vented heat.
Practical Solutions for Heat Protection
The most effective way to protect your marble from heat damage is to create distance or a buffer. Many high-BTU ranges are designed to be installed with a stainless steel backguard, sometimes called a riser. These panels are specifically engineered to absorb and dissipate heat, protecting the wall behind them. While some designers may prefer the seamless look of running the marble directly down to the cooktop, foregoing this protective element is a significant risk.https://fixitinthehome.com/marble-tile-with-white-grout_gem1/
If your range does not have an integrated backguard, ensure there is adequate clearance between the back of the stove and the marble surface, as specified by the appliance manufacturer. This small gap can make a significant difference in reducing direct heat transfer. Proper planning during the installation phase is critical to prevent long-term, heat-related discoloration.
A Maintenance Masterclass: Cleaning Marble Without Causing Damage
Cleaning a marble backsplash is a delicate science. The wrong products or techniques can cause more harm than good, leading to etching, scratching, or a dull finish. The golden rule is to be gentle and swift. Address spills the moment they happen, before they have a chance to penetrate the stone. Never use acidic or abrasive cleaners.
For daily cleaning, a soft cloth or sponge with warm water and a small amount of pH-neutral dish soap is all you need. Harsh chemical cleaners, vinegar, lemon juice, or scrubby sponges will damage the surface. Always wipe spills immediately, blotting first to absorb the liquid before gently cleaning the area.
Step-by-Step Guide for Tackling Tough Stains
Even with the best preventative care, stubborn stains can happen. For oil-based stains, a chemical poultice is the most effective solution. This is a thick paste made from a fine, absorbent powder (like baking soda or diatomaceous earth) mixed with a chemical solvent.
To make a simple poultice for an oil stain, create a paste of baking soda and water until it has the consistency of peanut butter. Gently apply the paste to the stain, extending slightly beyond its edges. Cover it with plastic wrap and tape the edges down to keep the paste moist. Let it sit for 24 to 48 hours as it works to draw the stain out of the stone. Afterward, remove the plastic, allow the paste to dry completely, and then gently scrape it off and clean the area with a pH-neutral cleaner. For a seamless look across all your marble surfaces, you might even consider a marble tile countertop no grout installation to complement your backsplash.
Design and Installation: Putting It All Together
Successfully integrating a marble backsplash requires careful planning that extends beyond the material itself. The backsplash must harmonize with your cabinets, countertops, and overall kitchen aesthetic. Whether you opt for a dramatic, heavily veined Calacatta Gold or a subtle, soft Carrara, the stone should feel like a deliberate and cohesive part of the design.
Professional installation is highly recommended, especially for a full slab. Manipulating a large, heavy, and expensive piece of stone requires expertise and specialized equipment. Proper wall preparation is also key to ensure the marble adheres correctly and remains secure for years to come. This is also the time to consider details like the placement of floating shelves. Deciding whether to install floating shelves before or after backsplash can impact the final look and ease of installation.
Final Touches for a Flawless Finish
The small details often make the biggest difference. The placement of outlets and light switches can disrupt the flow of a beautiful marble pattern. Careful planning with your electrician and installer can ensure these elements are positioned discreetly. In some cases, dealing with existing wall imperfections might require creative solutions, such as finding the right outlet covers for uneven backsplash to ensure a clean finish.
By considering these elements from the outset—from the type of marble and sealer to the heat protection and installation details—you can mitigate the risks associated with this beautiful material. A marble backsplash behind the stove is not a low-maintenance choice, but with the right knowledge and commitment, it can be a stunning and lasting feature in your kitchen.
The Verdict: Is a Marble Backsplash Worth the Risk?
A marble backsplash behind the stove is a commitment. It requires more than just an initial investment; it demands ongoing diligence, regular maintenance, and a mindful approach to cooking. The material’s inherent vulnerability to staining, etching, and heat damage makes it a high-risk choice for one of the hardest-working areas of the kitchen.
However, for those willing to embrace the required upkeep, the aesthetic reward is unparalleled. The timeless beauty and unique character of natural marble can create a focal point that is both elegant and deeply personal. The key to success lies in understanding the material’s weaknesses and proactively protecting against them through proper sealing, careful cleaning, and smart installation choices.
Ultimately, the decision rests on your lifestyle and priorities. If you desire a worry-free, low-maintenance surface, materials like porcelain, quartz, or even stainless steel may be a better fit. But if you are captivated by the allure of marble and are prepared to give it the care it deserves, you can successfully enjoy its beauty for many years to come.