Mango Seed Turned Black? Don’t Panic, Here’s Your Guide
You’ve just enjoyed a delicious, juicy mango, and you’re excited about the prospect of growing your own tree. You carefully clean the large seed, only to find it’s covered in unsettling black spots or has turned entirely black. It’s a common moment of confusion for many home gardeners: is it rot, a disease, or just a normal part of the process? This guide will demystify why your mango seed has turned black and provide a clear path forward.
Understanding the causes behind this discoloration is the first step toward successfully germinating your seed. Often, a black mango seed isn’t a lost cause; it just requires a bit of extra knowledge and care to determine its viability and encourage it to sprout. Let’s explore the reasons and the solutions to give your seed the best chance at life.
You'll Learn About
Why Did My Mango Seed Turn Black? Uncovering the Causes
Finding a black mango seed can be alarming, but it’s not always a sign of death. Several factors, ranging from harmless natural processes to more serious issues like fungal infections, can cause this discoloration. Identifying the likely culprit is key to deciding your next steps.
The location and nature of the blackening—whether it’s on the outer husk or the inner kernel—provide important clues. Let’s break down the most common reasons for a mango seed to turn black, so you can diagnose the problem accurately.
Natural Oxidation and Aging
One of the most frequent and least concerning reasons for a black mango seed is simple oxidation. Just like a sliced apple turns brown when exposed to air, the outer husk (endocarp) of a mango seed will naturally darken over time. This process is a chemical reaction that occurs when the seed’s internal compounds are exposed to oxygen.
This type of blackening is typically uniform and appears on the surface of the husk. If the discoloration is only skin-deep and the inner kernel remains a healthy, cream color, your seed is likely perfectly fine and viable for planting.
Fungal and Bacterial Infections
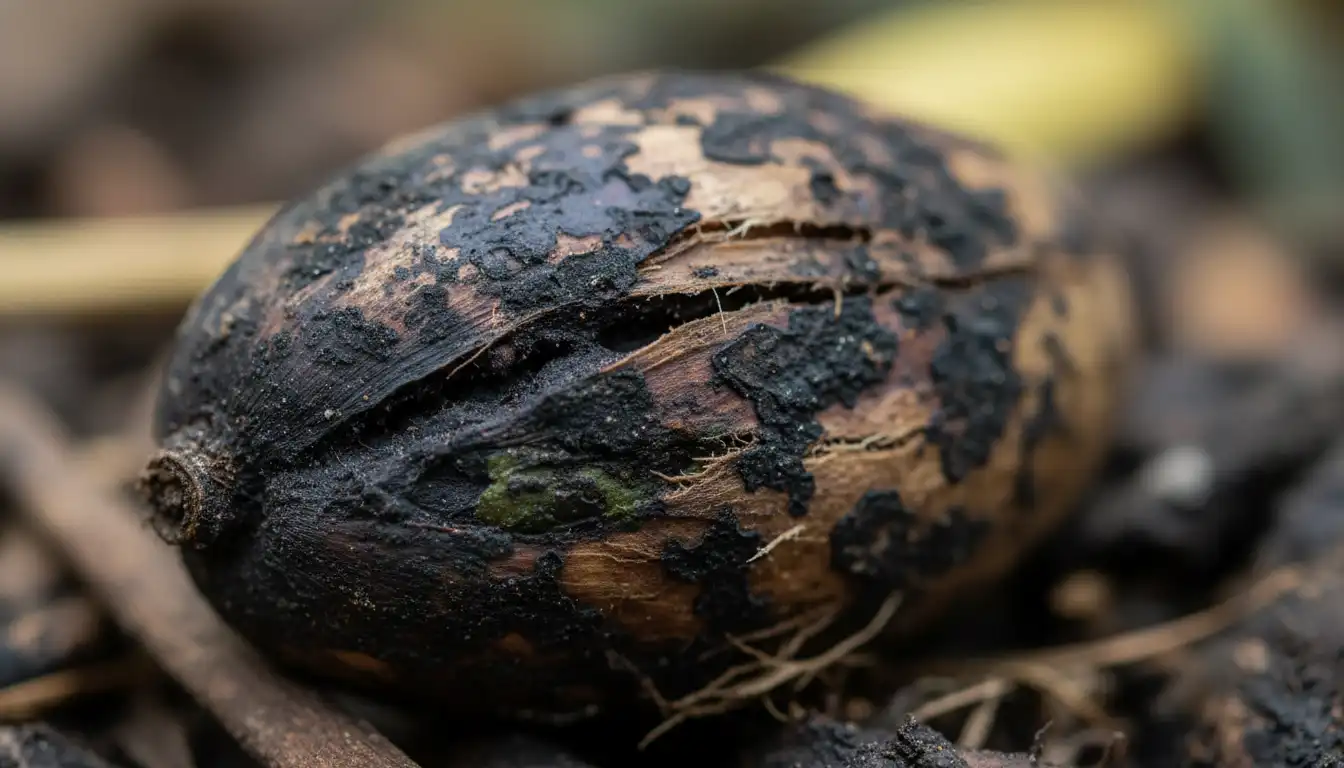
A more serious cause of a black mango seed is a fungal or bacterial infection. Pathogens like anthracnose (Colletotrichum gloeosporioides) can affect the fruit and penetrate through to the seed, causing it to rot from the inside. These infections often create distinct, mushy black spots rather than a uniform darkening.
If you suspect an infection, check for other signs like a foul smell or a soft, spongy texture. Seeds affected by significant rot are typically not viable, as the infection has likely destroyed the delicate embryo inside. These types of diseases are more common in overly ripe or damaged fruit.
Environmental Stress and Improper Storage
How you handle the seed after removing it from the fruit plays a crucial role in its health. Leaving residual fruit pulp on the husk can promote mold and bacterial growth, leading to black spots. Furthermore, storing the seed in an environment that is too wet or lacks air circulation can quickly lead to rot.
Excessive humidity is a primary enemy of a freshly harvested seed. It creates the perfect breeding ground for microorganisms that cause decay. Proper cleaning and drying are essential steps to prevent this type of environmental damage.
Pest Infestation
In some cases, pests like the mango seed weevil can be the source of the problem. These insects lay their eggs in the developing fruit, and the larvae burrow into the seed to feed, destroying it from within. This internal damage often leads to decay and blackening of the kernel.
While less common for store-bought mangoes due to import regulations, it’s a possibility, especially with fruit from local or untreated trees. An infested seed is not viable and should be discarded to prevent the spread of pests.
Is a Black Mango Seed Still Viable for Planting?
After discovering your mango seed has turned black, the critical question is whether it can still grow. The answer depends entirely on the condition of the inner kernel, not just the outer husk. A discolored husk can hide a perfectly healthy seed, while a pristine-looking husk might contain a non-viable kernel.
Fortunately, there are simple tests and inspection methods you can use at home to determine if your seed is worth the effort of planting. These checks will give you a clear indication of the seed’s health and its potential to sprout into a thriving mango tree.
The Float Test: A Quick Viability Check
A classic method for testing the viability of many types of seeds is the “float test.” Place the entire mango seed husk in a container of water. A healthy, viable seed is typically dense and will sink to the bottom. If the seed floats, it may indicate that the inner kernel has dried out, rotted, or been eaten by pests, making it hollow and non-viable.
While not 100% foolproof, this test is an excellent first step. A sinking seed is a positive sign, but you should still proceed with a physical inspection of the kernel for confirmation.
Inspecting the Kernel: The Ultimate Test
The most reliable way to check for viability is to carefully open the hard outer husk and examine the kernel inside. Use a sturdy pair of kitchen shears or gently pry the husk open at its seam. Be very careful, as the husk can be tough and the kernel inside is slippery.
A healthy, viable mango kernel will be firm to the touch and a uniform cream or ivory color. A non-viable kernel will show clear signs of trouble: it may be shriveled, have dark brown or black spots, feel mushy, or have a foul, fermented odor. Any seed that is not firm and creamy-white is unlikely to germinate.
| Characteristic | Viable Seed (Likely to Sprout) | Non-Viable Seed (Unlikely to Sprout) |
|---|---|---|
| Color of Kernel | Uniform cream, ivory, or light tan | Dark brown or black spots, gray, or fully black |
| Texture of Kernel | Firm, plump, and solid | Mushy, soft, shriveled, or spongy |
| Smell | Neutral, slightly nutty, or fresh | Sour, fermented, rotten, or moldy |
| Husk Condition | Can be black from oxidation but is intact | Cracked with visible mold, signs of pest entry |
| Float Test Result | Sinks in water | Floats in water |
Step-by-Step Guide to Saving and Planting a Discolored Mango Seed
If your inspection reveals a healthy kernel inside a discolored husk, it’s time to act. Giving the seed proper care at this stage can significantly increase its chances of successful germination. This process involves cleaning, treating, and planting the seed using techniques that cater to its slightly compromised state.
Even if the kernel has a few minor dark spots, it may still have enough energy to sprout. Follow these steps carefully to rescue your seed and guide it toward becoming a healthy sapling.
Step 1: Meticulous Cleaning and Preparation
Once you have extracted the kernel from its husk, gently wash it under lukewarm running water. Use a soft brush or your fingers to remove any remaining papery brown skin or slimy residue. This step is crucial to eliminate any surface bacteria or fungal spores that could lead to rot during germination.
After washing, pat the kernel dry with a clean paper towel. Avoid using harsh soaps or chemicals, as they can damage the delicate seed embryo. The goal is to create a clean slate for germination.
Step 2: A Proactive Anti-Fungal Treatment
To give your seed an extra layer of protection, consider a natural anti-fungal soak. This is especially important if the husk showed signs of mold or if the kernel has minor surface blemishes. A gentle treatment can inhibit the growth of common pathogens that thrive in the warm, moist conditions required for sprouting.
A highly effective and safe option is a dilute hydrogen peroxide solution. Mix one part 3% hydrogen peroxide with ten parts water and soak the kernel for 10-15 minutes. Alternatively, a soak in cooled chamomile tea or a light dusting with cinnamon powder can also provide anti-fungal benefits.
Step 3: Choosing Your Germination Method
With a cleaned and treated kernel, you are ready to begin the germination process. The most popular and reliable technique is the “paper towel method,” which allows you to monitor progress easily. It creates a mini-greenhouse effect that maintains consistent moisture and warmth.
Wrap the mango kernel loosely in a damp—not soaking wet—paper towel. Place the wrapped seed inside a zip-top plastic bag, leaving a small opening for air exchange. Store the bag in a warm, dark place, such as on top of the refrigerator or in a pantry.
Step 4: Planting Your Sprouted Seed
Check the seed every few days for signs of life. A small root should emerge from one end of the kernel within one to three weeks. Once the primary root is about half an inch long, it’s time to plant your seed.
Fill a deep pot (at least 6-8 inches) with a well-draining potting mix. Mango trees develop a long taproot, so depth is important. Plant the sprouted seed with the root pointing down, leaving the top quarter of the kernel exposed above the soil line. Water thoroughly and place the pot in a warm, sunny location.
Proactive Care: How to Prevent Your Mango Seeds from Turning Black
Prevention is always the best strategy. By adopting the right practices from the moment you select your mango, you can greatly reduce the chances of encountering a black, rotted seed. Healthy seeds start with healthy fruit and proper handling.
These proactive steps will ensure that the seeds you save are in optimal condition for planting. From choosing the right mango at the store to mastering storage techniques, a little foresight goes a long way.
Start with a High-Quality Mango
The health of the seed is directly linked to the quality of the parent fruit. Choose a mango that is ripe but still firm, with unblemished skin. Avoid fruit that is overly soft, bruised, or has large black spots, as these can be signs of fungal diseases like anthracnose that may have already infected the seed.
A perfectly ripened mango will have a fragrant, sweet smell at the stem end. This indicates that the fruit has reached maturity under good conditions, increasing the likelihood of a viable seed inside.
Immediate and Thorough Cleaning
Do not let the seed sit with fruit pulp clinging to it for an extended period. As soon as you have enjoyed the mango, clean the seed husk immediately. Use a scrub brush or a scouring pad under running water to remove every last bit of the sugary fruit flesh.
Any remaining pulp will quickly begin to ferment and attract mold and bacteria, which can easily penetrate the husk and compromise the seed. A clean husk is the foundation of a healthy germination process.
Optimal Drying and Storage Conditions
If you aren’t planting the seed right away, proper drying is essential. After cleaning, let the husk air dry in a well-ventilated spot for a few days. Do not place it in direct sunlight, as this can overheat and kill the embryo.
Once dry, you can store the seed for a short time. However, mango seeds do not have a long shelf life and should be planted as soon as possible for the best results. Ensuring your storage area has good air circulation is as important as choosing the right flooring for a humid basement; making the right choice, like when weighing bamboo flooring vs. LVP, prevents moisture-related problems down the line.
Beyond Germination: Caring for Your Young Mango Tree
Successfully sprouting a mango seed is a thrilling achievement, but it’s just the beginning of the journey. Nurturing your seedling into a strong, healthy tree requires consistent care and attention to its specific needs. Providing the right environment will set your plant up for long-term success.
From sunlight to soil, understanding the basic requirements of a young mango tree will help you avoid common pitfalls. This foundational knowledge ensures your sapling not only survives but thrives.
Soil, Water, and Sunlight Requirements
Mango trees need well-draining soil to prevent root rot. A mix of standard potting soil with sand or perlite works well for container-grown plants. Water the seedling regularly, keeping the soil consistently moist but never waterlogged. Allow the top inch of soil to dry out between waterings.
Sunlight is critical for a mango tree’s growth. Place your plant in the sunniest spot you can find, ideally a south-facing window where it can receive at least six to eight hours of direct sunlight per day. If you live in a colder climate, you may need to supplement with a grow light during the winter months.
Common Challenges for New Growers
Overwatering is one of the most common mistakes made by new mango growers. It can quickly lead to root rot, which is often fatal for young saplings. Always check the soil moisture before adding more water.
Additionally, as your tree grows, you may need to transport it or bring home larger gardening supplies. Planning for these tasks, such as figuring out how to transport a ladder without a roof rack for pruning, can make managing a growing tree much easier. Proper tools and foresight are key to handling the logistical challenges of home horticulture.
Final Words
Finding a black mango seed doesn’t necessarily mean your planting journey is over. In many cases, the dark discoloration is simply oxidized tannins or harmless surface staining from the fruit’s juices, rather than deep-seated rot. Before discarding it, gently scrape the surface or check the firmness of the embryo inside the husk. If the seed is plump and firm despite its color, it is likely still viable and ready to germinate.
However, if the blackness is accompanied by a mushy texture or an unpleasant odor, fungal decay has likely set in. To prevent this in the future, always clean the seed thoroughly and start the paper towel method immediately after extraction. By acting quickly and identifying the difference between harmless staining and actual rot, you can successfully sprout your mango and turn a grocery store snack into a thriving tropical plant.