LVP Over Tile Problems: Your Guide to Avoiding Total Floor Failure
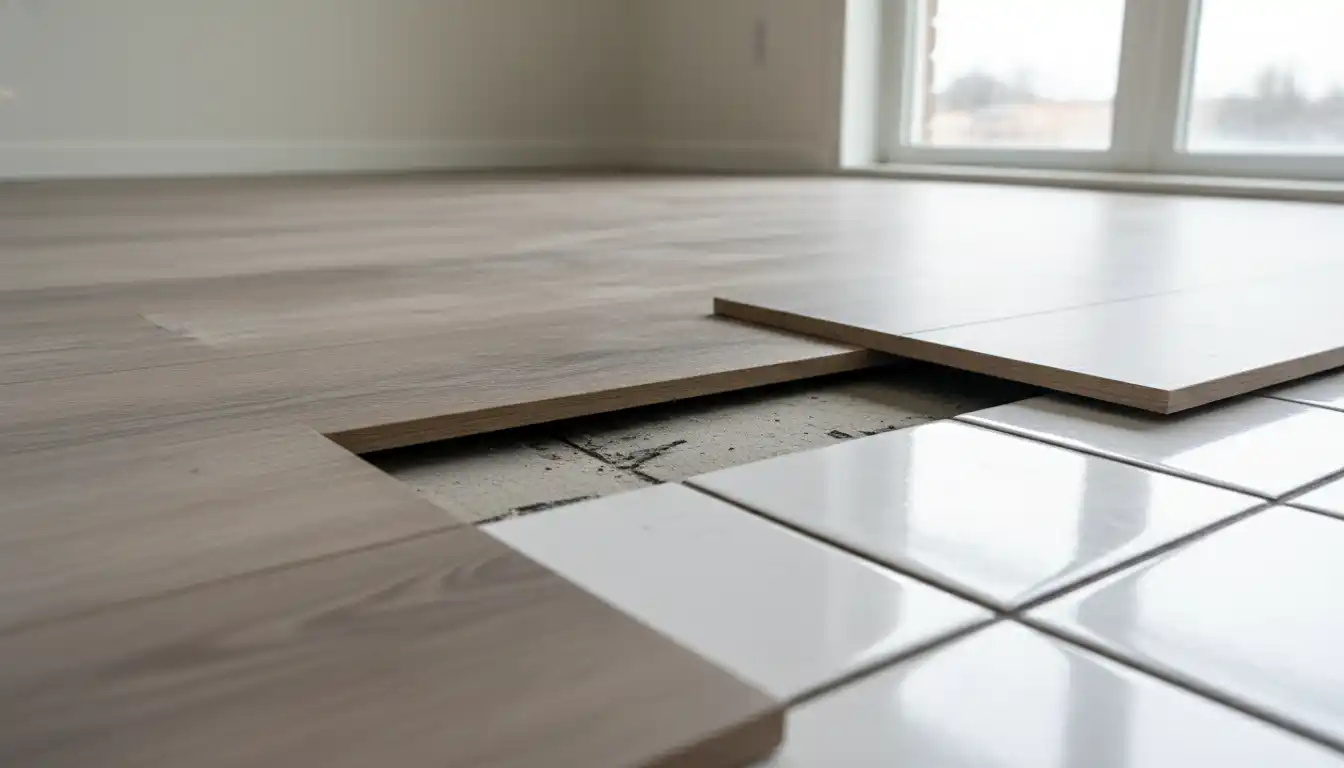
Laying new flooring can transform a room, but the thought of demolishing old tile is enough to stop any project in its tracks. The dust, the noise, the sheer labor involved is immense. This is why installing Luxury Vinyl Plank (LVP) directly over existing tile seems like the perfect, hassle-free solution.
It promises a fast, clean, and budget-friendly upgrade. However, this convenient shortcut is filled with hidden traps that can lead to a flooring disaster. Ignoring the specific needs of this installation can result in a floor that fails within months, wasting your time and money.
This guide exposes the most common LVP over tile problems and provides a clear, step-by-step framework for success. We will cover why these issues happen and, more importantly, how to do the job right the first time to ensure a beautiful, long-lasting floor.
You'll Learn About
Why Floating LVP Over Tile is a Tempting Trap
The appeal of skipping demolition is powerful. Homeowners are drawn to the idea of saving hundreds or even thousands of dollars in labor costs. The project timeline also seems to shrink from days of messy work to a simple weekend project.
Manufacturers often market LVP as an easy-to-install “floating floor,” which can be placed over many existing hard surfaces. While technically true, this claim comes with a major caveat: the existing surface must be almost perfectly flat, smooth, and stable. Unfortunately, most tile floors, with their grout lines and minor imperfections, fail to meet these strict requirements from the start.
The Critical Flaw: Understanding Subfloor Requirements
The success of any LVP installation hinges on the quality of the subfloor beneath it. The locking mechanisms that hold the planks together are small and precise. They require a solid, flat foundation to function correctly and bear weight without stress.
When you lay LVP over an unprepared tile floor, you are building on a foundation filled with dips, bumps, and potential instability. This is the root cause of nearly every problem that follows. Even minor imperfections in the tile can translate into major issues for the new vinyl planks on top.
Top 7 LVP Over Tile Problems and How to Fix Them
Skipping proper preparation will almost certainly lead to one or more of the following issues. Understanding these problems is the first step toward preventing them.
1. Telegraphing: The Ghost of Grout Lines Past
One of the most frequent and visually frustrating problems is “telegraphing.” This is when the pattern of the old tile grout lines becomes visible through the surface of the new LVP, creating faint indentations across your floor.
This happens because LVP, even rigid core, has some degree of flexibility. Over time, it will settle and conform to the shape of the surface beneath it. Grout lines, even shallow ones, create low spots that the LVP eventually sinks into. The wider and deeper the grout lines, the more severe the telegraphing will be.
The solution is to create a perfectly smooth surface. You must fill the grout lines with a cement-based patching or embossing leveler compound. Apply the compound with a trowel, scrape it flat, and feather the edges to ensure a seamless transition with the tile surface.
2. Locking System Failure and Gapping
Have you seen an LVP floor with ugly gaps opening between the planks? This is a sign of locking system failure, and it’s a direct result of an uneven subfloor. When there are high and low spots from uneven tiles (a condition known as “lippage”), the LVP planks flex every time you walk on them.
This constant vertical movement puts immense stress on the small tongue-and-groove locking mechanisms. They are not designed to bend. Eventually, they will wear down, crack, or break entirely, causing the planks to pull apart.
Preventing this requires ensuring the tile floor is perfectly flat before you lay the first plank. Use a long level or straightedge to find any high or low spots. High spots from tile lippage must be ground down, and low spots must be filled with a leveling compound.
3. Unwanted Noise: Clicking, Popping, and Hollow Sounds
A properly installed LVP floor should feel solid and sound quiet underfoot. If your new floor clicks, pops, or has a hollow sound when you walk on it, it’s another symptom of an uneven tile subfloor. These noises are created by the planks moving up and down over voids.
The small spaces between the LVP and the low spots in the tile act like tiny echo chambers. The clicking sound is often the locking system being stressed with each footstep. Not only is the noise annoying, but it’s also an audible warning that your floor’s locking system is under strain and heading toward failure.
The only real solution is prevention. A flat, solid subfloor eliminates these voids. While a quality underlayment can help dampen sound, it cannot fix the core problem of an uneven surface.
4. Added Height and Clearance Nightmares
A frequently overlooked problem is the additional height the new LVP floor adds. You aren’t just adding the thickness of the plank; you are adding its height on top of the existing tile and thinset mortar. This can be a half-inch or more of new height.
This seemingly small change can create a cascade of problems. Doors, especially exterior doors with weather stripping, may no longer swing freely and will need to be trimmed. Dishwashers and refrigerators that were a snug fit may not slide back into place under countertops. Transitions to other flooring surfaces will now have a noticeable and awkward height difference.
Before you begin, measure the height of your LVP and check all clearances. Open and close every door that will swing over the new floor. Measure the height of your appliances. Planning for these adjustments beforehand will save you major headaches later.
5. Voided Manufacturer Warranties
Every LVP manufacturer provides a detailed installation guide that includes strict requirements for subfloor flatness. A common standard is that the floor must not have any variation greater than 3/16 of an inch over a 10-foot span.
If you install LVP over an unprepared tile floor that doesn’t meet this standard, you have likely voided your warranty. If your floor later fails due to gapping or broken locks, the manufacturer will not be responsible for replacing the material. They will rightfully argue that the failure was caused by improper installation, not a product defect.
To protect your investment, you must read the warranty and installation instructions before you start. Following the subfloor preparation guidelines to the letter is your only way to ensure warranty coverage.
6. Instability and a “Spongy” Feeling
Your floor should feel solid and secure. If it feels “spongy” or bouncy in certain spots, it’s a sign of instability in the old tile floor. This can be caused by tiles that have come loose from the mortar bed or by a subfloor that has some flex.
Walking on these areas causes the entire section of LVP to depress, stressing the joints of all surrounding planks. This is not only uncomfortable to walk on but also contributes to the premature failure of the locking systems.
Before installation, you must inspect every single tile. Tap each one with a rubber mallet or your knuckles. A hollow sound indicates a loose tile that needs to be removed and its space filled with a patching compound to create a solid base.
7. Trapped Moisture and Mold Growth
LVP flooring is waterproof from the top down, but it is not breathable. If you install it over a tile floor with existing moisture issues, you are creating a perfect environment for mold and mildew to grow. This is especially a concern for tile installed on a concrete slab that may not have a proper vapor barrier.
Once trapped between the tile and the vinyl, this moisture has nowhere to go. It can lead to musty odors, compromise your home’s air quality, and potentially damage the subfloor itself over time.
It is wise to perform a simple moisture test before proceeding. You can tape a small square of plastic sheeting to the tile floor for 24-48 hours. If condensation forms underneath the plastic, you have a moisture issue that must be addressed before you can cover the floor.
Your Blueprint for Success: Preparing Tile for LVP
Avoiding these problems comes down to one thing: meticulous preparation. Turning your existing tile into a suitable subfloor is a non-negotiable process.
First, thoroughly clean the tile to remove any dirt, wax, or grime. Then, perform a detailed inspection. Remove any loose or broken tiles and fill the voids with a rapid-setting floor patch. Use an angle grinder with a diamond cup wheel to flatten any high spots or significant tile lippage.
Next, you must address the grout lines. For shallow grout lines (less than 1/4 inch wide and deep), a high-quality, cement-based embossing leveler is ideal. For deeper grout lines or more widespread unevenness, a full coat of self-leveling underlayment is the superior choice. Consulting a guide on using self-leveling cement over tile is crucial for achieving a perfectly flat and smooth surface ready for LVP.
Choosing the Right LVP for the Job
While no LVP can eliminate the need for subfloor prep, some types are better suited for floating over a well-prepared surface. Modern rigid core LVP, also known as SPC (Stone Plastic Composite), is much more rigid than older flexible LVP. This rigidity helps bridge very minor subfloor imperfections.
A thicker plank (5mm or more) can also provide more stability and durability. Many quality planks come with a pre-attached underlayment pad, which helps with sound absorption and comfort. For those seeking the most authentic appearance, options like embossed in register LVP offer textures that perfectly match the visual wood grain, adding a layer of realism to your new floor.
| Problem | Primary Cause | The Non-Negotiable Solution |
|---|---|---|
| Telegraphing Grout Lines | LVP conforming to low spots in grout lines. | Fill all grout lines with an embossing leveler to create a flat surface. |
| Gapping & Broken Locks | Vertical movement over an uneven surface. | Grind high spots and fill low spots. The floor must be flat to within 3/16″ over 10′. |
| Clicking or Hollow Sounds | Voids between LVP and the uneven tile. | Ensure a perfectly flat, solid subfloor with no gaps for the LVP to move over. |
| Door/Appliance Clearance Issues | Added height from the new flooring layer. | Measure all clearances beforehand and plan to trim doors or adjust transitions. |
| Voided Product Warranty | Failure to meet manufacturer’s subfloor flatness requirements. | Read and follow the installation guide precisely. Document your prep work. |
When You MUST Remove the Tile
Sometimes, installing over tile is simply not an option. If your floor has widespread issues, attempting to patch and level it can be more work and expense than starting fresh. You must demolish the old tile if you encounter these deal-breakers.
If there are large areas of loose, cracked, or hollow-sounding tiles, the foundation is too unstable. If the existing floor has significant, rolling unevenness or is sloped, it’s better to remove it. Finally, if you have a known moisture issue coming up through the slab, the tile must be removed to address the root cause.
For some projects, a different type of floating tile might be an alternative. Exploring options in a Revotile vs Quictile comparison can reveal solutions that are designed differently than LVP.
The Final Verdict: A Project of Preparation
Installing LVP over tile can be a successful project, but only if you shift your focus. The job is not about laying planks; it’s about creating a perfect subfloor. The time, effort, and money you save on demolition must be reinvested into proper preparation.
Skipping this critical phase is a guarantee of future failure. By cleaning, flattening, and smoothing your existing tile floor, you are laying the groundwork for a beautiful, quiet, and durable LVP installation that will last for years to come. Do the prep work, and you will be rewarded with a floor you can be proud of.