The Laundry Sink Rough In Height Mistake You Can’t Afford to Make
Installing a laundry sink, also known as a utility sink or slop sink, seems like a straightforward DIY project. However, one of the most critical and often overlooked details is the rough-in height for the plumbing. Getting this wrong can lead to a cascade of frustrating problems that are difficult and expensive to fix after the walls are closed up.
A poorly positioned drain or water supply line can result in slow drainage, gurgling pipes, sewer gas leaks, and even water damage. This guide will walk you through the essential measurements and considerations to ensure your laundry sink functions perfectly from day one.
You'll Learn About
Why Your Laundry Sink Rough-In Height is So Critical
Before diving into specific numbers, it’s crucial to understand what “rough-in” plumbing means. The rough-in phase is when all the pipes—drain, waste, vent, and water supply lines—are installed within the walls, floors, and ceilings. This happens after the framing is complete but before any drywall or insulation is installed.
For a laundry sink, there are three key components to the rough-in: the central drain line and the hot and cold water supply lines. The precise vertical and horizontal placement of these pipes is the foundation of a functional sink. An incorrect height is not just an inconvenience; it can be a code violation.
The Golden Rule That Overrides Standard Measurements
While this article will provide standard industry guidelines, the single most important rule is this: always have the exact sink you are installing, or at least its detailed specification sheet, before you begin the rough-in. Many people make the mistake of using generic measurements, only to find their chosen sink is deeper or taller than average, rendering their rough-in plumbing useless.
The sink’s specific dimensions are the ultimate authority. Factors like the basin depth, the height of a supporting cabinet or legs, and the style of the faucet will directly dictate the final placement of your pipes. A deep basin farmhouse-style utility sink will have vastly different drain requirements than a shallow, wall-mounted basin.
Standard Rough-In Heights: A Starting Point, Not a Final Answer
With the golden rule in mind, you can use standard measurements as a reliable starting point for your planning. These heights are measured from the subfloor to the center of the pipe. Remember to account for the thickness of your finished flooring when making final calculations.
These guidelines are generally accepted in the plumbing industry, but you must always verify them against your local plumbing codes, which can have specific requirements. A quick call to your local building department is a wise investment of time.
| Plumbing Component | Standard Height (from Unfinished Floor) | Key Considerations & Pro Tips |
|---|---|---|
| Drain Outlet (Center of Pipe) | 12-18 inches | This must be low enough to accommodate the P-trap assembly and maintain a continuous downward slope of 1/4 inch per foot from the sink’s drain to the wall outlet. The sink’s basin depth is the most critical factor influencing this height. |
| Hot & Cold Supply Lines | 24-30 inches | These should be positioned well above the drain outlet to provide ample working room for installation. Crucially, they must also be located above the sink’s flood level rim to prevent potential cross-contamination. |
| Supply Line Spread | 6-8 inches apart | This horizontal spacing provides adequate clearance for installing the shut-off valves (angle stops) and connecting the faucet supply hoses without them kinking or interfering with each other. |
| Washing Machine Standpipe | 30-36 inches | If you are installing a separate drain for your washing machine, the top of the standpipe must be above the washer’s overflow level to prevent siphoning. Always check the washer manufacturer’s recommendations. |
Step-by-Step: How to Calculate Your Perfect Rough-In Height
Forget generic advice. The most reliable way to ensure your installation is flawless is to calculate the measurements based on your specific sink. This methodical approach eliminates guesswork and prevents costly errors.
Follow these steps to determine the precise location for your pipes.
Step 1: Determine Your Sink’s Flood Level Rim
The “flood level rim” is simply the top edge of the sink basin. If water were to fill the sink completely, this is the point where it would overflow. This measurement is most critical for positioning your water supply lines.
Measure from the floor to the top edge of your installed sink. Your hot and cold water supply lines must be stubbed out of the wall at a point several inches above this flood level rim. This is a code requirement in most areas to create an air gap and prevent contaminated sink water from ever siphoning back into your clean water supply.
Step 2: Calculate the Drain Height (The Tricky Part)
Calculating the drain height is the most complex part of the process, but it’s essential for good drainage. An outlet that is too high is one of the most common DIY plumbing mistakes. Here is how to get it right:
1. Establish Sink Drain Height: First, determine the height of the actual drain opening on the bottom of the sink. For a freestanding sink with legs, this is easy to measure. For a drop-in sink, add the cabinet height to the measurement from the countertop to the sink’s drain opening. Let’s call this the “Sink Drain Height”.
2. Account for the P-Trap Assembly: Next, you need to account for the P-trap. The P-trap is the U-shaped pipe that holds water to block sewer gases. A standard 1.5-inch P-trap assembly typically requires about 6 to 8 inches of vertical space from the sink drain opening to the center of the trap arm outlet that goes into the wall.
3. Factor in the Slope: Plumbing codes universally require the horizontal drain pipe (the trap arm) to have a downward slope of 1/4 inch for every foot of length. This uses gravity to ensure waste and water flow away effectively. You need to subtract this drop from your height.
The formula looks like this: (Sink Drain Height) – (P-Trap Height) – (Required Slope) = Ideal Rough-In Drain Height. This final number gives you the perfect center-line height for the drainpipe in the wall.

Step 3: Position the Water Supply Lines
Compared to the drain, positioning the water lines is simple. As established in Step 1, they need to be a few inches above the sink’s flood level rim. A good rule of thumb is to place them about 4 to 6 inches above the rim.
Horizontally, the hot water supply is always on the left and the cold is on the right. Space them about 6 to 8 inches apart. This provides plenty of room for the angle stops (shut-off valves) and faucet connections, making future repairs or faucet replacements much easier.
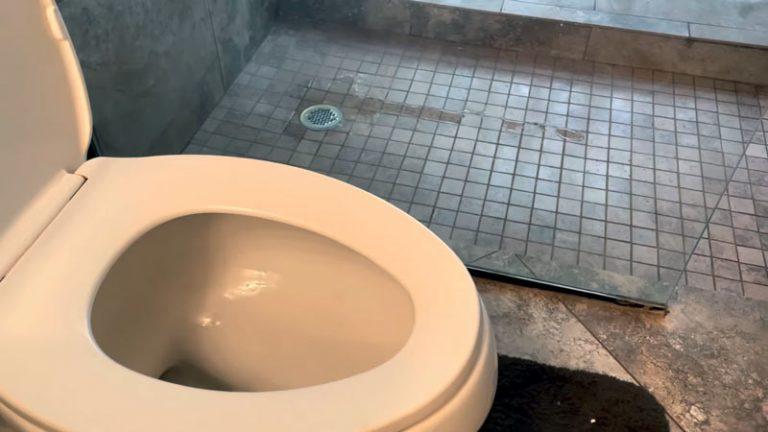
The #1 Mistake That Guarantees Poor Drainage
The most devastating mistake in a laundry sink installation isn’t just getting the height wrong; it’s creating a situation that negates the function of the P-trap and vent. The rough-in height is directly related to this. If the drain outlet in the wall is too high relative to the sink’s drain, it forces the installer to rig a dangerous and illegal plumbing configuration.
This often results in an “S-trap,” where the pipe goes down from the sink, up into a P-trap, and then immediately down into the floor or low on the wall. This setup is prone to siphoning, where the velocity of the draining water sucks the protective water seal right out of the P-trap. An empty P-trap offers a direct, open invitation for hazardous sewer gas to enter your home. A correctly placed rough-in drain allows for a proper P-trap and a horizontal trap arm leading to a vented pipe in the wall, preventing siphoning and ensuring smooth flow.
Special Considerations: Washing Machines and Different Sink Types
Laundry rooms are multifunctional spaces, and your plumbing rough-in should reflect that. Consider how your washing machine and chosen sink style will interact with the plumbing.
Integrating Your Washing Machine Drain
You generally have two options for draining your washing machine. The simplest method is to hook the drain hose over the edge of the utility sink and let it drain directly into the basin. The second, more integrated method is to install a dedicated standpipe for the washer that connects to the same drain line as the sink.
If you choose a standpipe, its height is critical. The top of the standpipe must be higher than the water level of the washing machine to prevent siphoning. A height of 30 to 36 inches from the floor is a safe standard. The standpipe will have its own P-trap and must be properly vented.
Rough-In Heights for Different Sink Styles
The type of sink you choose will be the biggest variable in your measurements. Here’s how to approach the most common styles:
- Freestanding Utility Tubs: These classic, deep-basin tubs on four legs are the most straightforward. You can assemble the sink, set it in place, and take direct measurements from it to mark the locations for your pipes.
- Drop-In/Cabinet Sinks: These sinks are installed into a countertop on top of a base cabinet. Here, your calculations must include the height of the cabinet, the thickness of the countertop, and the depth of the sink basin itself. This is where pre-planning with a spec sheet is absolutely mandatory.
- Wall-Mounted Sinks: These sinks offer more flexibility in setting the final height, making them a good option for customized or ADA-compliant installations. However, you must install solid wood blocking within the wall framing during the rough-in phase to securely support the weight of the sink and any water in it.
Beyond the Basics: Vents, Codes, and Professional Help
A successful installation goes beyond just the pipes you can see. The hidden components are just as important for a safe and functional plumbing system.
Understanding Venting Requirements
Every drain in your home needs a vent. A vent pipe allows air to enter the drain system behind the draining water, preventing a vacuum from forming. Without a properly located vent, your sink will drain slowly, make gurgling sounds, and be prone to siphoning the P-trap dry.
Plumbing codes have strict rules about how far a P-trap can be from its vent. This is another reason why blindly following height recommendations without understanding the whole system can lead to trouble. The complexity of venting often varies; sometimes it involves just a few pipes, while other times it might mean more significant work, such as adding new insulation, which leads to questions about why spray foam insulation is so expensive.
Always Check Local Plumbing Codes
This guide provides general, widely accepted standards. However, plumbing is governed by local codes that can have unique requirements based on regional factors. Before you cut a single pipe, a quick search for your city or county’s plumbing code or a call to the local building inspector can save you from a failed inspection.
Major plumbing work often requires a permit and inspection to ensure it’s done safely and correctly. This is not just red tape; it’s a protection for you and future owners of your home. Sometimes, these upgrades go along with other major work, and it’s helpful to understand the related expenses, like the cost to upgrade to 200 amp service if you’re overhauling your utility room.
When to Call a Plumber
If you feel uncertain at any stage, especially when it involves cutting into your main drain stack or figuring out complex venting, hiring a licensed plumber is the wisest decision. A professional can ensure the job is done correctly, efficiently, and up to code.
For complex projects, such as a basement laundry room that requires breaking up the foundation, professional help is non-negotiable. It’s crucial to understand the full scope of such a project, and that includes researching the cost to cut basement concrete floor for plumbing before you commit.
Conclusion: Measure Twice, Plumb Once
The key takeaway for setting your laundry sink rough-in height is simple: don’t rely on generic numbers. Your specific sink is the only true source of information. By taking the time to measure your sink, calculate the drain height methodically, and consider the entire plumbing system including vents and local codes, you can avoid common pitfalls.
A little extra planning during the rough-in stage will prevent a world of drainage headaches down the road. It ensures your laundry room will be as functional and reliable as it is convenient, saving you from costly and invasive repairs in the future.