That ‘Max 33-Inch Sink’ Rule for a 36-Inch Cabinet? It’s a Lie.
You have the perfect kitchen layout. The centerpiece is a robust 36-inch sink base cabinet, ready to house a spacious, functional undermount sink. But then you encounter the “rule.”
Installers, designers, and online forums all echo the same advice: for a 36-inch cabinet, you must buy a 33-inch sink, no larger. This conservative guideline has become so widespread that homeowners often sacrifice precious basin space out of fear, settling for a smaller sink than they truly want and need.
The problem is, this one-size-fits-all rule is fundamentally flawed. It fails to account for modern sink designs, cabinet construction variances, and the skill of an experienced countertop fabricator. Following it blindly can lead to a kitchen that is less functional and a design that feels compromised from the start.
You'll Learn About
Why the 3-Inch Rule Exists (And Why It’s Outdated)
The logic behind the “cabinet-minus-three-inches” rule is rooted in caution. It’s a foolproof guideline designed to prevent costly mistakes for inexperienced installers. The thinking is simple and accounts for a worst-case scenario.
A standard 36-inch cabinet isn’t 36 inches on the inside. The cabinet walls, typically made of 1/2-inch to 3/4-inch plywood or particleboard, reduce the usable interior space. A cabinet with 3/4-inch walls on both sides immediately loses 1.5 inches, leaving you with a 34.5-inch interior width.
Furthermore, traditional undermount sinks rely on bulky metal clips to secure them to the underside of the countertop. These clips require significant clearance—at least an inch on each side—to be installed correctly. Factoring in cabinet walls and clip clearance, a 33-inch sink becomes a “safe” bet that will almost always fit without issue.
The Real-World Factors Ignored by the Standard Rule
This simple math, however, doesn’t tell the whole story. It ignores several key variables that can allow for a much larger sink, transforming your kitchen’s functionality.
Actual Interior Dimensions: Not all cabinets are built the same. Frameless cabinets often offer more interior space than face-frame cabinets. The thickness of the material can also vary, meaning your 36-inch cabinet might have an interior width of 35 inches, not 34.5 inches. Always measure your specific cabinet’s interior from wall to wall.
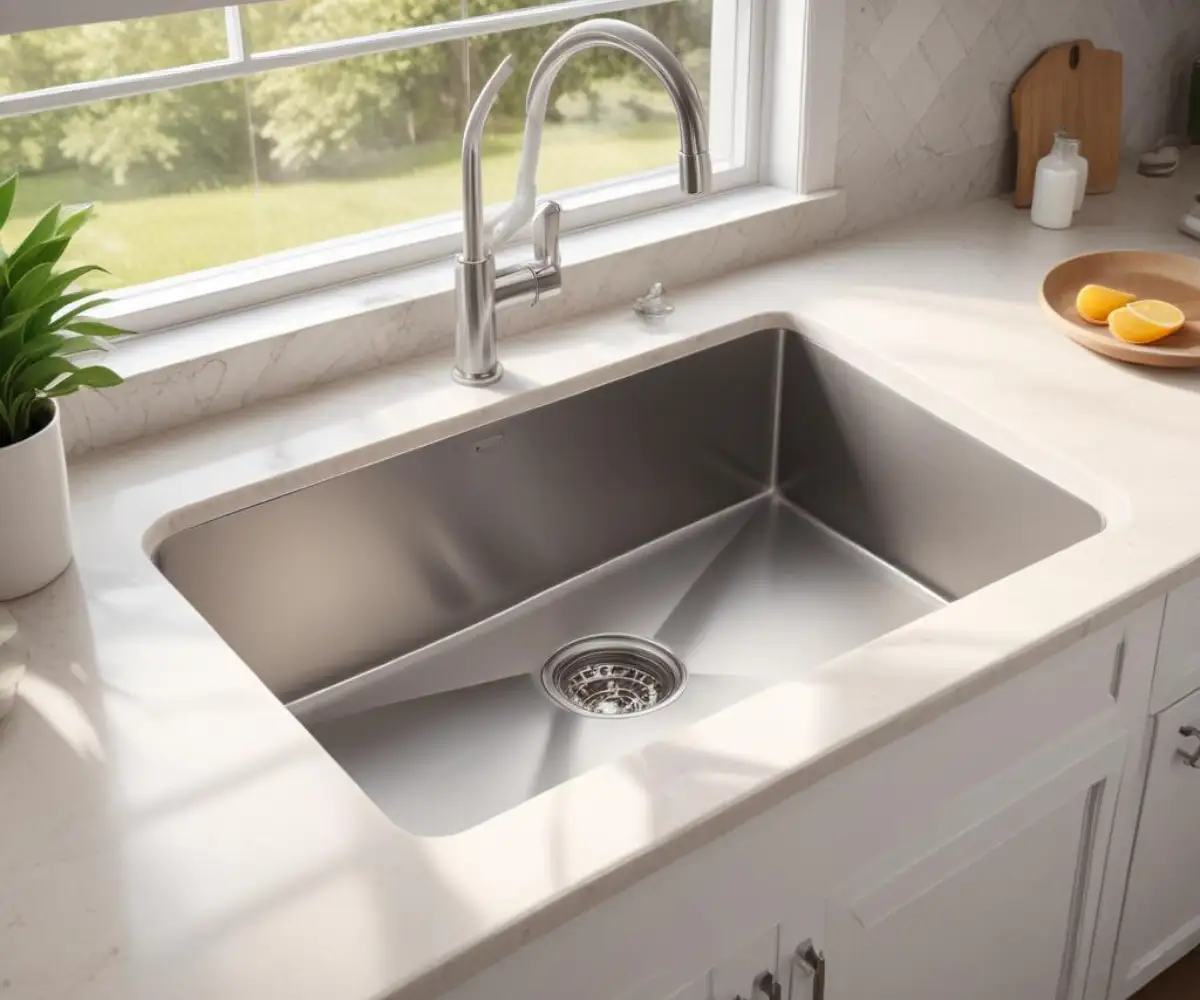
Sink Flange Design: Modern stainless steel sinks, especially those with tight-radius corners, often have very slim flanges (the flat rim that attaches to the countertop). These minimalist designs require far less horizontal space for mounting than older, bulkier sink models.
Mounting Hardware Evolution: While clips are still used, many expert installers now prefer sink harnesses or specialized support systems. These systems cradle the sink from below, supporting its weight directly on the cabinet walls and eliminating the need for bulky side clips. This immediately frees up valuable horizontal space.
The Pro Installer’s Secret: Notching the Cabinet
Here is the single most important technique that allows for a dramatically larger sink: notching the cabinet walls. An experienced countertop installer can carefully cut down, or “scoop,” the top few inches of the cabinet’s side walls.
This simple modification allows the flange of a larger sink—even a 34-inch or 35-inch model—to rest directly on the top edge of the lowered cabinet walls. The countertop is then laid over the entire assembly, concealing the alteration and securing the sink in place. This professional method bypasses the interior width constraint entirely for the sink’s rim.
This is not a DIY job. An improper cut can compromise the cabinet’s structural integrity. However, for a skilled fabricator, it’s a routine procedure that unlocks the maximum possible sink size for your cabinet, giving you a custom, high-end result.
Your Action Plan for Maximum Sink Size
To break free from the 33-inch limitation and get the largest possible sink, you must be proactive. Planning and clear communication with your countertop provider are essential.
Step 1: Measure Everything Yourself
Before you shop for a sink or speak to an installer, get precise measurements. Use a tape measure to determine the exact interior width of your 36-inch sink base cabinet, from the inside of the left wall to the inside of the right wall.
Also, measure the front-to-back depth. While less of a constraint, you need to ensure there is enough room for the faucet and any accessories behind the sink. A standard 24-inch deep cabinet can typically accommodate a sink up to 19 inches from front to back.
Step 2: Research Sinks Based on Overall Width
When shopping, look at the sink’s specification sheet, paying close attention to the “overall width” or “exterior dimensions.” This is the number that matters. The “basin width” refers to the usable interior of the sink, which will naturally be smaller.
Armed with your cabinet’s interior dimension, you can now confidently look at sinks listed as 34 inches, 34.5 inches, or even 35 inches wide. Ensure the flange design is relatively slim to make installation easier.
Step 3: Have a Crucial Conversation with Your Fabricator
This is the most critical step. Do not simply order a countertop and have it delivered. You must speak directly with the fabricator—the company cutting your stone or quartz—and discuss your intentions.
Ask them explicitly: “Are you able to install a 35-inch undermount sink into a 36-inch cabinet by scooping the cabinet walls?” Their answer will tell you everything you need to know about their skill and experience level. An experienced pro will be familiar with this technique. If they seem hesitant or insist on the “3-inch rule,” you may want to consider a different fabricator.
Step 4: Choose the Right Sink Material and Configuration
For a tight fit, material matters. Stainless steel is the most forgiving material as it is lightweight and dimensionally precise. Heavy fireclay or cast iron sinks can have slight variations from the manufacturing process and their immense weight requires robust support systems built into the cabinet itself, which can complicate an already tight installation.
Consider how you use your sink day-to-day. A large single bowl offers the most versatility for washing large pots, pans, and baking sheets. This configuration makes the most of the expanded space you’ve worked to achieve.
| Sink Configuration | Best For | Considerations in a 36″ Cabinet |
|---|---|---|
| Large Single Bowl | Washing large items like baking sheets, stockpots, and skillets. Maximizing uninterrupted space. | This is the best option to take full advantage of the extra width. A 34″ or 35″ single bowl feels immense and highly functional. |
| Low-Divide Double Bowl | Separating tasks (e.g., washing and rinsing) while still fitting larger items over the low barrier. | A good compromise. The low divider provides separation without fully sacrificing the ability to wash large pans. |
| 50/50 or 60/40 Double Bowl | Dedicated basins for separate tasks; often one side for washing and one for a garbage disposal. | Even in a large sink, a full-height divider can make both basins feel cramped. A 35″ sink split 60/40 yields one decent-sized basin and one smaller one. |
Potential Problems and How to Avoid Them
Pushing the limits requires diligence. The biggest risk is choosing an inexperienced installer. A bad cabinet cut can weaken the structure, and improper sink sealing can lead to leaks. This is not the place to cut corners; the cost of professional installation is minor compared to repairing water damage. To avoid issues with bad countertop work, it’s wise to understand the signs of a poor installation job.
Another consideration is future replacement. A custom-fit large sink might be harder to replace with an off-the-shelf model years down the line. However, a high-quality stainless steel sink can last for decades, making this a low-risk concern. If you are replacing an existing sink, such as an older solid surface model, the process requires careful planning. For instance, a Corian sink replacement involves specific steps to de-bond the old sink without damaging the countertop.
Finally, ensure your plumbing is accounted for. The garbage disposal and drain lines need adequate space. An oversized sink, especially a deep one, can lower the position of the garbage disposal, potentially creating alignment issues with the existing plumbing in the wall. Discuss this with your plumber beforehand.
Properly sealing all joints is paramount. Just as you would meticulously apply sealant when caulking a butcher block countertop to prevent water intrusion, the seal between an undermount sink and the countertop must be perfect. Using a high-quality, 100% silicone caulk is non-negotiable.
The cost of fitting a larger sink primarily comes from labor. While the sink itself may not cost more, the countertop fabricator may charge a small additional fee for the cabinet modifications. This is a worthwhile investment for the significant gain in daily functionality. Comparing this to other installation costs, like understanding the factors that influence Lowe’s vanity installation cost, puts this minor upcharge into perspective.
By understanding the mechanics of cabinet and sink installation, communicating clearly with your fabricator, and taking precise measurements, you can confidently install a much larger sink than you thought possible. Don’t let an outdated rule dictate the limits of your kitchen’s most-used feature. Reclaim those inches and enjoy the functionality of a sink that truly fits your needs.