L-Shaped Quartz Countertop Problems? Avoid Seam & Cost Disasters
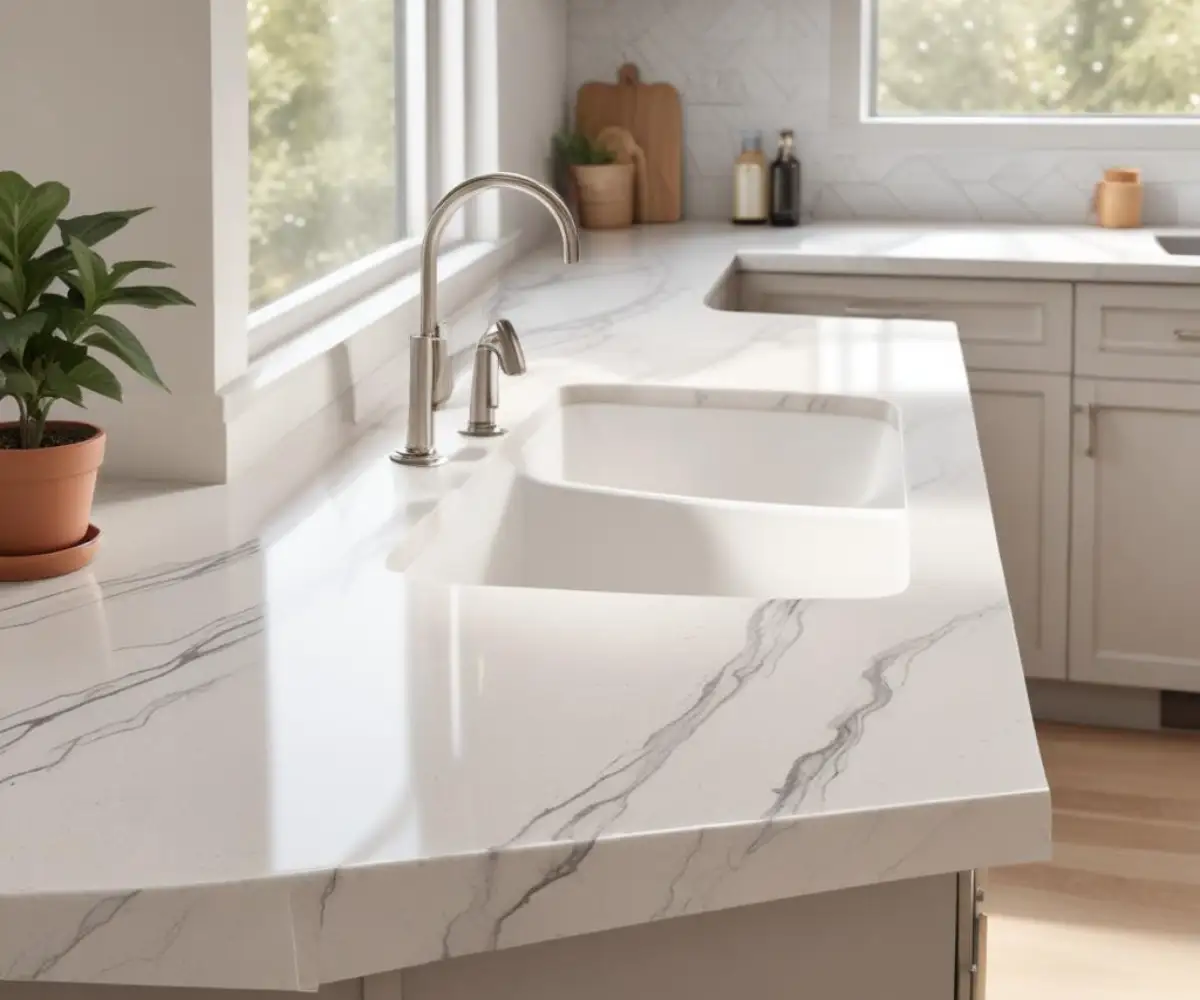
The L-shaped quartz countertop is a cornerstone of modern kitchen design. It promises a sprawling, continuous surface that enhances workflow and creates an open, inviting atmosphere. But this dream can quickly turn into a costly nightmare.
Many homeowners are shocked to find their beautiful new countertop bisected by an ugly, obvious seam. Others face unexpected costs that shatter their budget. The reality is that the elegant simplicity of an L-shape hides significant technical challenges.
This guide provides the expert knowledge you need to navigate the process. We will uncover the hidden pitfalls of seam placement, decode the complex pricing structure, and offer a clear blueprint for a flawless installation, ensuring your investment is both beautiful and built to last.
You'll Learn About
Why the “L” Shape is Both a Blessing and a Design Challenge
The popularity of the L-shaped layout is no accident. It naturally creates an efficient work triangle, connecting the sink, refrigerator, and stove with minimal steps. This ergonomic advantage makes it a favorite among both home cooks and professional chefs.
However, the very corner that makes this layout so effective is also its greatest weakness during fabrication. Quartz countertops are manufactured in rectangular slabs of a standard size, typically around 120 x 56 inches. It is almost impossible to cut a large, single-piece “L” from one of these slabs without creating immense waste or exceeding the slab’s dimensions.
This physical limitation necessitates at least one seam to join two separate pieces of quartz. The quality of this seam, from its placement to its execution, is what separates a breathtaking kitchen from a disappointing renovation project.
The #1 Homeowner Nightmare: The L-Shaped Countertop Seam
Nothing ruins the monolithic beauty of a quartz countertop faster than a poorly executed seam. It can draw the eye for all the wrong reasons, looking like a crack or a mistake in the installation. Understanding why seams are needed and how to manage them is the most critical part of your project.
The goal is not always to have *no* seam, but to have a seam so well-planned and well-executed that it becomes virtually invisible. This requires a deep collaboration between you and your chosen fabricator.
Strategic Seam Placement: Where a Seam Should (and Should Not) Go
The location of your seam is not an arbitrary decision. A strategic fabricator will place it where it is least noticeable and under the least amount of stress. Never allow a seam to be placed directly over a dishwasher, as the heat and moisture can weaken the epoxy over time.
Poor seam placement includes high-visibility areas like the middle of a long, uninterrupted span or right in the main prep area. The best locations are typically over a cabinet support, away from the sink and cooktop cutouts, and out of your primary line of sight. For corners, a diagonal “French mitre” seam can sometimes offer a more continuous look for certain patterns than a simple butt joint.
Beyond Placement: What Defines a “Good” Seam?
A high-quality seam is a work of art, defined by three key characteristics. First is tightness; the gap between the two pieces should be exceptionally small, ideally no wider than 1/16th of an inch. Anything larger will collect dirt and become more noticeable.
Second is smoothness. When you run your hand over the seam, you should not feel a height difference between the two pieces, a condition known as “lippage.” Finally, the installer must use a high-quality, color-matched epoxy that is perfectly blended to the specific shade and pattern of your quartz, making the joint blend into the countertop’s surface.
Decoding the Cost of Your L-Shaped Quartz Countertop
Determining the final price of your L-shaped quartz countertop is more complex than simply paying for the stone itself. The total cost is a combination of three distinct elements: the material you choose, the skilled fabrication required, and the final on-site installation.
Failing to account for all three aspects is a common reason why budgets spiral out of control. A cheap slab can end up costing you more if it requires complex fabrication or a difficult installation. Always request an itemized quote that breaks down these charges clearly.
Key Factors That Inflate Your Final Bill
Several variables can significantly impact the price. The grade of the quartz is a major factor; a simple, solid-colored slab will be far less expensive than a premium one with intricate, bookmatched veining designed to mimic marble. The “L” shape itself often requires purchasing two full slabs, even if you don’t use all of the material, which increases the base cost.
Furthermore, every detail adds to the fabrication bill. A simple, straight edge profile is standard, but a more decorative ogee or bullnose edge requires more labor and specialized tools. Every cutout for an undermount sink, drop-in cooktop, or faucet will also add to the final invoice. A waterfall edge, where the countertop drops vertically to the floor, is a significant additional expense.
Estimated Cost Breakdown for a Standard L-Shaped Quartz Countertop
To provide clarity, the table below outlines the potential costs for a mid-range L-shaped quartz project. Prices are estimates and will vary based on your location, material choice, and fabricator.
| Item | Average Cost Range (USD) | Key Considerations |
|---|---|---|
| Quartz Slabs (2) | $1,200 – $3,000+ | Cost depends on brand, color, and pattern complexity. Veined patterns are more expensive. |
| Digital Templating | $200 – $400 | Non-negotiable for a perfect fit. Ensures all measurements are precise before cutting. |
| Fabrication (Cutting & Edging) | $800 – $1,500 | Includes labor for cutting to size, edge profiling, and finishing. More complex edges cost more. |
| Sink/Cooktop Cutouts | $100 – $300 per cutout | Undermount sink cutouts are more labor-intensive and thus more expensive than drop-in models. |
| Installation & Seaming | $500 – $1,000 | Covers labor for delivery, setting the stone, creating the seam, and final cleanup. |
| Total Estimated Cost | $2,800 – $6,200+ | This is an estimate for materials and labor only; it does not include tear-out of old tops. |
The Blueprint for a Perfect Installation
A flawless result depends on a meticulous process that starts long before the quartz arrives at your home. Each step builds upon the last, and skipping or rushing any part can lead to costly errors. From measurement to final sign-off, precision is paramount.
This process is not a DIY endeavor. The weight of the quartz and the skill required for seaming demand experienced professionals. Your role is to be an informed project manager, ensuring each step is completed to the highest standard.
Step 1: Precision Measurement and Templating
The foundation of your project is the template. Modern fabricators use digital laser templating systems to create a perfect 3D map of your cabinets. This process accounts for any bows in the walls or inconsistencies in your cabinetry, ensuring the countertop will have a snug, perfect fit.
Before the templating appointment, your cabinets must be 100% installed, level, and secured in their final position. As any comprehensive kitchen planner will confirm, the countertop is one of the last pieces of the puzzle; all foundational work must be completed first.
Step 2: Choosing Your Slab and Discussing Seams
For quartz with any veining or pattern, you must insist on viewing and approving the exact slabs that will be used for your project. Computer-generated samples are not enough. This allows you to see the true colors and flow of the pattern in person.
This is also the time to discuss a high-end technique known as “bookmatching.” For slabs with prominent veins, the fabricator can cut and join them so the patterns mirror each other at the seam, creating a stunning, continuous flow around the corner. While more expensive, this delivers an unmatched custom look. You must have the seam location and strategy documented on your contract before any cutting begins.
Step 3: Supporting Your Countertop – The Unsung Hero
Quartz is incredibly strong, but it is not self-supporting over long spans. Any overhang greater than 10-12 inches, such as for a breakfast bar, requires structural support. This is a critical safety measure to prevent the stone from cracking or breaking under its own weight.
These supports can be decorative corbels or invisible steel brackets that are mounted to the cabinet bases. Discuss the specific support plan with your installer to ensure it is both adequate for the weight and consistent with your kitchen’s design aesthetic. Proper support is non-negotiable.
Beyond the Basics: Design and Functionality Tips
With the technical challenges handled, you can focus on integrating your new countertop into the overall kitchen design. The corner, once a challenge, now becomes an opportunity. Consider installing a Lazy Susan or specialized corner drawers to make the deep corner cabinet space fully accessible and functional.
Your material choice will influence the entire feel of the kitchen. A bright white quartz can make a small kitchen feel larger, while a dark or concrete-finish quartz can create a dramatic, modern statement.
Lighting Your L-Shaped Masterpiece
The right lighting is crucial for showcasing the beauty of your quartz. Poor lighting can make even the most expensive countertop appear dull and flat. Under-cabinet LED lighting is essential for illuminating the work surface and highlighting the color and depth of the material.
Consider the overall lighting scheme to ensure there are no dark zones, especially in the corner. If you have outdated fixtures, now is the perfect time for an upgrade. For instance, you could convert can light to track light to direct focused, adjustable illumination precisely where you need it most on your new L-shaped surface.
Considering a Future Upgrade?
If your L-shaped quartz countertop is part of a larger renovation, it’s helpful to understand the entire process. Removing the old countertop is a delicate job that must be done carefully to protect your cabinetry, which you will likely be keeping.
Knowing the steps involved in the deconstruction phase can help you prepare for the installation of your new quartz. For those upgrading from older stone surfaces, learning how to remove granite countertops without damaging cabinets offers valuable insight into the care and technique required for a smooth transition.
Long-Term Care: Keeping Your Quartz Pristine
One of the primary benefits of engineered quartz is its low-maintenance nature. The surface is non-porous, meaning it resists staining from coffee, wine, and oil without needing to be sealed. For daily cleaning, a simple wipe-down with a soft cloth, mild soap, and warm water is all that is required.
However, quartz is not indestructible. Always use a trivet or hot pad for pots and pans, as sudden thermal shock can potentially damage the resin binders. Likewise, use a cutting board to prevent scratches and avoid dropping heavy objects, which can cause chips or cracks, especially along the edges.
Your Flawless L-Shaped Countertop Awaits
An L-shaped quartz countertop is a phenomenal investment in your home’s value and your daily quality of life. By moving past the showroom sample and understanding the critical details of its creation, you can avoid the common pitfalls that lead to disappointment.
Focus on a meticulous plan that prioritizes a professionally managed seam, a clear and comprehensive budget, and a qualified, reputable fabricator. With this knowledge, you are fully equipped to achieve the stunning, seamless kitchen centerpiece you envisioned.