Stuck Kohler Tub Drain? Your Ultimate Removal Guide is Here!
There are few home plumbing issues more frustrating than a stubborn bathtub drain. Whether it’s clogged, leaking, or simply outdated, the time will come when your Kohler tub drain needs to be removed. For many, what seems like a straightforward task quickly turns into a battle against years of corrosion, hardened plumber’s putty, and inaccessible parts.
This guide is designed to walk you through every step of the Kohler tub drain removal process. We’ll cover how to identify your specific drain type, the essential tools you’ll need, and the proven techniques to remove even the most obstinate drains without damaging your bathtub. Prepare to tackle this project with confidence and restore your tub to perfect working order.
You'll Learn About
Before You Begin: Identifying Your Kohler Tub Drain
Before you can begin the removal process, it is crucial to identify which type of Kohler drain system you have. The removal method for the stopper varies significantly between models, and using the wrong technique can lead to damage. Taking a moment to identify your drain will save you time and frustration.
The Lift-and-Turn Drain
A lift-and-turn drain is one of the most common types. It operates via a small knob on top of the stopper. To close the drain, you turn the knob to lower the stopper; to open it, you lift and turn it to lock it in the open position. These are often secured by a small set screw hidden on or under the knob.
The Toe-Tap (or Toe-Touch) Drain
As the name suggests, a toe-tap drain is operated with your foot. You simply push the stopper down to close it, and a spring-loaded mechanism will hold it in place. Pushing it a second time causes it to pop up, opening the drain. These stoppers typically just screw directly into the drain crossbars.
The Pop-Up Drain with Overflow Plate Lever
This system is more complex, involving a trip lever on the overflow plate located on the vertical wall of the tub. Flipping this lever moves a linkage rod connected to a plunger or stopper deep inside the drain pipe. Removing this type requires working at both the overflow plate and the drain opening.
Essential Tools and Materials for the Job
Having the right tools is non-negotiable for a successful drain removal. Attempting this job without the proper equipment is a primary reason people run into trouble, often resulting in broken drain crossbars or a damaged tub surface. Gathering everything you need beforehand will make the process much smoother.
A tub drain wrench is the single most important tool for this job. While some try to use the handles of pliers, this method often leads to breaking the fragile crossbars inside the drain. A proper wrench makes contact with all four points, distributing the force evenly and dramatically increasing your chance of success.
| Tool/Material | Purpose | Pro Tip |
|---|---|---|
| Tub Drain Wrench (Smart Dumbbell) | Engages the drain’s crossbars for safe turning and removal. | Ensure you get the right size for a snug fit. |
| Channel-Lock Pliers | Provides torque to turn the drain wrench. | A larger pair offers better leverage. |
| Screwdrivers (Flathead & Phillips) | For removing set screws on stoppers and overflow plates. | Keep a few sizes handy. |
| Heat Gun or Hair Dryer | Softens old, hardened plumber’s putty. | Use caution on acrylic tubs to avoid overheating the surface. |
| Penetrating Oil (e.g., PB Blaster) | Helps break down corrosion on metal threads. | Apply liberally and allow at least 30 minutes to work. |
| New Drain Assembly | The replacement drain for your tub. | Bring your old drain to the store to ensure a perfect match. |
| Plumber’s Putty or Silicone Sealant | Creates a watertight seal under the new drain flange. | Check manufacturer recommendations; Kohler often suggests silicone. |
| Utility Knife & Rags | For cleaning old putty and general cleanup. | A plastic putty knife can also work without scratching the tub. |
Step-by-Step Guide to Removing a Standard Kohler Tub Drain
With your drain type identified and your tools at the ready, it’s time to begin the removal. Work slowly and deliberately. Applying excessive force is the fastest way to break something and turn a simple DIY job into a costly professional repair.
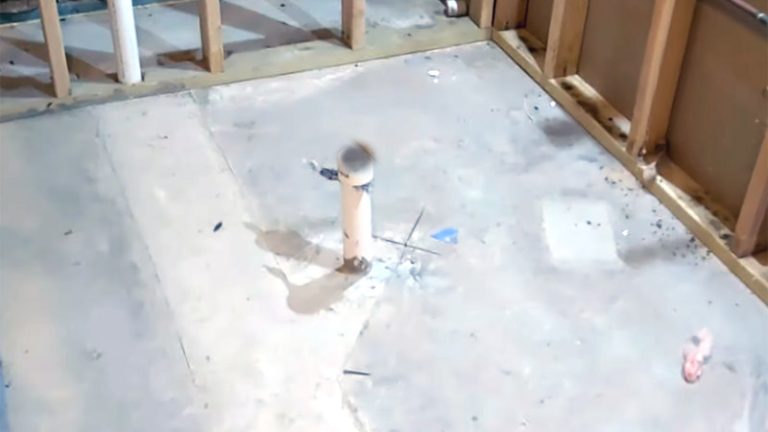
Step 1: Preliminary Preparations
Start by thoroughly cleaning the drain area. Remove any hair, soap scum, or debris that could interfere with your tools. Once clean, make sure the drain and the surrounding tub surface are completely dry for the best possible grip.
Step 2: Removing the Stopper
First, you must remove the visible stopper to access the drain flange below. For a lift-and-turn stopper, open the drain and hold the stopper body while unscrewing the top knob counter-clockwise. Look for a small set screw on the side; loosen it with a screwdriver or Allen wrench to lift the stopper off. For a toe-tap stopper, simply push it to the open position and unscrew the entire cap counter-clockwise; it should come right off its threaded post.
Step 3: Dealing with a Stubborn Drain Flange
This is where most projects hit a snag. The drain flange is sealed with plumber’s putty and threaded into the drain pipe below the tub. Over years, this putty hardens like concrete, and the threads can corrode. Heat is your most powerful ally here. Use a heat gun or a hair dryer on its highest setting and direct the heat onto the metal drain flange for several minutes. This will soften the old putty and cause the metal to expand slightly, helping to break the seal.
After heating, apply a generous amount of penetrating oil around the edge of the flange, allowing it to seep into the threads. Let it sit for at least 30 minutes, or even a few hours for very stubborn cases. This combination of heat and oil is a professional technique that dramatically improves your chances of success.
Step 4: Using the Tub Drain Wrench
Insert the tub drain wrench into the drain opening, ensuring it engages firmly with the crossbars. Place the jaws of your channel-lock pliers or an adjustable wrench onto the top of the drain wrench. Apply steady, firm pressure in a counter-clockwise direction to unscrew the drain. You may hear a crack or pop as the seal breaks; this is normal. Continue turning until the drain flange is completely unthreaded from the drain shoe below.
The Ultimate Nightmare: Removing a Drain with Broken Crossbars
It is a common and dreaded scenario: you apply pressure, and instead of the drain turning, the crossbars snap. At this point, your standard drain wrench is useless. Do not panic; you still have options, though they require more advanced techniques and potentially specialized tools.
Method 1: The Drain Extractor Tool
A tub drain extractor is a specialized tool designed for this exact situation. It’s a tapered, threaded tool that you hammer into the drain opening. The hardened steel teeth are designed to bite into the soft metal of the drain flange from the inside. Once it is firmly seated, you can attach a ratchet or wrench to the top and turn it counter-clockwise to remove the broken drain.
Method 2: The Two-Screwdriver/Plier Method (The DIY Approach)
If you don’t have an extractor, you can try a DIY method, but proceed with caution as it risks damaging the tub. Insert the handles of two sturdy screwdrivers or a pair of needle-nose pliers into the drain, spreading them apart to press against the inside walls. Then, place a larger wrench or another screwdriver between the first two tools and use it as a lever to turn the entire assembly counter-clockwise. This provides the rotational force needed but can slip easily.
Method 3: The Last Resort – Cutting the Drain
This method should only be attempted if all else fails, as it carries a high risk of cutting into the bathtub itself. Using a Dremel with a cutting wheel or a mini hacksaw blade, carefully cut two vertical notches into the drain flange, about half an inch apart. Do not cut all the way through to the tub. The goal is to weaken the drain. Once the notches are cut, use a flathead screwdriver and a hammer to chisel out the small section between the cuts. This should relieve the pressure and allow you to pry the rest of the drain out.
Cleaning and Preparing for the New Installation
Once the old drain is successfully removed, proper preparation is key to ensuring the new one doesn’t leak. Scrape away every last bit of old plumber’s putty and corrosion from the tub’s surface. A plastic scraper or an old credit card is perfect for this, as it won’t scratch the enamel or acrylic.
Use a rag with mineral spirits or a good cleaning solvent to remove any remaining residue. Inspect the drain opening for any chips or cracks. Significant damage to the tub itself may need professional repair, a task that can sometimes be as involved as a full walk-in tub removal project.
Installing Your New Kohler Tub Drain: A Perfect Seal Every Time
With the surface clean and prepped, you’re ready to install the new drain. One of the most debated topics is what to use for the seal: traditional plumber’s putty or modern silicone sealant. Both have their place, and the right choice depends on your fixture and preference.
Plumber’s Putty vs. Silicone: Making the Right Choice
Plumber’s putty is a classic choice. It’s easy to apply, remains pliable, and makes future removal easier. However, its oil base can potentially stain some porous materials like marble or certain plastics over time. 100% silicone sealant creates a stronger, more permanent, and completely waterproof adhesive bond. Many professionals now prefer silicone for tub drains because it will not dry out or crack, but it is more difficult to clean up and makes future removal much harder.
For modern acrylic or fiberglass tubs, many manufacturers, including Kohler, often recommend using a non-staining, oil-free putty or a 100% silicone sealant. Always check the installation instructions for your specific drain model.
The Installation Process
To install the new drain, roll a rope of plumber’s putty (about the thickness of a pencil) and place it around the underside of the new drain flange. If using silicone, apply a continuous bead in the same location. From the top of the tub, carefully insert the new drain and thread it clockwise into the drain shoe below. It is critical to start the threads by hand to avoid cross-threading.
Use your drain wrench to tighten the flange until it is snug. You should see the excess putty or silicone squeeze out evenly around the entire circumference. Do not overtighten, as this can crack the tub or the drain fitting.
Cleaning Up and Leak Testing
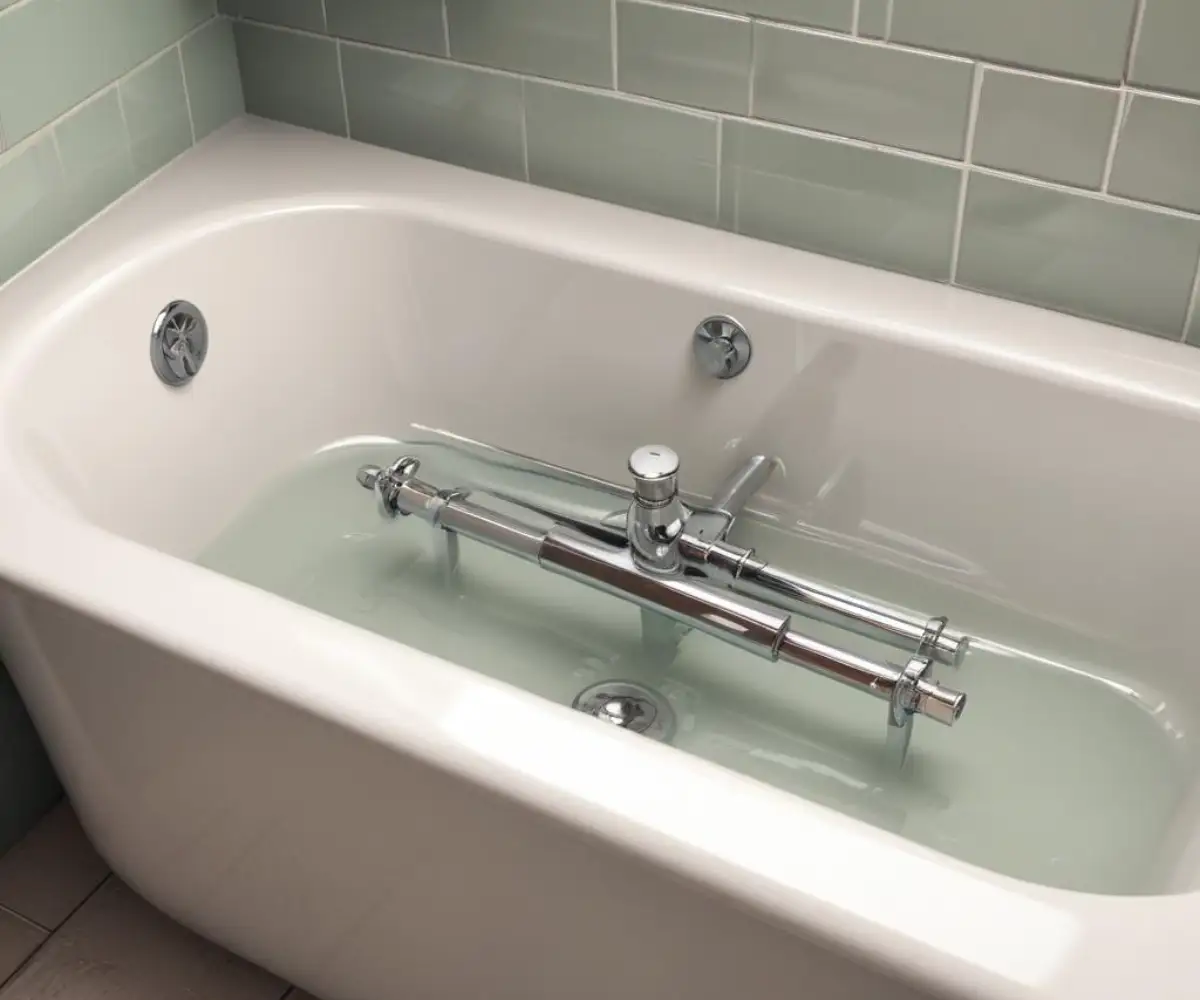
Wipe away all the excess putty with a rag. If you used silicone, clean up the excess with a solvent like mineral spirits before it cures. Reinstall the stopper according to its type. Finally, perform a leak test by closing the drain, filling the tub with several inches of water, and letting it sit for at least 30 minutes. Check for any drips below if you have access, and watch for any bubbles around the drain itself.
When to Call a Professional Plumber
While removing a Kohler tub drain is a manageable DIY project for many, there are times when it’s best to call a professional. If you’ve tried all the methods for a stuck drain without success, or if you discover the drain pipe (the drain shoe) underneath the tub is cracked or broken, it’s time to stop.
A professional plumber has specialized tools and the experience to handle these worst-case scenarios without causing further damage. The expense of a service call can vary, much like how a Kohler shower installation cost depends on project complexity. Trying to force a hopelessly stuck drain could lead to more extensive plumbing work, so it’s wise to know your limits and when a complex issue might impact something as significant as the Terralift cost for your main drain field.
Frequently Asked Questions (FAQ)
What direction do you turn a tub drain to remove it?
Standard plumbing threads mean you always turn the drain counter-clockwise to loosen and remove it. Remember the old saying: “righty-tighty, lefty-loosey.”
Can I use WD-40 to loosen a stuck tub drain?
While WD-40 can help, a dedicated penetrating oil like PB Blaster or Liquid Wrench is far more effective at breaking down rust and corrosion on the threads. These products are specifically designed to creep into tight spaces and dissolve oxidation.
How do I remove a Kohler toe-tap drain stopper for cleaning?
For most Kohler toe-tap models, you can simply unscrew the top cap counter-clockwise while the stopper is in the open position. This will allow you to remove it for easy cleaning of hair and debris without having to remove the entire drain flange.
Why is my new Kohler drain leaking?
A leak after a new installation is almost always due to an improper seal. This can be caused by not using enough plumber’s putty or silicone, not tightening the drain flange enough, or tightening it too much and cracking a fitting. It’s also possible that the large rubber gasket between the drain shoe and the bottom of the tub was damaged or misaligned.