Iris and Tulips: Stop These 5 Mistakes for a Perfect Garden
The dream of a spring garden is often painted with the vibrant colors of tulips and the elegant forms of irises. Many gardeners imagine a seamless tapestry of blooming flowers. The reality, however, can often be a frustrating display of clashing bloom times and struggling plants.
The core problem is treating these two spring heroes as if they are the same. Their fundamental needs, from water to soil, are surprisingly different. This guide provides the solution to creating a harmonious and breathtaking garden where both irises and tulips can thrive together.
You'll Learn About
Understanding the Challenge: Why Pairing Iris and Tulips Can Be Tricky
Achieving a perfect partnership between irises and tulips requires understanding their unique personalities. Ignoring their differences is the primary reason many garden designs fail. They are not interchangeable bulbs; they are distinct plants with specific demands.
One of the most common frustrations is a mismatched bloom sequence. A flush of early tulips might fade weeks before the first iris buds even begin to show color. This leaves the garden with awkward green gaps rather than a continuous, rolling wave of blooms.
The Critical Difference: Water and Soil Needs
The single most important factor that causes failure is their conflicting relationship with water. Tulips require consistent moisture during their spring growth and bloom cycle to produce strong stems and vibrant flowers. After blooming, as the foliage dies back, they prefer drier conditions to prevent the bulbs from rotting.
In stark contrast, many of the most popular irises, especially the majestic Bearded Iris, demand excellent drainage year-round. Planting bearded iris rhizomes in soil that stays consistently moist is a recipe for disaster, leading to soft, mushy rhizomes and bacterial soft rot. This fundamental conflict over water is the central puzzle to solve.
Sunlight and Foliage Considerations
Both irises and tulips thrive in full sun, needing at least six hours of direct sunlight per day to flourish. This shared need is one of the few easy aspects of their pairing. However, the appearance of their foliage after the flowers fade presents another design challenge.
Tulip foliage must be left in place to yellow and wither naturally, as this process recharges the bulb for the following year. This can look untidy for several weeks. Iris foliage, particularly the sword-like leaves of bearded irises, remains green long after the bloom, acting as a structural element in the garden.
The Solution: The “Layered Planting” Strategy
The secret to success is not to force them into an unnatural cohabitation but to give each plant what it needs within the same garden bed. Think of it as creating specialized zones. This “layered planting” strategy accommodates their different needs for a stunning, cohesive display.
This involves planting tulips deeper and irises shallower in the same area. This simple mechanical separation gives both plants their ideal conditions. The deeper tulips can access moisture lower in the soil profile, while the shallow-rooted iris rhizomes can bake in the sun and stay relatively dry on the surface.
Creating the Perfect Soil Foundation
The first step is to prepare the entire garden bed to ensure good basic drainage. Most garden soils benefit from the addition of organic matter like compost. This improves soil structure, helping with both moisture retention and drainage.
For areas with heavy clay soil, amending with compost and coarse sand or fine grit is essential. This prevents the entire bed from becoming waterlogged, which is a threat to both plants. Proper soil preparation is the groundwork upon which your success is built.
Designing Your Dream Iris and Tulip Bed: A Step-by-Step Guide
A successful design is a planned performance, not a random assortment of plants. By strategically selecting varieties and placing them thoughtfully, you can create a garden that performs from the first hint of spring until the beginning of summer. This level of planning is essential for a truly professional-looking result.
Before you even purchase a single bulb or rhizome, sketch out your garden plan. Consider the final heights, colors, and bloom times. A well-thought-out plan, much like ensuring you have a functional 4-foot-wide-hallway indoors, prevents future problems with access and overcrowding.
Step 1: Master the Bloom Sequence
To create a continuous show of color, you must layer the bloom times of your chosen varieties. The goal is to have one set of flowers opening just as another is reaching its peak. This requires careful selection from the vast array of tulips and irises available.
Start with early-blooming varieties and build from there. Pair Dwarf Reticulated Irises (Iris reticulata) with early tulips like Fosteriana or Greigii tulips. As they fade, mid-season tulips and Intermediate Bearded Irises take over, followed by the grand finale of late-blooming tulips and Tall Bearded Irises.
Step 2: The Art of Color and Form
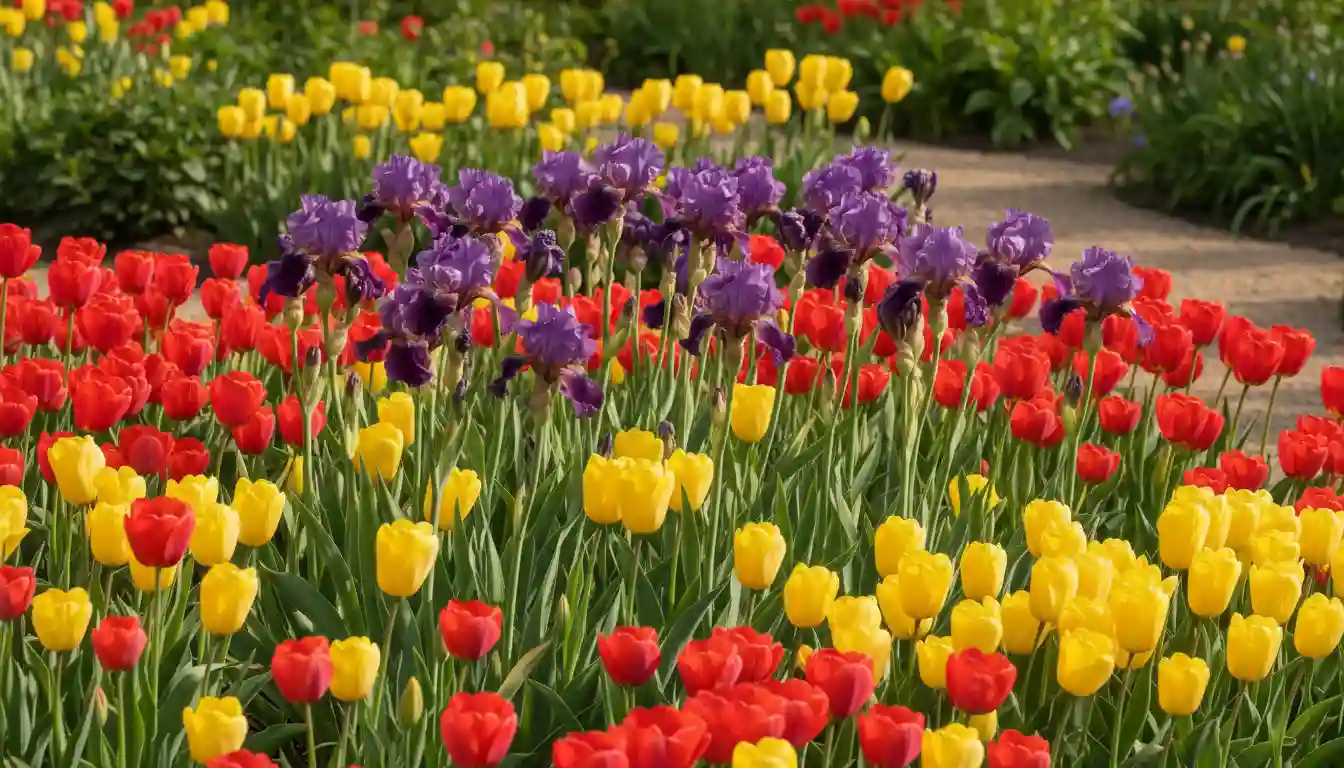
Color theory can elevate a simple flower bed into a work of art. For a calming and sophisticated look, choose a monochromatic scheme with shades of purple, blue, and violet. For a vibrant, high-energy display, use complementary colors like deep purple irises paired with brilliant yellow tulips.
Pay attention to the form and height of the plants. Use the tall, vertical spikes of Tall Bearded Irises as the “thrillers” that provide a dramatic backdrop. Use large drifts of tulips as the “fillers” for a mass of mid-level color. This creates depth and visual interest.
| Bloom Season | Recommended Tulip Varieties | Recommended Iris Varieties | Design Notes |
|---|---|---|---|
| Early Spring | Emperor Tulips (e.g., ‘Orange Emperor’), Greigii Tulips (e.g., ‘Red Riding Hood’) | Dwarf Crested Iris (Iris cristata), Reticulated Iris (Iris reticulata) | Creates a low-growing, vibrant carpet of color to wake up the garden. |
| Mid-Spring | Darwin Hybrid Tulips (e.g., ‘Apeldoorn Elite’), Triumph Tulips (e.g., ‘Prinses Irene’) | Intermediate Bearded Iris (e.g., ‘Limonada’), Siberian Iris (e.g., ‘Caesar’s Brother’) | The heart of the spring show, with robust tulips and irises of medium height. |
| Late Spring | Single Late Tulips (e.g., ‘Queen of Night’), Parrot Tulips (e.g., ‘Black Parrot’) | Tall Bearded Iris (e.g., ‘Immortality’), Japanese Iris (Iris ensata) | A grand finale of tall, elegant flowers that bridges spring into early summer. |
Step 3: Flawless Planting Technique
Proper planting is non-negotiable for the health of your plants. All bulbs and rhizomes should be planted in the fall, typically after the first light frost but before the ground freezes solid. This gives them time to establish roots before winter.
First, prepare the entire bed by loosening the soil to a depth of at least 12 inches. Dig individual holes for your tulips, planting them at a depth of 6 to 8 inches. This deeper placement helps them find moisture and anchors their tall stems.
Next, plant your bearded iris rhizomes in the same area, but much shallower. The top of the rhizome should be partially visible at the soil surface. This exposure to the sun is crucial to prevent rot and encourage blooming. Do not bury them deep like a tulip bulb.
Long-Term Care for a Thriving Partnership
Your work does not end after planting day. Proper long-term care throughout the seasons will ensure your iris and tulip garden returns stronger and more beautiful each year. Consistent maintenance is key to a healthy, perennial display.
Establishing good habits for watering, feeding, and post-bloom cleanup will prevent most common problems. A little attention after the flower show is over pays huge dividends the following spring. Before engaging professionals for extensive garden work, it’s helpful to know industry standards; for instance, many people ask, is it legal to charge for an estimate when planning a major landscaping project.
Watering Wisely: The Most Critical Task
This is where your understanding of their different needs truly matters. Water the entire bed deeply after planting in the fall. In the spring, provide consistent water while the tulips are actively growing and blooming.
Once the tulips have finished flowering, significantly reduce watering. Allow the top few inches of the soil to dry out completely between waterings. This dry period is exactly what bearded irises need during the summer to prevent rot and thrive.
Feeding and Fertilizing
Both irises and tulips are not heavy feeders. Over-fertilizing, especially with high-nitrogen fertilizers, can lead to lush foliage at the expense of flowers, and can promote rot in iris rhizomes. A light touch is best.
Apply a granular, low-nitrogen fertilizer, such as one labeled 5-10-10 or even bone meal, in the early spring as new growth emerges. A single application is typically sufficient for the entire season. Avoid direct contact between the fertilizer granules and the iris rhizomes.
Post-Bloom Maintenance for Lasting Health
Once a tulip flower fades, “deadhead” it by snipping off the flower head. This prevents the plant from wasting energy on seed production. Crucially, you must allow the stem and leaves to remain until they turn completely yellow and wither. This is how the bulb stores energy for next year’s bloom.
For irises, cut the entire flower stalk down to its base after the last flower on it has faded. This keeps the plant looking tidy. The green, sword-like leaves should be left in place all season. Every three to four years, bearded iris clumps should be divided in the late summer to rejuvenate them and prevent overcrowding.
Troubleshooting Common Iris and Tulip Problems
Even with careful planning, issues can sometimes arise. Knowing how to identify and solve common problems quickly will keep your garden healthy. Most issues are related to the cultural conditions you provide.
A major garden renovation can sometimes unearth unexpected issues in other parts of your property. It’s not uncommon for a serious plumbing issue, like a kitchen-sink-falling-down, to be discovered while digging or redirecting water flow in the yard.
Problem: My Irises are Mushy or Rotted
This is the most common and serious issue for bearded irises, and the cause is almost always excess moisture. The culprit is either poor soil drainage, planting the rhizomes too deeply, or overwatering. The rhizome will feel soft and may have a foul odor.
To solve this, you must act quickly. Carefully lift the affected rhizome out of the soil. Use a sharp, clean knife to cut away all the soft, rotted portions until you reach firm, healthy tissue. Allow the cut rhizome to cure in a dry, shady spot for a day or two, then replant it in a better-drained location, ensuring the top of the rhizome is at or just below the soil surface.
Problem: Few or No Flowers
A lack of blooms, especially on established plants, can be frustrating. For tulips, this can be due to removing the foliage too early the previous year or planting varieties that are not good for perennializing. Many hybrid tulips are best treated as annuals.
For irises, the most common reasons for not blooming are planting too deeply or too much shade. They need that sun exposure on the rhizome to form flower buds. Overcrowding can also be a cause, which is a sign that it is time to divide the clumps.
Conclusion: A Harmonious Spring Masterpiece
Creating a stunning garden of irises and tulips is not about finding a magic bullet, but about respecting the individual needs of each plant. By understanding their differences in water, soil, and planting depth, you can move beyond common frustrations and achieve spectacular results.
The “layered planting” strategy is your key to success. It allows you to provide the drier surface conditions irises crave while still offering moisture to the deeper-rooted tulips. With careful planning of bloom times and colors, your garden will become a dynamic and breathtaking display of spring’s finest flowers.