Interior Door Gap Fix: Banish Drafts, Light & Noise Now!
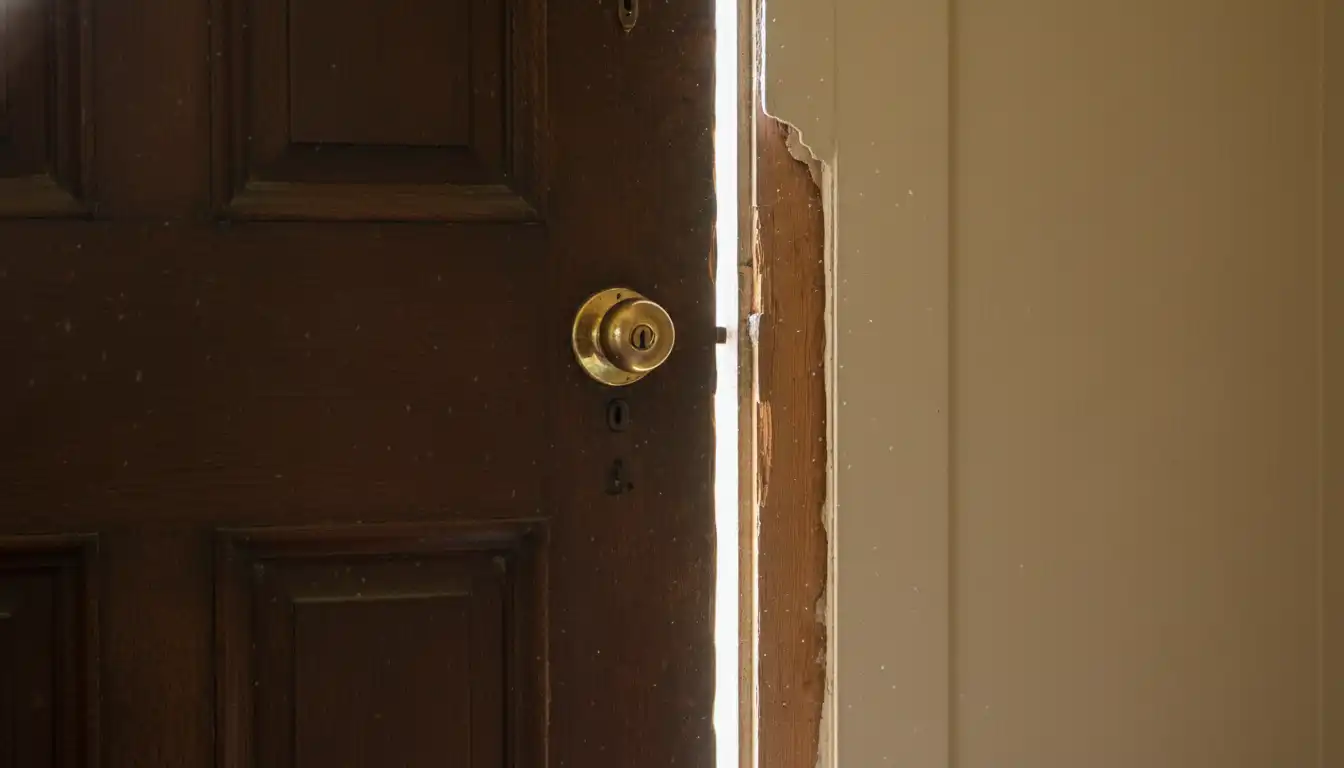
That sliver of light under the bedroom door. The faint sound of conversation drifting in from the living room. An annoying draft that makes a room feel just a little too cool. These are all common household annoyances caused by one simple thing: a gap around an interior door.
While often ignored, these gaps can impact your home’s comfort, privacy, and even energy efficiency. Fortunately, fixing them is one of the most satisfying and straightforward DIY projects you can tackle. This guide will walk you through everything you need to know to diagnose and permanently fix any interior door gap.
You'll Learn About
Why Do Interior Door Gaps Happen in the First Place?
Before jumping to a solution, it’s crucial to understand the root cause of the gap. Gaps around interior doors don’t just appear for no reason. They are usually a symptom of a larger issue, and identifying it is the key to a lasting fix.
The most common culprits include the natural settling of your home, which can cause door frames to become slightly out of square. Seasonal humidity changes are another major factor; wood doors can swell in the summer and shrink in the winter, altering the gaps around them. Other causes can be improper installation or hardware that has loosened over time.
Diagnosing the Type of Gap You Have
Take a close look at the gap. Is it uniform along the top, bottom, or latch side of the door? Or is it tapered, wider at the top and narrower at the bottom (or vice versa)? A tapered gap often points to hinge problems or the house settling, while a uniform gap might be solved with simpler methods.
Knowing the “why” will lead you directly to the correct “how.” A proper diagnosis prevents you from applying a temporary bandage to a problem that needs a more structural solution.
Easy Fixes for Minor and Uniform Door Gaps
If you’re dealing with a consistent, small gap, you’re in luck. These are often the easiest to solve and require minimal tools or expertise. These solutions are perfect for reducing noise, blocking light, and stopping minor drafts between rooms.
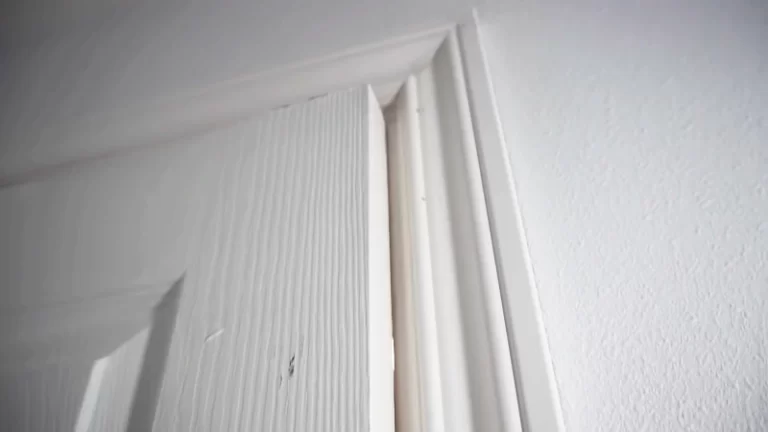
Install Adhesive Foam or Rubber Weatherstripping
Weatherstripping isn’t just for exterior doors. Applying it to an interior door frame is a fast, effective, and inexpensive way to seal gaps. Self-adhesive foam or rubber strips can be applied directly to the door stop—the thin strip of wood inside the frame that the door rests against when closed.
Simply clean the door stop, cut the weatherstripping to length, peel off the backing, and press it firmly into place. When the door closes, the foam compresses to create a tight seal, instantly blocking light and dampening sound. This is an excellent first step for any gap-fixing project.
Attach a Door Sweep for Bottom Gaps
The gap at the bottom of a door is often the largest and most noticeable. A door sweep is a long strip of flexible material, like vinyl or nylon bristles, housed in a metal or plastic carrier that attaches to the bottom of the door. They are incredibly effective at blocking drafts, light, and even dust from passing underneath.
Installation is simple: measure the width of your door, cut the sweep to size with a hacksaw, and attach it to the inside face of the door with the provided screws. Some models are even self-adhesive for a tool-free installation. This is a must-do for home offices or bedrooms where privacy and quiet are essential.
Intermediate Fixes: Adjusting Hardware for a Tighter Fit
When a gap is uneven or wider on one side, it often indicates a problem with the door’s alignment. These issues are typically caused by loose or improperly set hardware. A few simple adjustments can often pull the door back into its correct position, closing the gap without any fillers.
The Hinge-Bending Trick
If you have a small gap on the hinge side of the door, you can often close it by slightly bending the hinge knuckles. To do this, close the door, place the tip of a nailset between the hinge leaves, and gently pull the door closed further to slightly spread the hinge. Alternatively, you can remove the hinge pin and use an adjustable wrench to gently bend the knuckles toward the door stop.
This subtle adjustment pulls the entire door slightly closer to the latch-side jamb, effectively narrowing the gap on that side. It’s a professional trick that can solve many alignment issues in minutes.
The Long Screw Method for Sagging Doors
A tapered gap that is wider at the top of the latch side is a classic sign of a sagging door. This happens when the top hinge pulls away from the door jamb. The fix is surprisingly simple: replace one of the shorter screws in the top hinge with a 3-inch screw.
Remove the screw closest to the center of the door jamb on the top hinge. Drive the new, longer screw in its place. This long screw will go past the jamb and anchor securely into the wall’s framing stud, pulling the entire hinge and the top of the door back toward the frame. This simple action can lift the latch side of the door, evening out the gap instantly.
Shimming the Hinges
If the gap is on the hinge side, you can “push” the door away from the jamb by placing a shim behind a hinge. Unscrew the hinge from the door jamb and place a thin piece of cardboard or a dedicated hinge shim behind it. When you screw the hinge back in, the shim will push the door slightly over, closing the gap on the latch side.
You can add shims to the top, bottom, or both hinges to achieve the perfect alignment. For instance, a shim behind the bottom hinge will push the bottom of the door out and raise the top on the latch side.
| Solution | Best For | Difficulty | Average Cost |
|---|---|---|---|
| Adhesive Weatherstripping | Small, uniform gaps (sides/top) | Easy | $5 – $15 |
| Door Sweep | Gaps at the bottom of the door | Easy | $10 – $25 |
| The Long Screw Method | Sagging doors (gap wider at top) | Easy | Under $5 |
| Shimming Hinges | Uneven gaps on the latch side | Intermediate | Under $5 |
| Adjusting the Strike Plate | Doors that rattle or don’t latch | Intermediate | Free |
| Adding Wood Strips | Large, persistent gaps | Advanced | $15 – $30 |
Advanced Solutions for Large or Stubborn Gaps
Sometimes, simple adjustments aren’t enough. If you’re dealing with a large, unsightly gap that persists after trying other methods, a more hands-on approach may be necessary. These techniques require a bit more effort but provide a permanent, professional-looking finish.
Adjusting the Strike Plate
If your door closes but still rattles in the frame, the gap issue might be at the latch itself. The strike plate is the metal piece on the door jamb that the latch clicks into. If it’s positioned too far from the door stop, the door will remain loose even when latched.
To fix this, you can either move the strike plate or adjust its tab. Many strike plates have a small, bendable tab that can be adjusted with a screwdriver to tighten the connection with the latch. For a more significant adjustment, you can remove the strike plate, fill the old screw holes with wood filler, and reinstall it slightly closer to the door stop.
Adding a Strip to the Door Jamb
For a very large gap on the latch side, the best solution is often to add a thin strip of wood to the door jamb. This effectively makes the door frame smaller, closing the gap for a custom fit. This is a common issue, for example, in a bathroom with two doors where privacy is paramount.
Measure the width and length of the gap. Cut a thin strip of wood to these dimensions, apply wood glue, and tack it onto the door jamb on the latch side. Once the glue is dry, you can sand it, prime it, and paint it to match the existing frame, making the repair virtually invisible.
Maintaining Your Interior Doors for a Gap-Free Home
Once you’ve fixed the gaps, a little preventative maintenance can keep them from returning. Periodically check and tighten the screws on all your door hinges and strike plates, as they can loosen over time with repeated use. Keeping your home’s humidity levels stable can also prevent wood doors from shrinking and swelling excessively.
By addressing interior door gaps, you not only eliminate minor annoyances but also enhance the sense of privacy and comfort in every room. With these straightforward fixes, you can easily achieve a quieter, more secure, and more polished-feeling home.