Insulation Between Brick and Drywall: Your Ultimate Guide
That beautiful, timeless brick wall might be the star of your home’s aesthetic, but it could be the secret villain behind your high energy bills and chilly drafts. Many homeowners with brick properties grapple with a common, often invisible problem: a lack of proper insulation between the exterior brick and the interior drywall. This gap can lead to significant heat loss in the winter and unwanted heat gain in the summer, making your home uncomfortable and expensive to maintain.
The core issue lies in the nature of brick itself. While sturdy and durable, brick is a poor insulator. Without a thermal barrier, the outside temperature easily transfers through the masonry, creating a constant battle for your HVAC system. This article is your comprehensive guide to understanding and solving this critical home improvement challenge, transforming your charming brick house into an energy-efficient sanctuary.
You'll Learn About
Why Your Uninsulated Brick Walls Are Costing You Money
The problem with uninsulated brick walls goes beyond just feeling a draft. It creates a domino effect of issues that impact your comfort, your wallet, and even the structural integrity of your home. Understanding these underlying problems is the first step toward finding the right solution.
The Science of Heat Transfer and Thermal Bridging
Heat naturally moves from warmer areas to cooler areas. In winter, the warmth from your heating system is constantly seeking a way out, and your uninsulated brick walls are like an open door. This process is known as thermal bridging. The brick and the mortar joints act as a bridge for heat to escape directly to the outside.
This means your furnace or boiler has to work much harder to maintain a comfortable indoor temperature, leading to a direct increase in your energy consumption and utility bills. Conversely, during summer, the sun’s heat radiates through the brick, turning your interior into a stuffy, uncomfortable space and forcing your air conditioner to run nonstop. Even indirect sunlight can contribute to this unwanted heat gain, a concept further explored in our passive heating guide.
The Hidden Danger: Moisture and Mold
Perhaps the most significant risk of improperly insulating a brick wall is moisture entrapment. Brick is a porous material, meaning it can absorb and store water. When warm, moist air from inside your home hits the cold surface of the interior side of the brick, condensation can form within the wall cavity.
This trapped moisture has nowhere to go. It creates the perfect breeding ground for mold, mildew, and rot, which can compromise your indoor air quality and lead to serious health issues. Furthermore, this moisture can damage wooden framing members and lead to the deterioration of the brick and mortar itself over time, a problem that can sometimes be exacerbated by issues like a gap between the chimney and house which allows even more moisture to penetrate the building envelope.
Choosing the Right Insulation: A Comparative Guide
Once you’ve decided to tackle the insulation issue, the next crucial step is selecting the right material for the job. Not all insulation types are created equal, especially when it comes to the unique challenges of brick walls. The primary goal is to create a continuous thermal barrier that also effectively manages moisture.
Your choice will depend on your budget, the specific construction of your walls, your climate, and whether you’re taking a DIY approach or hiring a professional. Let’s break down the most common and effective options for insulating between brick and drywall.
Rigid Foam Boards: The Popular Choice
Rigid foam insulation is one of the most highly recommended solutions for interior brick wall applications. It comes in large, sturdy sheets and is typically made from expanded polystyrene (EPS), extruded polystyrene (XPS), or polyisocyanurate (polyiso). These boards offer a high R-value (a measure of thermal resistance) per inch, providing excellent insulation in a relatively thin profile.
One of the key advantages of rigid foam is its ability to act as a vapor barrier. When the seams are properly taped, it can prevent warm, moist indoor air from reaching the cold brick surface, thus preventing condensation. This makes it an all-in-one solution for both thermal control and moisture management.
Spray Foam Insulation: The High-Performance Seal
For a seamless and airtight barrier, spray foam insulation is an excellent, albeit more expensive, option. There are two main types: open-cell and closed-cell. For brick walls, closed-cell spray foam is the superior choice. It expands to fill every crack and crevice, creating an almost perfect air seal that eliminates drafts and thermal bridging.
Crucially, closed-cell spray foam has a very low vapor permeability, meaning it acts as an incredibly effective vapor retarder. It also adds structural rigidity to the wall assembly. However, it is a job best left to professionals, as it requires specialized equipment and safety precautions during installation.
Mineral Wool and Fiberglass Batts: The Traditional Approach
While traditional fiberglass or mineral wool batts are common in standard wood-frame construction, they require careful consideration for brick walls. These materials are cost-effective and easy to install for DIYers, but they do not inherently stop air or vapor movement. If you use batts, it’s absolutely critical to install a separate, continuous air and vapor barrier (like a smart membrane) between the insulation and the interior drywall.
Without a proper vapor barrier, moisture can pass through the batts and condense on the cold brick, leading to saturation, reduced R-value, and the potential for mold and rot. An air gap between the brick and the insulation is also often recommended to allow for some drainage and drying potential.
Comparing Insulation Options for Brick Walls
To help you make an informed decision, here is a breakdown of the key features of each insulation type suitable for application between brick and drywall.
| Insulation Type | Average R-Value per Inch | Moisture Resistance | Installation Complexity | Estimated Cost |
|---|---|---|---|---|
| Closed-Cell Spray Foam | R-6.5 to R-7 | Excellent (acts as vapor barrier) | Professional Only | High |
| Extruded Polystyrene (XPS) Foam Board | R-5 | Good (semi-permeable) | Moderate (DIY-friendly) | Moderate |
| Polyisocyanurate (Polyiso) Foam Board | R-6 to R-6.5 | Good (faced boards act as vapor barrier) | Moderate (DIY-friendly) | Moderate to High |
| Expanded Polystyrene (EPS) Foam Board | R-3.8 to R-4.2 | Fair (more permeable than XPS/Polyiso) | Easy (DIY-friendly) | Low to Moderate |
| Mineral Wool Batts | R-3.7 to R-4.2 | Poor (requires separate vapor barrier) | Easy (DIY-friendly) | Low |
| Fiberglass Batts | R-3.1 to R-3.4 | Poor (requires separate vapor barrier) | Easy (DIY-friendly) | Low |
Step-by-Step Installation Guide
Insulating the interior of a brick wall is a methodical process. While the exact steps may vary slightly based on the insulation type you choose, the general framework involves preparing the wall, creating a frame, installing the insulation, and finishing with drywall. Here is a general overview of the process using rigid foam boards, a common and effective DIY-friendly method.
Step 1: Prepare the Brick Wall
Before you begin, the brick wall must be clean, dry, and in good repair. Inspect the exterior for any cracks in the mortar or issues with flashing that could allow bulk water entry. Water management is crucial; sometimes, issues originate from the top of a structure, necessitating a chimney water diverter or similar solutions to prevent water from running down the masonry. Make any necessary repairs and ensure the wall is completely dry before proceeding.
Step 2: Build the Interior Stud Wall
You will need to build a new interior frame to hold the drywall. This is typically done with 2×4 wood studs or steel studs. It is crucial to leave a small air gap (around 1 inch) between the back of this new stud wall and the face of the brick. This gap provides a capillary break and a drainage plane in case any moisture does find its way through the brick.
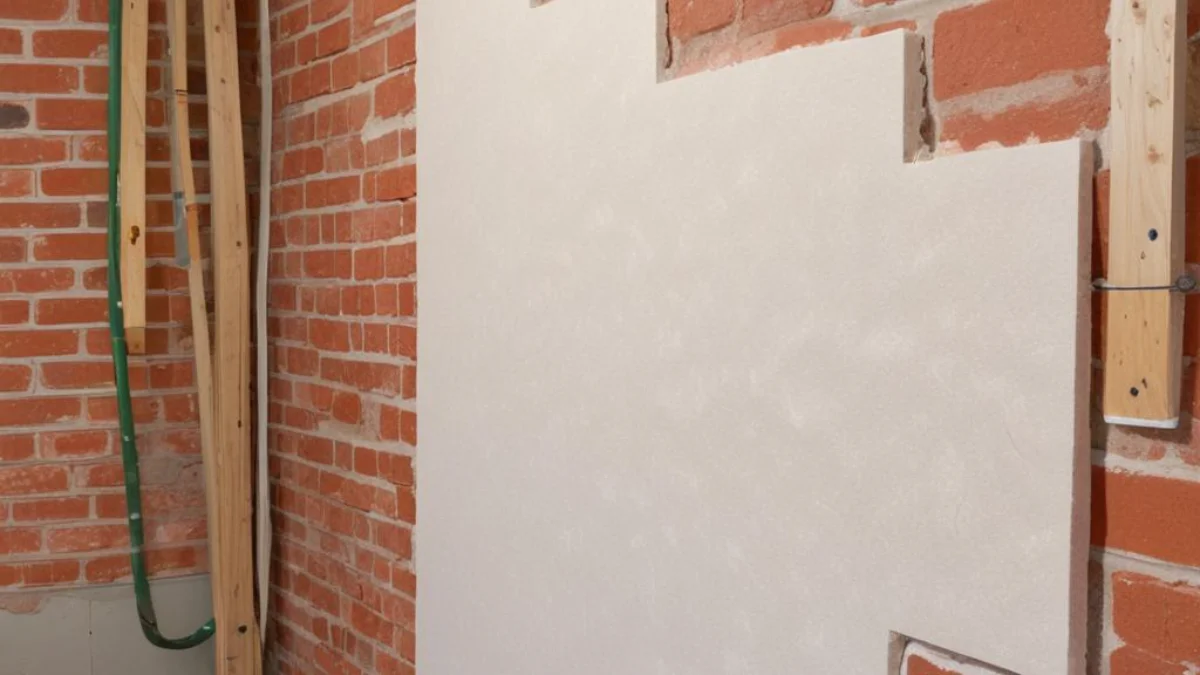
Step 3: Install the Insulation
This is the most critical stage. If using rigid foam boards, cut them to fit snugly against the brick wall, within the stud cavities, or as a continuous layer between the brick and the new framing. A continuous layer of foam board against the brick is the most effective method as it prevents thermal bridging through the studs. Use a high-quality construction adhesive and mechanical fasteners to secure the boards directly to the brick.
Pay meticulous attention to sealing all seams between the foam boards with contractor’s tape specifically designed for this purpose. Also, use canned spray foam to seal any gaps around windows, doors, and electrical outlets. The goal is to create a perfectly continuous and airtight thermal and vapor barrier.
Step 4: Install the Drywall
Once the insulation is in place and all seams and gaps are sealed, you can hang the drywall onto your new stud frame. Screw the drywall sheets to the studs, then tape, mud, and finish the joints as you would with any standard wall. After finishing, you can prime and paint the wall to match your room’s decor.
Common Mistakes to Avoid
While the process is straightforward, a few common errors can undermine the effectiveness of your insulation project and lead to serious problems down the road. Awareness is key to avoiding these pitfalls.
Ignoring Moisture Management
The single biggest mistake is failing to properly manage moisture. This means not only creating a perfect interior vapor barrier but also ensuring the exterior of the brick wall is in good condition and can dry to the outside. Never trap moisture within the wall assembly. Using the wrong type of insulation, or failing to seal your vapor barrier, is a recipe for disaster.
Creating Thermal Bridges
If you simply place insulation batts between the studs of your new wall without a continuous layer of insulation against the brick, the studs themselves will act as thermal bridges. Heat will bypass the insulation and travel through the wood or steel framing. This significantly reduces the overall R-value of your wall system. This is why a continuous layer of rigid foam or spray foam against the brick is the preferred method.
Forgetting Air Sealing
A surprising amount of energy loss comes from air leaks. Simply installing insulation isn’t enough; you must also meticulously air seal. Use caulk, canned spray foam, and high-quality tape to seal every potential leak around the perimeter of the wall, at the top and bottom plates, and around all penetrations. A drafty installation is an inefficient installation.
Is This a DIY Project or Should You Hire a Pro?
Insulating a brick wall can be a DIY project if you are experienced, meticulous, and have a solid understanding of building science, particularly moisture management. Using rigid foam boards and building a stud wall is within the capabilities of a skilled homeowner.
However, if you are unsure about any step, especially regarding vapor barriers and air sealing, it is highly recommended to consult with a professional. A building science expert or a qualified insulation contractor can assess your specific situation and recommend the best course of action. For spray foam insulation, hiring a certified professional is non-negotiable due to the health risks and specialized equipment involved.
Investing in proper insulation between your brick and drywall is one of the most effective upgrades you can make to an older home. It not only drastically improves comfort and reduces your energy bills but also protects the long-term health of your home’s structure. By choosing the right materials and focusing on a meticulous, airtight, and moisture-proof installation, you can finally enjoy the timeless beauty of your brick walls without compromising on modern energy efficiency.