Insulating Keter Shed: Stop Your Plastic Nightmare Now!
Keter sheds are a fantastic solution for backyard storage. They are affordable, easy to assemble, and require minimal maintenance. However, they possess a significant flaw: their thin resin walls offer virtually no protection from the elements, turning them into scorching hot boxes in the summer and freezing cold chambers in the winter.
This extreme temperature fluctuation leads to the number one enemy of any shed owner: condensation. The constant battle with dripping walls, dampness, and the resulting mold, mildew, and rust can quickly ruin your stored belongings. This guide provides a comprehensive, step-by-step solution to transform your Keter shed from a glorified plastic tent into a stable, protected, and usable space year-round.
You'll Learn About
Why Your Keter Shed Feels Like an Oven (or a Freezer)
The core of the problem lies in the material. The resin panels of a Keter shed have a very low thermal resistance, commonly known as R-value. This means heat passes through them with almost no opposition. In summer, the sun’s rays heat the dark-colored plastic, creating a greenhouse effect that can make the interior dangerously hot for storing sensitive items like paint, electronics, or even gardening supplies.
In winter, the opposite occurs. The minimal insulation allows any warmth to escape instantly, causing the interior temperature to plummet. When warmer, moist air (either from outside or from items stored inside) comes into contact with these ice-cold plastic surfaces, the moisture condenses into water droplets. This persistent dampness is what leads to rusty tools, warped wood, and destructive mold growth.
Before You Insulate: The Crucial First Steps No One Talks About
Many guides jump straight into choosing an insulation type, but without proper preparation, your efforts will be wasted. A successful insulation project relies on a solid foundation. Skipping these preliminary steps is the most common reason for failure.
Step 1: Deep Clean and Degrease
Insulation is typically attached with adhesives, which will not bond to dirty surfaces. The interior plastic walls of a shed accumulate dust, grime, and oily residues over time. You must thoroughly clean every square inch of the interior walls and ceiling with a strong degreasing cleaner or soap and hot water. Let the shed air out and dry completely before proceeding.
Step 2: Become a Gap Detective
Your Keter shed is assembled from multiple panels, and every seam, joint, and connection point is a potential air leak. These gaps undermine your insulation efforts by allowing drafts and moisture to penetrate. Seal all gaps meticulously. Use a high-quality, weatherproof silicone caulk to seal the joints between wall panels, around the base of the shed, and where the walls meet the roof. Check the seals around doors and windows and apply new weatherstripping if needed.
Step 3: Assess Your Foundation and Floor
A significant amount of moisture can seep up from the ground, especially if your shed sits on a simple slab or directly on the soil. If your shed is on a concrete pad, consider applying a concrete sealant to block moisture from wicking upwards. Ensuring your shed’s base is level and has proper drainage around it is also a critical, often-overlooked step in moisture control.
Choosing Your Weapon: The Best Insulation for a Plastic Shed
Not all insulation is suitable for a frameless plastic shed. The right choice depends on your climate, budget, and DIY comfort level. Avoid materials like fiberglass batts, which require a wooden frame for support and can trap moisture, leading to mold.
Here is a comparison of the most effective options for a Keter shed:
| Insulation Type | Approx. R-Value (per inch) | Pros | Cons | Best Use Case |
|---|---|---|---|---|
| Polyisocyanurate (Polyiso) Rigid Foam | R-6.0 to R-6.5 | Highest R-value; foil-faced acts as radiant barrier. | More expensive; foil facing can be damaged. | Best overall performance for walls and roof in all climates. |
| Extruded Polystyrene (XPS) Rigid Foam | R-5.0 | Highly moisture resistant; durable and easy to cut. | Lower R-value than Polyiso; flammable without a fire barrier. | Excellent for floors and high-moisture areas. |
| Foil-Faced Bubble Wrap (Radiant Barrier) | R-1.0 (plus radiant effect) | Easy to install; excellent at reflecting summer heat. | Low thermal resistance; less effective against cold. | Hot climates or as a supplementary layer with foam board. |
| Closed-Cell Spray Foam | R-6.0 to R-7.0 | Creates a perfect air seal; high R-value. | Expensive; messy application; can warp thin plastic walls if over-applied. | Experienced DIYers aiming for maximum sealing and insulation. |
The Champion: Rigid Foam Boards (Polyiso & XPS)
For most Keter shed projects, rigid foam board is the undisputed champion. It offers a fantastic balance of high R-value, moisture resistance, and ease of installation. Polyiso boards, with their foil facing, provide the added benefit of a radiant barrier, which is excellent for reflecting heat in the summer.
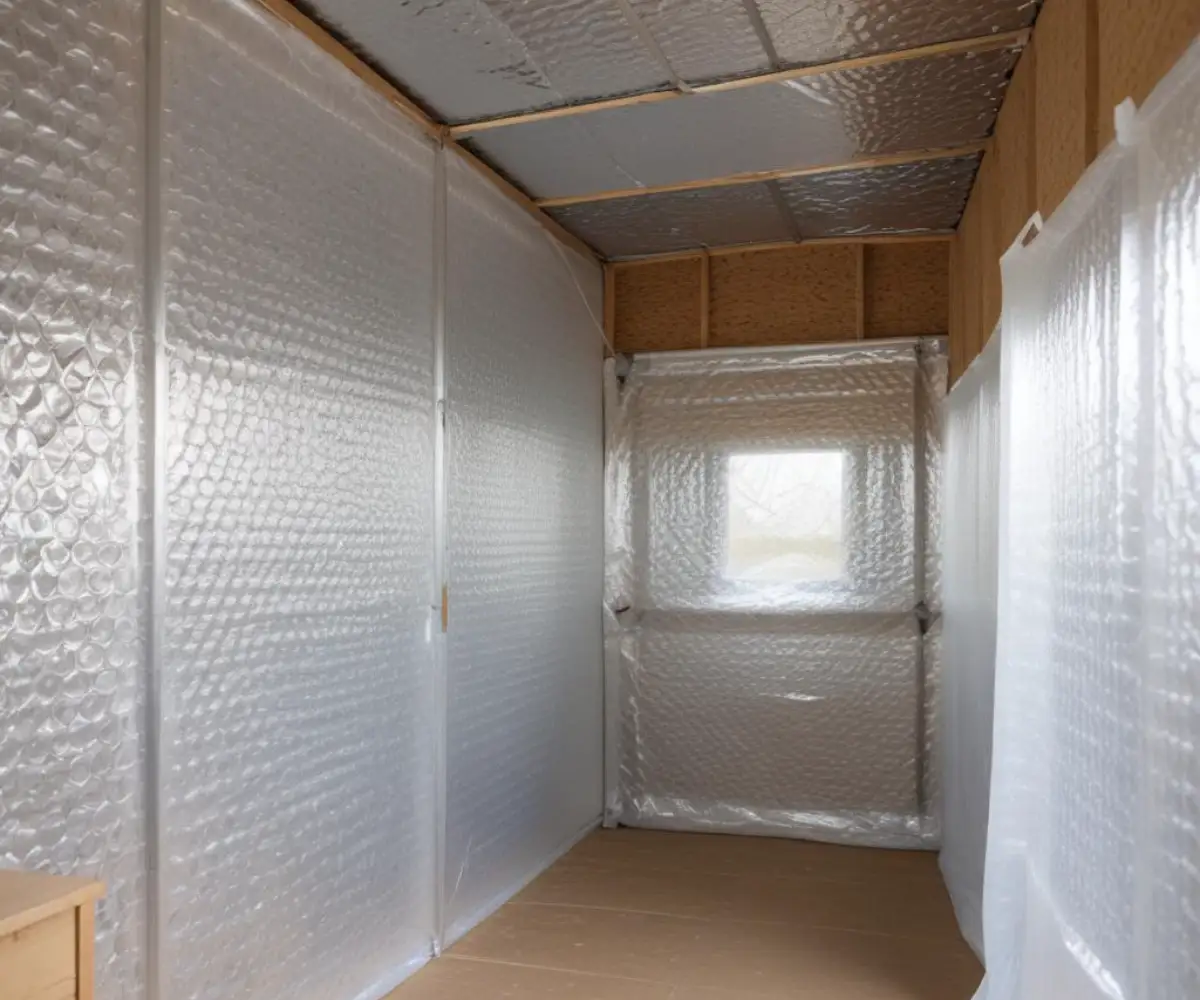
The Quick Fix: Foil Bubble Wrap (Radiant Barrier)
If your primary concern is intense summer heat, a radiant barrier is a cost-effective and simple solution. Foil-faced bubble wrap is lightweight and can be easily attached with heavy-duty double-sided tape. While it doesn’t provide significant thermal insulation against cold, it excels at blocking radiant heat.
The Pro’s Choice: Closed-Cell Spray Foam
For those seeking the absolute best seal and R-value, closed-cell spray foam is an option. However, it requires careful application. The foam expands with significant force and can easily bow or warp the thin resin panels of a Keter shed. This method is best left to those with prior experience.
The Ultimate Step-by-Step Installation Guide
This guide will focus on installing rigid foam boards, the most recommended method for Keter sheds.
Tools and Materials Checklist
- Rigid foam insulation boards (Polyiso or XPS, 1-inch or 1.5-inch thickness)
- Tape measure
- Straight edge and utility knife (with extra blades)
- Caulking gun with weatherproof silicone
- Construction adhesive rated for foam and plastic (e.g., Loctite PL 300)
- Foil insulation tape
- Safety glasses and gloves
Phase 1: Conquering the Walls
Start with the walls. Carefully measure each panel section of your shed’s interior. Keter sheds often have recessed panels and support channels, so measure each flat area you intend to cover.
Transfer these measurements to your foam board and cut it to size using a sharp utility knife and a straight edge. The goal is a snug fit that requires minimal adhesive to hold. Apply the construction adhesive to the back of the foam panel in an “S” pattern, then press it firmly into place on the clean shed wall. Repeat this process for all wall sections.
Phase 2: Mastering the Roof
The roof is the most critical area for preventing heat gain in the summer. The process is the same as the walls, but you will need to make more angled cuts to fit the roof panels and gables. It is crucial to work safely on a stable ladder.
Once all foam boards are in place on the walls and ceiling, the final, critical step is to tape all the seams between the boards with foil insulation tape. This creates a continuous air and vapor barrier, preventing drafts and moisture from getting behind the insulation. Do not skip this step.
Phase 3: Fortifying the Floor
An uninsulated floor is a major source of cold and dampness. Lay down rigid XPS foam boards directly onto the shed floor, cutting them to fit tightly. You can then cover the foam with a layer of plywood or interlocking rubber mats to create a durable, insulated surface. If you are building a wooden subfloor over a concrete base, you might consider using specialized fasteners. Understanding how strong Tapcon screws are can be vital for securing the frame effectively.
Phase 4: Don’t Forget the Door!
The shed door is often overlooked. Use the leftover pieces of foam board to insulate the flat panels of the door. This final touch helps ensure a completely sealed and insulated environment.
The Secret to a Dry Shed: Why Ventilation is Non-Negotiable
You have now created a tightly sealed, insulated box. While this is great for temperature control, it can trap moisture generated from the air, the ground, or even damp items you store. Without an escape route, this moisture will condense. Proper ventilation is an essential part of the insulation system.
The solution is to install passive vents. The most effective strategy is to place one vent low on one wall and another vent high on the opposite wall. This encourages natural convection, allowing cool, dry air to enter through the bottom vent while warm, moist air exhausts through the top. Small, screened gable vents or circular soffit vents are inexpensive and easy to install.
For ultimate protection against moisture and pests in your newly dry environment, maintaining a pest-free space is key. Exploring professional services can offer peace of mind, and reading through Orkin Dryzone reviews may provide insights into comprehensive moisture and pest control solutions.
Beyond Insulation: Taking Your Shed to the Next Level
With your shed now insulated, you can consider further upgrades. You can cover the insulation with thin plywood or hardboard panels to give the interior a finished look and provide a solid surface for hanging hooks and shelves.
You can also now efficiently heat or cool the space. A small electric space heater or a portable air conditioner will be far more effective. If you plan to add power, a key question becomes how to supply it. For homeowners facing the issue of no outlets outside the house, running a properly buried electrical line is a common project to power a shed for lights and tools.
Frequently Asked Questions (FAQ)
How much does it cost to insulate a Keter shed?
The cost varies based on shed size and insulation type. For a standard 8×6 shed using 1-inch rigid foam board, you can expect to spend between $150 and $300 on insulation, adhesive, and tape.
How much warmer/cooler will my shed be?
A properly insulated and ventilated shed can be 20-30°F cooler in the summer and significantly warmer in the winter compared to an uninsulated one. The primary benefit is the stabilization of temperature, which prevents the extreme spikes that cause condensation.
Can I use spray foam from a can to insulate?
Canned spray foam is excellent for sealing gaps during the preparation phase. However, it is not practical or cost-effective for insulating the entire shed. Its expansion can also be difficult to control on thin plastic panels.
Will insulating my Keter shed void the warranty?
Using non-damaging methods like adhesive to attach foam boards is unlikely to void the warranty. However, cutting large holes for vents or custom windows might. It’s always best to check the manufacturer’s terms and conditions if you are concerned.
By investing a weekend and following these steps, you can solve the inherent flaws of a standard Keter shed. You will protect your valuable tools and equipment from damage, eliminate condensation and mold, and create a functional, comfortable space that you can use all year long. Stop letting the weather dictate your shed’s usefulness and reclaim your backyard storage.