Husk Stain: Your Secret to a Flawlessly Natural Wood Finish
Achieving a wood finish that is both elegant and earthy can feel like a daunting task. You want a color that highlights the natural grain without overpowering it, a tone that feels warm and inviting. This is the core challenge for many homeowners and DIY enthusiasts.
The perfect stain should offer a timeless look that complements a wide range of decor and landscaping styles. Finding that ideal balance often leads to confusion and unsatisfactory results. Enter husk stain, the versatile solution to this common design dilemma.
You'll Learn About
What Exactly Is Husk Stain? Understanding the Appeal
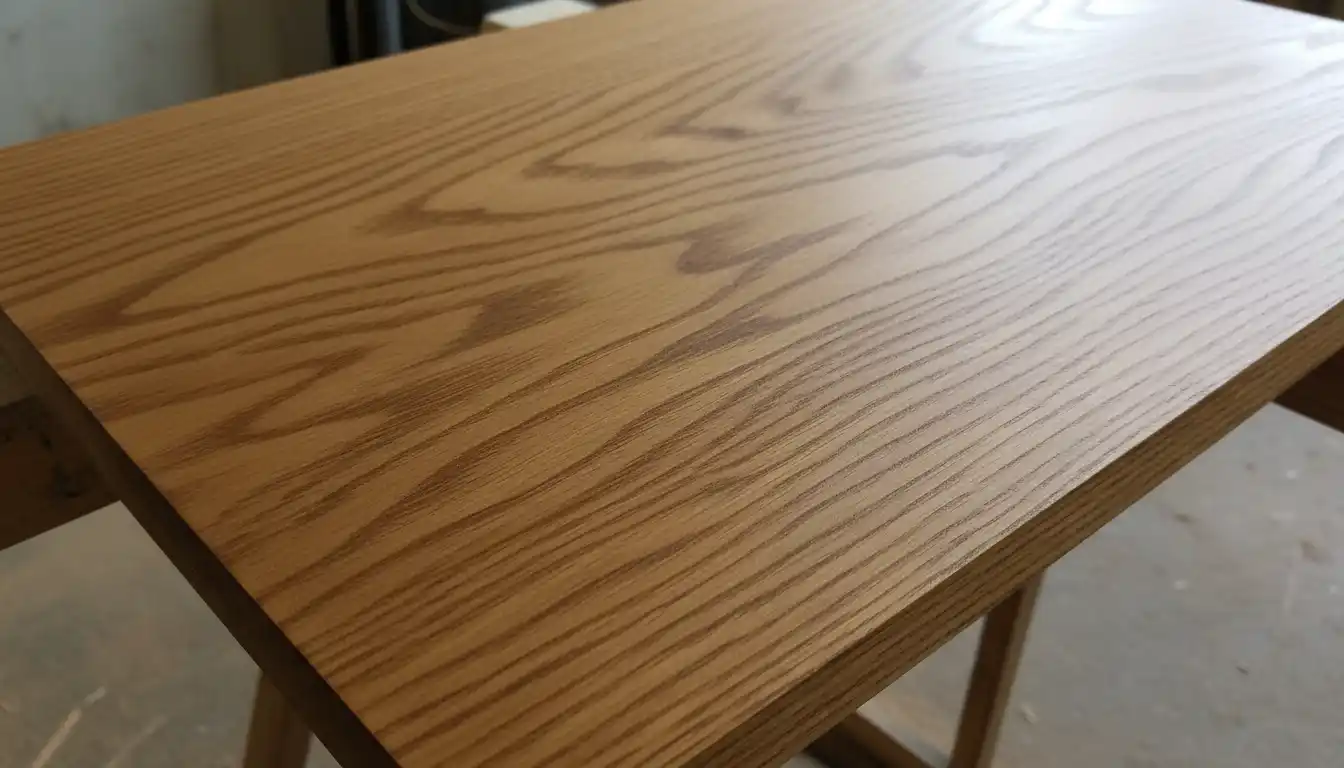
Husk stain is not a type of stain, but rather a specific color profile that has become increasingly popular. It is best described as a rich, medium-to-dark brown with warm, earthy undertones. Think of the natural, muted brown of a dried corn husk or the shell of a coconut.
Its primary appeal lies in its neutrality and warmth. Unlike stains with strong red or orange tones, husk provides a sophisticated, organic look. This makes it an incredibly versatile choice for countless home and garden projects.
The Unique Versatility of an Earth-Toned Palette
The true power of husk stain is its ability to adapt. On light woods like pine or poplar, it can produce a warm, medium-brown that beautifully accentuates the grain. On darker woods like oak or mahogany, it deepens the existing color, adding a layer of richness and complexity.
This chameleon-like quality allows it to bridge different design elements within a space. It creates a cohesive look that feels intentional and professionally designed, tying together furniture, flooring, and outdoor structures.
Why Husk Stain is the Perfect Choice for Your Home and Garden
Choosing the right stain color is critical for the success of any project. A husk stain offers a unique combination of aesthetic appeal and practicality that makes it a superior option for a wide variety of applications, both inside and outside the home.
From outdoor decks to interior furniture, its warm, natural tone enhances wood’s beauty while seamlessly blending with its surroundings. This creates a harmonious connection between your living spaces and the natural world.
Enhancing Your Garden and Outdoor Living Spaces
In a garden setting, a husk stain is unparalleled. It provides a beautiful finish for decks, pergolas, and fences that complements the greens of foliage and the colors of blooming flowers. It makes wooden structures feel like a natural extension of the landscape.
Consider how it can transform the look of a simple wooden fence. The earthy tone provides a stunning backdrop for plants and can make the entire boundary feel more organic and less obtrusive. This is especially effective when you are focused on creating clean lines with features like manicured garden edging.
Bringing Warmth and Sophistication Indoors
Inside the home, husk stain adds a touch of rustic elegance. It is an excellent choice for refinishing furniture, staining cabinetry, or finishing interior trim and beams. It creates a cozy, inviting atmosphere that never goes out of style.
Its ability to work with various wood species makes it a go-to for DIY furniture flippers and restoration projects. Even older items with wooden components, much like a vintage piece of outdoor equipment, can be given a new, sophisticated life with a carefully applied coat of husk stain.
Surface Preparation: The Foundation of a Flawless Finish
The most beautiful stain in the world will fail if the wood surface is not properly prepared. Proper preparation is not optional; it is the single most important factor in achieving a professional-looking, even finish. Skipping these steps will lead to blotchiness and disappointment.
Your goal is to create a clean, smooth, and uniform surface that is ready to accept the stain evenly. This involves a multi-step process of cleaning, sanding, and conditioning the wood before a single drop of stain is ever applied.
Step 1: Thorough Cleaning and Stripping
Begin by cleaning the wood surface thoroughly to remove any dirt, grime, or oils. A simple solution of mild soap and water is often sufficient for new wood. For older pieces, you may need a dedicated wood cleaner.
If the wood has an existing finish, you must remove it completely. This may require chemical strippers or extensive sanding. Ensuring all previous paint or varnish is gone is crucial, a process that requires the same attention to detail as when you tackle delicate cleanup jobs on other surfaces.
Step 2: The Art of Sanding
Sanding smooths the wood and opens its pores to accept the stain. Start with a medium-grit sandpaper (like 120-grit) and work your way up to a finer grit (such as 220-grit). Always sand in the direction of the wood grain to avoid creating visible scratches.
After sanding, it is absolutely essential to remove all sanding dust. Use a vacuum with a brush attachment, followed by a tack cloth, to ensure the surface is perfectly clean. Any remaining dust will get trapped in the stain and create a rough, gritty finish.
Step 3: The Non-Negotiable Pre-Stain Conditioner
Applying a pre-stain wood conditioner is the secret to an even, blotch-free finish, especially on soft woods like pine, fir, and maple. These woods are notorious for absorbing stain unevenly, creating dark, unattractive blotches. Conditioner partially seals the wood, forcing the stain to absorb more uniformly.
Apply the conditioner according to the manufacturer’s instructions. Typically, you apply a liberal coat, let it penetrate for 5-15 minutes, and then wipe off any excess. You must then apply your husk stain within the timeframe specified by the conditioner’s instructions, usually within two hours.
A Step-by-Step Guide to Applying Husk Stain
With your surface perfectly prepared, you are ready for the transformative step of applying the stain. Work in a well-ventilated area, and protect your floors and surrounding surfaces from drips. Patience and proper technique are key to success.
Gather your materials before you begin: your husk stain, high-quality natural bristle brushes or lint-free rags, protective gloves, and clean rags for wiping off excess. Stir the stain thoroughly to ensure the pigments are evenly distributed.
Application and Absorption
Apply the stain liberally in the direction of the wood grain using your brush or rag. Work in manageable sections to maintain a wet edge and prevent lap marks. The goal is to get an even coat onto the surface.
Allow the stain to penetrate the wood for the time recommended by the manufacturer, typically between 5 and 15 minutes. The longer you leave the stain on, the darker and richer the color will be. For a lighter husk tone, wipe it off sooner.
The Crucial Wiping Stage
After the penetration time has elapsed, use a clean, lint-free rag to wipe off all the excess stain. Wipe with the grain, not against it. This is a critical step; any stain left to dry on the surface will become a tacky, sticky film that ruins the finish.
Continue wiping with clean rags until the surface is no longer wet and the rag comes away nearly clean. The final color is determined by the stain that has been absorbed into the wood fibers, not the stain sitting on top of it.
Drying, Recoating, and Sealing
Allow the stain to dry completely according to the product’s directions, which can be anywhere from 4 to 24 hours. If you desire a deeper color, you can apply a second coat after the first is fully dry. Remember to wipe off the excess on the second coat as well.
Once you are satisfied with the color, you must protect the stained wood with a clear topcoat. For indoor projects, polyurethane or lacquer are excellent choices. For outdoor projects, use a spar urethane or a deck sealer with UV protection to prevent fading and weather damage.
Troubleshooting Common Staining Problems
Even with careful preparation, issues can sometimes arise. Understanding the cause of common problems makes them much easier to fix. Most issues relate directly back to surface preparation or application technique.
The table below outlines some of the most frequent problems encountered when using wood stain and provides clear, actionable solutions to correct them. Referencing this can save you from a great deal of frustration.
| Problem | Likely Cause | Solution |
|---|---|---|
| Blotchy, Uneven Color | Failure to use pre-stain wood conditioner, especially on soft woods. | Sand the surface back to bare wood, apply pre-stain conditioner, and re-stain. |
| Lap Marks or Dark Lines | Stain was allowed to dry before wiping, or the applicator did not maintain a “wet edge” between sections. | Apply another coat of stain to the entire surface to re-wet the dried stain, then wipe everything off evenly. On stubborn spots, a rag dampened with mineral spirits can help blend the lines. |
| Sticky or Tacky Surface | Excess stain was not wiped off and was left to dry on the surface. | Use a rag lightly dampened with mineral spirits to wipe the surface. This will dissolve the excess sticky stain. Use a clean, dry rag to immediately wipe the surface clean. |
| Color is Too Light | Stain was wiped off too soon, or not enough stain was applied. | Wait for the first coat to dry completely, then apply a second coat, allowing it to penetrate longer before wiping off the excess. |
| Visible Swirls or Scratches | Sanding against the grain or using sandpaper that was too coarse. | The project must be sanded down to bare wood again. Ensure you sand only in the direction of the grain and progress to a fine grit (220) before staining. |
Long-Term Care for Your Husk-Stained Wood
Your project is complete, and the finish is beautiful. To keep it looking that way, proper maintenance is key. The care routine will differ significantly between indoor and outdoor applications.
Protecting your work from moisture, sunlight, and physical wear will ensure the rich husk color remains vibrant for years to come. A little preventative care goes a long way.
Maintaining Interior Pieces
For indoor furniture, cabinetry, and trim, maintenance is relatively simple. Dust regularly with a soft cloth. For cleaning, use a mild wood cleaner and avoid harsh, abrasive chemicals that can damage the topcoat.
Place coasters under drinks and use placemats on tables to prevent water rings and heat damage. If the topcoat becomes scratched or worn over time, you can lightly sand the surface and apply a fresh coat of polyurethane to restore its protection.
Protecting Exterior Wood
Exterior wood is exposed to harsh elements, including UV rays, rain, and temperature fluctuations. An annual inspection is crucial for decks, fences, and outdoor furniture. Look for signs of wear, such as peeling, cracking, or graying wood.
Most exterior projects will need a fresh coat of sealant every 1-3 years. Clean the surface thoroughly with a deck cleaner, let it dry completely, and then apply a new coat of a high-quality outdoor sealer. This will refresh the finish and restore its protective qualities.
Conclusion: Elevate Your Home with the Beauty of Husk
Husk stain offers more than just a color; it provides a feeling of warmth, nature, and timeless elegance. Its incredible versatility makes it a perfect choice for nearly any project, capable of transforming mundane wood into a stunning feature.
By understanding the importance of meticulous preparation, proper application techniques, and long-term maintenance, you can confidently use husk stain to achieve a flawless, professional-grade finish that will enhance the beauty of your home and garden for many years.