How to Set Fence Posts in Bedrock Without Losing Your Mind
You’ve meticulously planned your new fence line, bought the materials, and are ready to start digging. Then you hit it—solid, unforgiving bedrock just inches below the surface. This common frustration can bring any fencing project to a grinding halt, turning what should be a straightforward task into a monumental challenge. The usual advice of digging deeper simply doesn’t apply when you’re up against solid rock.
Hitting bedrock is more than just an inconvenience; it threatens the very stability of your fence. Without a proper anchor, your posts will be weak, susceptible to wind, and unable to provide the security or privacy you need. But don’t despair—this is a solvable problem. With the right tools, techniques, and a bit of patience, you can create an incredibly sturdy foundation for your fence directly into the bedrock itself.
This comprehensive guide will walk you through several effective methods for setting fence posts in bedrock. We’ll explore everything from heavy-duty drilling to using specialized anchors, ensuring your fence stands strong for years to come, regardless of the rocky ground beneath.
You'll Learn About
Understanding the Challenge: Why Bedrock is a Problem
Standard fence post installation relies on digging a hole deep enough—typically one-third the height of the post—to provide stability against lateral forces like wind or leaning. This depth is crucial for creating a solid footing, especially when set in concrete. In many regions, this hole also needs to extend below the frost line to prevent “frost heave,” where frozen moisture in the ground pushes posts upward and out of alignment.
When you encounter bedrock near the surface, achieving this necessary depth becomes impossible with standard digging tools. You’re left with a shallow hole that offers no real support. A post simply placed on top of rock with a shallow concrete collar will easily be pushed over, making your fence flimsy and unreliable.
The Goal: Anchoring, Not Just Digging
The solution shifts from digging a deep hole to creating an unmovable anchor directly into the rock. Instead of relying on the weight and friction of surrounding soil, you’ll be leveraging the immense strength of the bedrock itself. This requires a different set of tools and a more precise approach, but the result can be even more stable than a traditional post installation.
Properly anchored, your fence posts become an extension of the solid rock, creating a foundation that won’t budge. This is essential for ensuring the longevity of your fence and for projects that require maximum strength, such as those in high-wind areas or when building a very tall privacy fence.
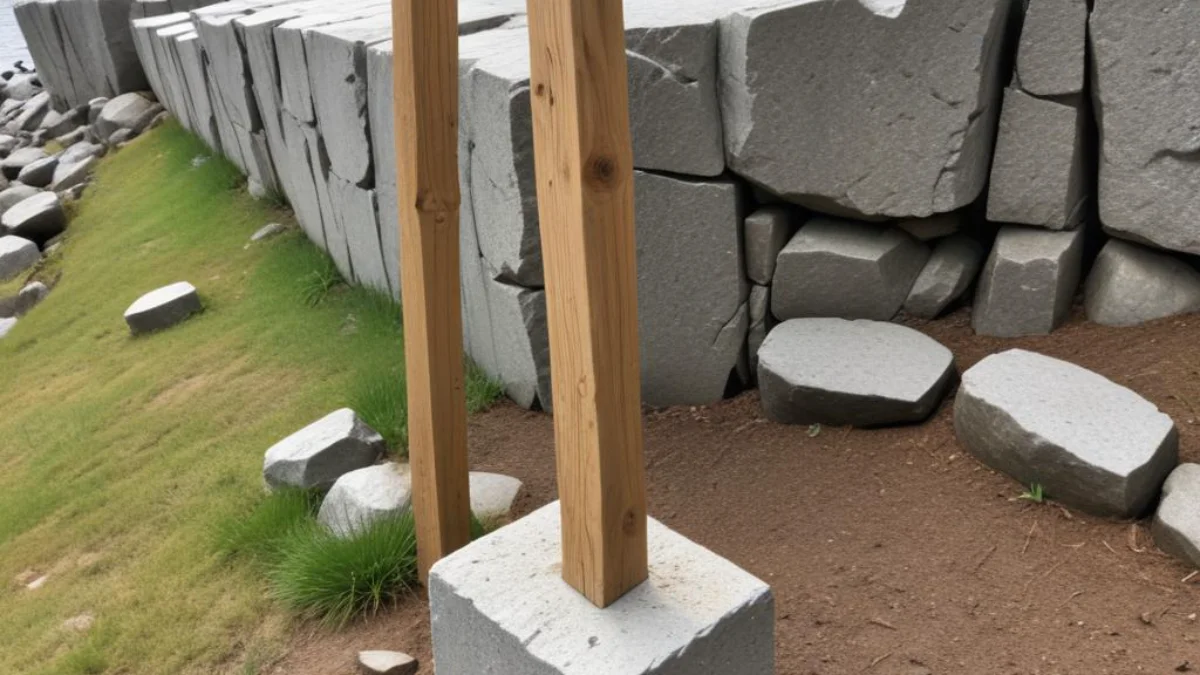
Method 1: The Core Drill and Hydraulic Cement Technique
This is one of the most robust and reliable methods for setting posts in solid rock. It involves drilling a clean, precise hole into the bedrock and securing the post with a specialized anchoring cement that expands as it cures, creating an incredibly tight bond.
Tools and Materials You’ll Need:
- Rotary Hammer Drill or Core Drill: A standard power drill won’t be sufficient. You need the power of a rotary hammer with a masonry bit or a dedicated core drill to penetrate bedrock effectively. These can often be rented from local tool suppliers.
- Masonry Bit/Core Bit: The diameter should be 1-2 inches larger than the diameter of your fence post (for wooden posts) or slightly larger than the post itself for metal posts.
- Hydraulic Cement (or Anchoring Cement): This material sets very quickly, even in the presence of water, and expands as it cures to lock the post in place.
- Shop Vacuum or Compressed Air: To thoroughly clean the drilled hole.
- Level, Shovel, and Mixing Bucket.
Step-by-Step Instructions:
1. Mark Your Post Location: Precisely mark the center of where your post will go directly onto the rock surface using spray paint or a marker.
2. Drill the Hole: Using the rotary hammer or core drill, begin drilling into the bedrock at your mark. This is the most critical and labor-intensive step. Apply steady pressure and let the tool do the work. The ideal depth is between 18 and 24 inches, but even a solid 12 inches into bedrock can provide substantial holding power.
3. Clean the Hole Thoroughly: This step is crucial for a strong bond. Use a shop vacuum or compressed air to remove all rock dust, debris, and water from the hole. Any loose material will weaken the cement’s grip.
4. Mix the Hydraulic Cement: Follow the manufacturer’s instructions carefully. Hydraulic cement has a very short working time, often just a few minutes, so only mix what you can use immediately for one post.
5. Set the Post: Place your post into the drilled hole. Use a level to ensure it is perfectly plumb (vertically straight). Pour the mixed hydraulic cement into the hole, filling the space around the post. Brace the post securely so it cannot move while the cement cures.
Method 2: Using Metal Post Anchors and Epoxy
If you prefer not to set a wooden post directly into concrete or cement, or if you only have a shallow layer of soil over the bedrock, using a metal post anchor is an excellent alternative. This method anchors a sturdy metal bracket into the rock, to which you then attach your wooden post.
Tools and Materials You’ll Need:
- Rotary Hammer Drill: For drilling smaller, precise holes for the anchor bolts.
- Masonry Bit: Sized to match the requirements of your chosen post anchor.
- Metal Post Base/Anchor: Choose a heavy-duty anchor (like a Simpson Strong-Tie) designed for concrete or rock applications.
- Anchoring Epoxy or Adhesive: A two-part epoxy adhesive provides a powerful, chemical bond for securing the anchor’s bolt or rebar.
- Wire Brush and Compressed Air: For cleaning the drilled hole.
- Wedge Anchors or Threaded Rod.
Step-by-Step Instructions:
1. Position the Anchor: Place the metal post base on the bedrock at the exact desired location and mark the positions of the bolt holes.
2. Drill the Anchor Holes: Using the rotary hammer and the appropriately sized masonry bit, drill holes into the bedrock to the depth specified by the anchor or epoxy manufacturer.
3. Clean the Holes: Use a wire brush to scour the inside of the holes, then blow them out completely with compressed air. A clean surface is essential for the epoxy to form a strong bond.
4. Install the Anchor: Fill the holes about two-thirds full with anchoring epoxy. Insert the threaded rod or the anchor bolt into the hole with a slight twisting motion to ensure full coverage. Position the metal base over the bolts and secure it.
5. Let it Cure: Allow the epoxy to cure completely according to the manufacturer’s directions. This can take anywhere from a few hours to a full day. Once cured, you can attach your wooden fence post to the bracket using lag screws or bolts. This approach can be very effective for many projects, much like understanding how to handle a post on pipe fence posts for different terrain.
Method 3: The Plate and Pin Technique for Surface Bedrock
When bedrock is at or very near the surface, especially on a slope, drilling a deep hole may not be practical. In this case, you can mount a steel plate directly to the rock surface and weld a steel post or a bracket for a wooden post onto it.
Step-by-Step Instructions:
1. Prepare the Plate: Start with a thick steel plate, at least 1/4-inch thick and large enough to provide a stable base (e.g., 8×8 or 10×10 inches). A metal post or a post bracket can be pre-welded to the center of this plate.
2. Drill Anchor Holes in the Rock: Place the plate on the rock and mark where you will drill for the anchor bolts, typically one at each corner.
3. Secure with Wedge Anchors: Drill holes for wedge anchors or use an epoxy system as described in Method 2. Secure the plate firmly to the rock. This method provides excellent stability, a key consideration similar to when you need to how to protect corner house from cars with sturdy barriers.
This method spreads the load over a wider area and is particularly useful on uneven or sloped rock surfaces where getting a single hole perfectly vertical would be challenging. The stability of your fence is paramount, just as the right insulation is for your home; considering the is r11 insulation good for a garage r value guide can make a big difference in comfort and energy savings.
Comparing the Methods: Which is Right for You?
Choosing the best method depends on your specific situation, including the type of bedrock, the tools you have available, and the type of fence you are building.
| Method | Best For | Pros | Cons |
|---|---|---|---|
| Core Drill & Hydraulic Cement | Solid, relatively flat bedrock where a deep, clean hole is possible. Ideal for heavy-duty privacy or security fences. | Extremely strong and durable; post is directly embedded for maximum stability. | Requires powerful, specialized tools (core drill); very labor-intensive. |
| Metal Anchors & Epoxy | Situations with shallow soil over bedrock or for keeping wood posts out of direct ground/concrete contact. | Protects wood posts from rot; allows for easier post replacement if damaged. | Strength depends on the quality of the anchor and epoxy; multiple anchor points are needed for best results. |
| Plate and Pin Technique | Exposed bedrock at the surface, especially on sloped or uneven ground. | Excellent for irregular surfaces; spreads the load effectively. | Requires welding or custom fabrication of the plate and post assembly; may be more visually prominent. |
Final Tips for Success
Safety First: Always wear appropriate safety gear, including safety glasses, hearing protection, and heavy-duty gloves when drilling into rock. Rock chips can fly with significant force.
Rent, Don’t Buy: For most DIYers, renting heavy-duty equipment like a rotary hammer or core drill is far more cost-effective than purchasing it for a single project.
Cleanliness is Key: No matter which method you choose, the strength of your installation depends on a clean hole free of dust and debris. Take the extra time to clean the holes properly before applying cement or epoxy.
Building a fence on bedrock is a test of patience and preparation. While it requires more effort and specialized tools than a standard installation, the result is a fence that is literally rock-solid. By choosing the right method and following these steps carefully, you can overcome the challenge of rocky terrain and build a fence that will last a lifetime.