How to Seal Garage Floor Edges: The Ultimate Guide
You’ve meticulously coated your garage floor. It looks pristine, durable, and ready to handle anything. But then you notice it—the edges. Those tricky areas where the floor meets the wall, the small gaps, and the uneven lines that threaten to undo all your hard work. How to seal garage floor edges is a question that plagues many DIY enthusiasts, but ignoring it can lead to peeling, chipping, and moisture damage.
An unsealed edge is more than just a cosmetic issue. It’s an open invitation for moisture, dirt, and debris to get underneath your new coating, causing it to fail prematurely. This guide will provide a comprehensive, step-by-step solution to ensure your garage floor edges are as durable and flawless as the rest of the surface.
You'll Learn About
Why Sealing Garage Floor Edges is a Critical Step
Many homeowners focus so much on the main surface of the garage floor that they overlook the perimeter. This is a significant mistake. The edges of your garage floor are highly vulnerable points for a number of reasons.
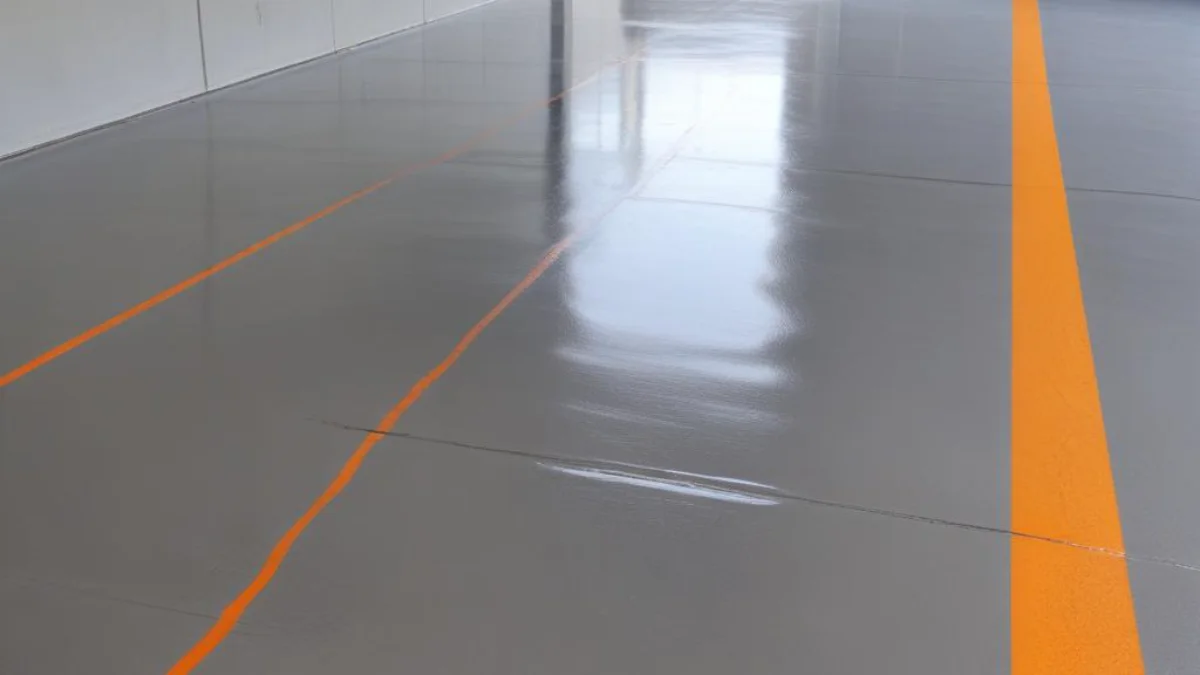
Firstly, the joint where the concrete slab meets the foundation wall is a natural point of movement. Temperature fluctuations cause the concrete to expand and contract. If this joint isn’t sealed with a flexible material, the coating can crack and peel away from the wall as the floor shifts.
Secondly, moisture is a major enemy of any floor coating. Water can seep in through unsealed gaps along the wall, especially near the garage door. This moisture can get trapped under the coating, leading to bubbling, blistering, and eventual peeling. In colder climates, this trapped water can freeze, expand, and cause significant damage to both the coating and the concrete itself. This is particularly problematic if you’ve ever wondered why is cold spot on floor; moisture intrusion at the edges can contribute to temperature differentials.
The Problem with Gaps and Cracks
Small gaps between the garage floor and the wall might not seem like a big deal, but they are havens for dirt, insects, and moisture. Cleaning becomes difficult, and over time, these gaps can widen. Properly sealing these gaps creates a monolithic, seamless surface that is easy to clean and maintain.
Without a proper seal, the edge of your coating is exposed and susceptible to chipping from impacts. Dropped tools, car doors, and other common garage activities can easily damage an unprotected edge. A well-sealed edge provides a smooth transition and reinforces this weak point.
Preparing the Edges for a Perfect Seal
Proper preparation is the most crucial phase of any flooring project. Excellent surface preparation is the key to success when sealing garage floor edges. Rushing this step will almost certainly lead to failure down the line.
First, you must thoroughly clean the entire perimeter. Use a wire brush and a powerful vacuum to remove all loose debris, dirt, and old, flaking paint from the edges and any gaps. For stubborn grease or oil stains, a concrete degreaser is essential. Any contaminants left behind will prevent the new sealant and coating from adhering properly.
After cleaning, inspect the edges for any cracks or damage. Small cracks should be repaired with a suitable concrete patching compound. For larger gaps along the wall, a backer rod may be necessary before applying a sealant. This foam rope fills the bulk of the gap, reducing the amount of sealant needed and ensuring the correct joint depth.
To Grind or Not to Grind the Edge?
For the most professional and durable finish, creating a defined edge is recommended, especially near the garage door. This involves using a handheld concrete grinder to cut a clean, straight groove where the coating will terminate. This small channel gives the coating a secure “anchor” point and prevents it from showing on the exterior when the garage door is closed. It also creates a clean line that prevents chipping. When grinding, always use a dust collector to manage the concrete dust.
Step-by-Step Guide to Sealing Garage Floor Edges
With the preparation complete, you are ready to seal the edges. This process involves a few key steps to ensure a seamless, durable finish that integrates perfectly with your main floor coating.
Step 1: Filling the Gaps
Focus on the expansion joint where the floor slab meets the foundation wall. This joint is designed to allow movement and must be filled with a flexible sealant. Do not use rigid epoxy or the floor coating itself to fill this gap. It will crack. Apply a flexible, self-leveling polyurethane sealant using a caulk gun. If you used a backer rod, ensure the sealant depth is between 1/8 and 1/2 inch. Smooth the sealant bead for a clean finish.
Step 2: Cutting In the Edges
Just like painting a room, you need to “cut in” the edges of the garage floor before rolling the main area. Use a high-quality paintbrush to apply a thin, even coat of your epoxy or polyaspartic coating along the entire perimeter. Work carefully to create a neat line against the wall or painter’s tape. This step ensures uniform coverage where a roller can’t easily reach.
Step 3: Applying the Main Coat and Maintaining a Wet Edge
Immediately after cutting in a section, begin rolling the main floor area. It is crucial to always maintain a wet edge. This means the rolled coating should overlap with the still-wet brushed edge. Allowing the edge to dry before you roll up to it will create a visible seam and a weak point in the coating.
Work in manageable sections, such as 4×4 foot squares. Cut in the edge of one section, then immediately roll that section, blending the two applications seamlessly. This technique is vital for achieving a professional, monolithic appearance.
Choosing the Right Sealant for Your Garage Edges
The product you choose to seal the gap between the floor and wall is critical. The table below compares common sealant types suitable for this application.
| Sealant Type | Pros | Cons | Best For |
|---|---|---|---|
| Polyurethane Caulk | Highly flexible, excellent adhesion, waterproof, durable. | Can be messy to apply, longer cure time. | Sealing the primary expansion joint between the floor and wall. |
| 100% Solids Epoxy Filler | Cures very hard, can be sanded, ideal for a seamless look under coatings. | Not flexible; should only be used for non-moving cracks or saw cuts, not expansion joints. | Filling control joints (saw cuts) that will be coated over. |
| Silane/Siloxane Sealers | Penetrates concrete, repels water, creates an invisible barrier. | Does not fill gaps, provides no aesthetic finish. | Treating the bare concrete edge for moisture resistance before coating. |
| Acrylic/Latex Caulk | Easy to apply and clean up, paintable. | Less flexible and durable than polyurethane. | Small, non-moving cosmetic gaps where durability is not the primary concern. |
Advanced Tips for a Flawless Finish
To elevate your project from good to great, consider these professional tips. Proper insulation, for instance, can play a role in managing temperature and moisture. While you’re focused on the floor, it might be a good time to inspect your exposed garage ceiling insulation to ensure a fully protected space.
Dealing with Moisture Issues
Before sealing, it’s essential to determine if your garage floor “sweats” or has underlying moisture problems. Tape a 16×16 inch square of plastic sheeting to a dry section of the floor, sealing all four edges. After 24 hours, check under the plastic. If the concrete is dry but the surrounding floor is damp, you have a condensation issue. If the concrete under the plastic is wet, moisture is coming up through the slab. This sub-slab moisture must be addressed with a vapor barrier or penetrating sealer before applying a topical coating, or the coating will fail.
Applying a Topcoat for Ultimate Protection
Once your primary coating has fully cured, consider applying a clear urethane or polyaspartic topcoat. This final layer adds incredible durability, chemical resistance, and UV stability. It will protect the edges from scuffs and impacts, making your floor last significantly longer. The same “cutting in” and “wet edge” techniques apply when adding a topcoat.
Properly sealing your garage floor edges is not an optional final touch; it is a fundamental step for a long-lasting, professional-quality finish. By carefully preparing the surface, choosing the right flexible sealant for gaps, and using the correct application techniques, you can protect the most vulnerable part of your floor. This ensures your investment is shielded from moisture, damage, and the peeling problems that frustrate so many homeowners. Tackling this detail transforms a good garage floor into a great one. Don’t forget that a well-sealed and insulated garage contributes to the overall comfort of your home, even affecting areas like adjacent rooms or a closet insulation situation if it shares a wall.