Sticky Shoe Insoles? Banish Annoying Residue for Good!
There are few small annoyances as persistent as a sticky shoe insole. That tacky, grabbing sensation with every step is enough to ruin your day. It makes wearing your favorite shoes feel like a chore, and the source of the stickiness can seem like a complete mystery.
You’re not alone in this common household problem. From high-performance athletic sneakers to everyday casual shoes, sticky insoles are a frequent complaint. The good news is that you don’t have to throw away an otherwise perfect pair of shoes. With the right techniques and a few common household items, you can completely remove that stubborn residue and restore comfort to your footwear.
You'll Learn About
Uncovering the Cause: Why Do Insoles Get Sticky?
Understanding the root cause of the problem is the first step toward an effective solution. The stickiness isn’t random; it’s typically the result of a few specific culprits. Identifying the source will help you choose the most effective removal method for your situation.
The Primary Suspect: Adhesive Breakdown
The most common reason for a sticky insole is the degradation of the glue used to manufacture the shoe. Manufacturers use a strong adhesive to bond the insole to the shoe bed. Over time, a combination of factors—heat from your feet, moisture from sweat, and the constant pressure of walking—can cause this adhesive to break down, turning it into a gooey, sticky mess that oozes onto the insole’s surface.
Leftover Sticker and Tag Residue
Often, the problem starts the day you buy the shoes. Price tags, brand stickers, or size labels are frequently placed directly on the insole. When you peel them off, they can leave behind a stubborn patch of sticky adhesive that attracts dirt and lint, growing progressively grimier over time.
The Mess of Leaking Gel Inserts
Some comfort and orthopedic insoles contain a gel-like substance for cushioning. If the insole’s casing is punctured or wears out, this gel can begin to leak. It creates a distinct type of sticky, and often oily, residue that can be particularly challenging to clean up.
Everyday Spills and Accumulated Grime
Accidents happen. Spilling a sugary drink like soda or coffee into your shoe can leave a tacky film on the insole once it dries. Over time, this small spill can combine with dirt and sweat to create a generally sticky surface inside your entire shoe.
Before You Begin: Essential Preparation for Success
Jumping straight into cleaning without proper preparation can lead to ineffective results or even damage your insoles and shoes. A few minutes of prep work will ensure a safe and successful cleaning process. Don’t skip these crucial first steps.
Step 1: Always Remove the Insole
If possible, take the insole completely out of the shoe. This isolates the problem and makes it much easier to work on the sticky area without getting cleaning solutions all over the shoe’s interior. It also protects the rest of the shoe from potential damage and allows the insole to dry much faster after cleaning.
Step 2: Identify the Insole Material
This is the most critical preparatory step. Insoles are made from a variety of materials, and each reacts differently to cleaning agents. A method that works wonders on a foam insole could ruin a leather one. Common materials include standard foam, memory foam, fabric, leather, suede, and gel.
Step 3: Gather Your Cleaning Arsenal
You likely already have everything you need. Gather your supplies before you start so you aren’t scrambling mid-process. You may need rubbing alcohol (isopropyl alcohol), white vinegar, baking soda, a mild dish soap, cooking or baby oil, cotton balls or pads, a soft cloth, and a plastic scraper or old credit card.
Step 4: The Golden Rule – Spot Test First!
Never apply a cleaning solution to the entire insole without testing it first. Choose a small, inconspicuous area, like the very edge of the toe or heel. Apply a tiny amount of your chosen cleaner and wait a few minutes to see how the material reacts. If you notice any discoloration, warping, or damage, stop immediately and try a different method.
A Method-by-Method Guide to Removing Sticky Residue
With your preparation complete, it’s time to tackle the stickiness. The key is to start with the gentlest method possible and only escalate to stronger solutions if necessary. Patience is your best ally in this process.
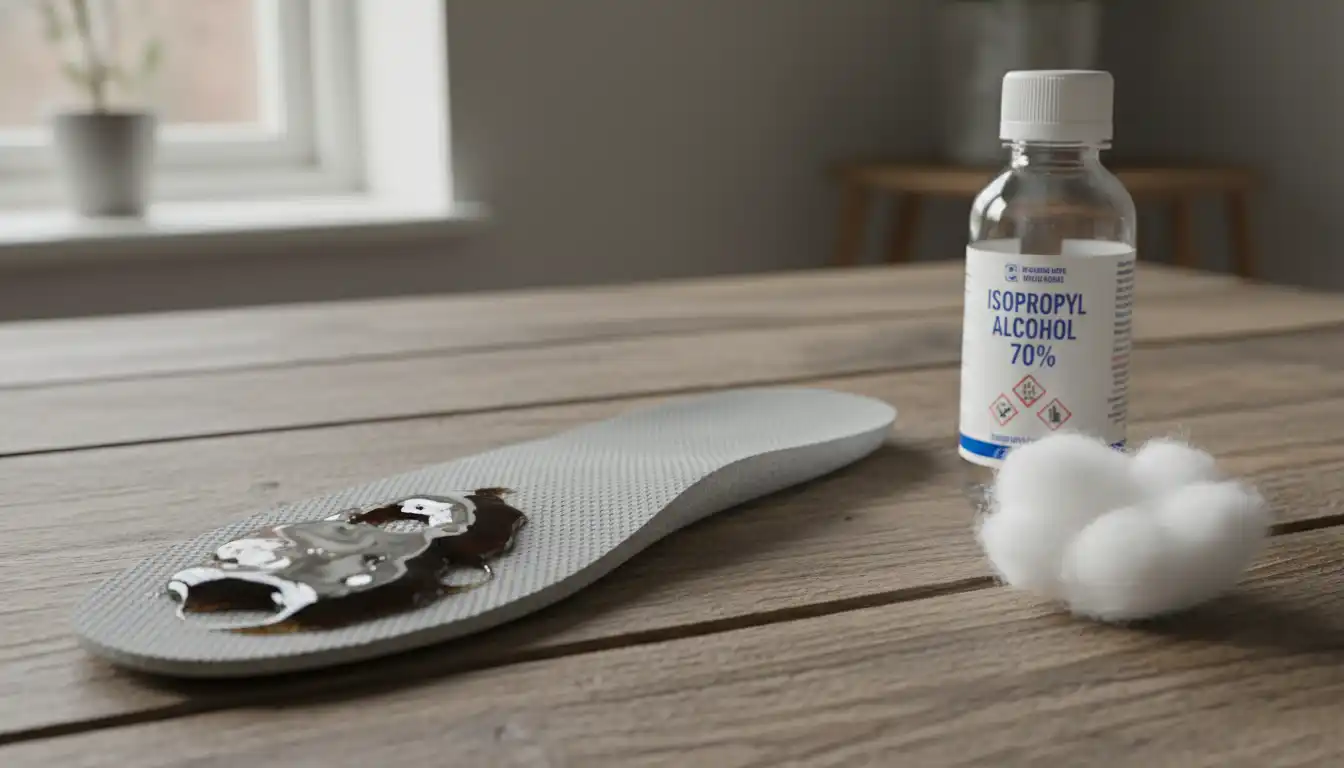
Method 1: The Rubbing Alcohol Technique (The All-Rounder)
Rubbing alcohol is an excellent solvent that is effective at breaking down the chemical bonds in many common adhesives. It evaporates quickly and is safe for most synthetic and fabric insoles. This should often be your first line of attack.
First, dampen a cotton ball or the corner of a clean cloth with isopropyl alcohol. Gently rub the sticky area in a circular motion. You should feel the residue start to dissolve and lift. For very stubborn spots, you may need to let the alcohol sit for a few minutes to penetrate the adhesive. Once the stickiness is gone, wipe the area with a separate cloth dampened with plain water to remove any remaining alcohol, then let the insole air dry completely.
Method 2: The Oil-Based Approach (For Stubborn Sticker Glue)
It might sound counterintuitive to fight stickiness with something oily, but oil is fantastic at dissolving oil-based adhesives, which are common in price stickers and labels. You can use various types of oil, such as baby oil, mineral oil, vegetable oil, or even peanut butter.
Apply a small amount of your chosen oil directly onto the sticky residue. Let it sit for at least an hour; for very tough glue, you might let it sit for several hours. The oil will slowly soften the adhesive. Then, use a plastic scraper or the edge of a credit card to gently scrape the softened goo away. After scraping, use a cloth with a bit of mild dish soap and water to clean off the remaining residue and the oil itself. This final cleaning step is crucial to avoid leaving an oily patch.
Method 3: The White Vinegar Solution (A Natural De-Sticker)
For those who prefer a more natural cleaning solution, white vinegar is a great option. The mild acetic acid in vinegar is effective at breaking down certain types of glue and grime without the harshness of chemical solvents. It also has the added benefit of helping to neutralize odors.
Create a solution of equal parts white vinegar and warm water. Dip a cloth into the solution and lay it over the sticky area of the insole, allowing it to soak for about 30 minutes. This gives the vinegar time to work. After soaking, use the cloth or a soft-bristled brush to scrub the residue away. Wipe the area clean with a water-dampened cloth and let it air dry completely. The vinegar smell will be strong at first but will disappear entirely as it dries.
Method 4: The Baking Soda Paste (For Gentle Scrubbing Power)
If the stickiness is combined with dirt and grime, a baking soda paste can provide the gentle abrasion needed to lift it off. Baking soda is a mild abrasive that cleans effectively without scratching or damaging most insole surfaces. It’s also a fantastic natural deodorizer.
In a small bowl, mix baking soda with just enough water to form a thick paste, similar in consistency to toothpaste. Apply this paste directly to the sticky spot and allow it to dry completely. As it dries, it will help lift the residue. Once dry, use a damp cloth or a soft brush to gently scrub the paste and the loosened residue away. Wipe the insole clean to remove any leftover baking soda.
Handling Special Cases and Delicate Materials
Not all insoles are created equal. Materials like leather, suede, and leaking gel inserts require a special touch. Using the wrong method on these materials can cause irreversible damage, so it’s vital to proceed with caution.
Leather Insoles: A Cautious and Gentle Approach
Leather is a natural material that can be easily damaged by harsh chemicals or excessive moisture. Alcohol and vinegar can strip the natural oils from leather, leaving it dry, brittle, and prone to cracking. Start with the least invasive method: a simple pencil eraser. Often, an eraser can “grab” and lift light adhesive residue without any chemicals.
If that doesn’t work, use a cotton swab to apply a very small amount of rubbing alcohol directly and only to the sticky spot, avoiding the surrounding leather. Work quickly and wipe it away immediately with a clean, damp cloth. After cleaning any spot on a leather insole, it’s essential to apply a quality leather conditioner to restore moisture and protect the material.
Suede or Nubuck Insoles: Proceed With Extreme Care
Suede and nubuck are even more delicate than standard leather. Liquids can easily stain and alter the texture of the material’s nap. For these insoles, you should avoid liquid cleaners entirely. Your best tools are a dedicated suede brush and a suede eraser (also called a crepe block).
Use the suede eraser to gently rub away the sticky residue. Afterwards, use the suede brush to restore the material’s texture, or nap. If this doesn’t work, your safest option is to consult a professional shoe repair or cleaning service. The risk of permanent damage from DIY methods is simply too high.
Leaking Gel Inserts: Containment and Replacement
When a gel insole leaks, the problem is structural. Cleaning the sticky gel off the surface is only a temporary fix. The best course of action is to replace the insoles, as the leak indicates they are no longer providing proper support and will continue to cause a mess.
For a short-term fix, you can clean the leaked gel using a cloth with mild soap and water. Dry the area thoroughly. Then, try to locate the puncture or split in the casing and seal it with a strong, flexible adhesive like Shoe Goo or a small patch to prevent further leakage.
The Secret Weapon: Using Gentle Heat to Your Advantage
One of the most effective yet rarely discussed techniques for dealing with adhesive residue involves heat. Just as heat can cause glue to break down over time, a short, controlled burst of heat can soften it almost instantly, making removal incredibly easy. This method turns a scrubbing chore into a simple peel-and-wipe job.
The principle is simple: adhesives used in shoes are thermoplastic. When they get warm, they transition from a solid to a semi-liquid state. This is why a hot car can often be the trigger for insoles starting to peel and get sticky. You can use this property to your advantage with a common household hairdryer.
How to Safely Apply Heat
Set your hairdryer to a low or medium heat setting. Never use the high heat setting, as it can easily melt foam or synthetic materials. Hold the hairdryer several inches away from the insole’s surface and aim it directly at the sticky patch. Move the hairdryer back and forth continuously to distribute the heat evenly and avoid scorching one spot.
Heat the area for only 20-30 seconds at a time. This is usually all it takes to soften the glue. Immediately after heating, test the residue with your fingertip or a plastic scraper. It should be significantly softer and easier to peel or wipe away. This technique is remarkably similar to methods used for stubborn sticker problems, like in a tough Ram Board tape removal project. If the residue hardens again, simply apply a little more heat. This pre-softening step makes follow-up cleaning with alcohol or oil much faster and more effective.
Choosing the Right Sticky Residue Removal Method
To help you decide which approach is best for your situation, here is a quick comparison of the primary methods. Always remember to spot-test before committing to a method.
| Method | Best For (Insole Type) | Pros | Cons |
|---|---|---|---|
| Rubbing Alcohol | Fabric, Foam, Synthetics | Very effective on many adhesives, evaporates quickly. | Can damage leather, suede, and some plastics. |
| Oil-Based Method | Removing sticker residue on non-porous surfaces. | Excellent at dissolving stubborn, oil-based glues. | Can stain fabric and porous materials; requires secondary cleaning. |
| White Vinegar | Fabric, Foam | Natural, deodorizing, and inexpensive. | Strong initial smell; may not work on all adhesives. |
| Baking Soda Paste | Sturdy Fabric, Synthetics | Provides gentle abrasion, deodorizes, very safe. | Can be messy; less effective on very gummy adhesives. |
| Gentle Heat | Most materials (with caution) | Makes residue incredibly easy to remove, no chemicals. | Risk of melting or damaging the insole if overheated. |
Prevention: How to Stop Insoles From Getting Sticky Again
Once you’ve successfully cleaned your insoles, you’ll want to prevent the problem from recurring. A few simple habits can make a huge difference in the longevity of your shoes and insoles.
The most impactful habit is to air out your shoes after every wear. Don’t leave them in a gym bag or a dark, stuffy closet. Pull the insoles out, if possible, and let both the shoes and insoles dry completely. This prevents the moisture buildup that accelerates adhesive breakdown. Regularly wiping your insoles with a damp cloth can also prevent the slow accumulation of grime.
Common Mistakes and Frequently Asked Questions
Navigating the world of shoe care can be tricky. Here are answers to some common questions and mistakes to avoid to ensure you don’t accidentally make the problem worse.
Can I use strong solvents like Goo Gone, WD-40, or acetone?
Commercial products like Goo Gone or WD-40 can be effective, but they are oil-based and must be used with caution and always spot-tested. They will require thorough cleaning afterwards to remove their own residue. You should absolutely avoid acetone (nail polish remover). Acetone is a powerful solvent that will melt and dissolve many of the foams and plastics used in insoles, causing irreparable damage and potentially leaving behind a permanent black residue on plastic components.
Is it safe to put insoles in the washing machine?
This is generally not recommended. The combination of high heat, water submersion, and tumbling action can delaminate the layers of the insole, destroy the adhesive bond, and cause the material to warp or shrink. Hand-washing is always the safer and more controlled method.
How long do insoles need to dry?
They need to be 100% completely dry before you put them back in your shoes. This can take 24 hours or more. Putting a damp insole back into a shoe creates a perfect environment for mold, mildew, and bacteria, leading to foul odors and potential foot health issues.
A Step Towards Lasting Comfort
Dealing with a sticky shoe insole is a frustrating but entirely solvable problem. By correctly identifying the cause and the material you’re working with, you can choose a safe and effective cleaning method from your own home supplies. From the gentle power of baking soda to the solvent action of alcohol, the solution is readily available.
Remember the crucial steps: prepare properly, always spot test, and prioritize prevention by keeping your shoes dry. By following this guide, you can banish that annoying sticky residue for good and restore the clean, comfortable feeling your feet deserve, extending the life of your favorite pair of shoes.