Stair Skirt Board Removal: Your Damage-Free DIY Guide
That diagonal line of trim running up your staircase—the stair skirt board—often goes unnoticed until it’s damaged, outdated, or in the way of a renovation. Attempting to remove it can feel intimidating. Many homeowners fear causing massive damage to the drywall, the stair treads themselves, or splintering the board into a dozen pieces.
The problem is that a stair skirt isn’t just any piece of trim. It’s often installed early in the staircase’s construction, meaning it can be stubbornly attached with a combination of nails, adhesive, and years of hardened caulk and paint. But with the right approach and a little patience, this is a DIY project you can absolutely conquer without needing to call in a pro.
This comprehensive guide will walk you through the entire process, from initial inspection to final wall repair. We’ll cover the tools you need, the techniques to minimize damage, and how to handle the common frustrations that can pop up along the way. Your path to a clean, professional-looking removal starts here.
You'll Learn About
Before You Begin: Essential Prep Work for a Clean Removal
Jumping straight in with a hammer and pry bar is the fastest way to create a wall full of gouges and a pile of splintered wood. Proper preparation is not just recommended; it’s the most critical phase of this project. Taking 30 minutes to get organized and assess the situation will save you hours of repair work later.
This initial stage involves gathering the right tools, ensuring your safety, and understanding exactly how your specific skirt board is attached to the wall. Each staircase is slightly different, and a quick inspection will reveal whether you’re dealing with simple nails or a more formidable combination of fasteners and glue.
Assembling Your Toolkit: The Right Tools for the Job
Having the correct tools on hand is non-negotiable for a smooth removal process. While you might be tempted to make do with a flathead screwdriver, using the proper prying tools is essential to protect your walls. Here is a breakdown of what you’ll need.
Many of these are standard tools for any DIYer, but items like a thin, flexible putty knife and a good quality pry bar are particularly important for this task. Don’t skimp on safety gear; dust and debris are guaranteed.
| Tool Category | Specific Items | Purpose |
|---|---|---|
| Cutting & Scoring | Utility Knife (with fresh blades) | Crucial for scoring the caulk and paint lines to prevent tearing the drywall paper. |
| Prying Tools | 5-in-1 Painter’s Tool, Putty Knife, Pry Bar, Crowbar | Used in sequence from thin to thick to gently and progressively create a gap. |
| Striking & Pulling | Hammer or Mallet, Nail Puller or Pliers | For tapping prying tools and removing nails from the board or wall. |
| Protection | Safety Glasses, Work Gloves, Thin Wood Block/Scrap | To protect yourself and to use the wood block as a fulcrum to protect the wall from the pry bar. |
| Optional (for stubborn jobs) | Oscillating Multi-Tool, Heat Gun | A multi-tool can cut the board in sections, and a heat gun can soften old adhesive. |
Safety First: Protecting Yourself and Your Home
Before you make the first cut, take a moment for safety. Put on your safety glasses to protect your eyes from flying debris, old paint chips, or nail fragments. A good pair of work gloves will save your hands from splinters and scrapes.
Next, protect the surrounding area. Lay down a drop cloth or old blankets on the stair treads and the floor at the bottom of the staircase. This not only makes cleanup easier but also protects your floors and stairs from dropped tools or the skirt board itself once it comes free.
Inspecting Your Skirt Board: What Are You Dealing With?
Look closely at your skirt board. Can you see small, puttied-over dimples along its length? Those are finishing nails. Run a utility knife blade gently along the top edge where the board meets the wall. You’ll likely find a bead of caulk or layers of paint that have sealed it tight.
The most important question is whether the skirt board was installed before or after the stair treads and risers. In many modern homes, the skirt is attached to the wall first, and the treads and risers butt up against it. In some older homes, the skirt may be laid over the top of the treads, which can make removal trickier. If you can’t tell, assume it was installed first for now.
The Step-by-Step Guide to Removing Your Stair Skirt Board
With your preparation complete, it’s time to begin the removal process. The key here is patience and finesse, not brute force. Work methodically from one end of the board to the other, applying steady pressure and listening to the sounds of the fasteners letting go. Rushing this stage is what leads to damaged walls.
Step 1: Breaking the Seal – The All-Important First Cut
This is the single most important step to prevent wall damage. Take your utility knife with a fresh blade and carefully score the line where the top of the skirt board meets the drywall. Cut through the paint and any caulk that’s sealing the joint.
Don’t try to cut through it all in one pass. Make two or three steady passes, applying firm but controlled pressure. You want to create a clean break, ensuring that when you pry the board away, it doesn’t peel the top layer of paper or paint off the drywall with it. Do this along the entire length of the board.
Step 2: The Gentle Art of Prying
Start at one end of the skirt board, either the top or bottom. Take a thin putty knife or the blade of a 5-in-1 tool and gently tap it into the seam you just scored using your hammer. Your goal is to create a very slight gap, just enough to get a thicker tool in.
Once you have a small opening, switch to a small pry bar. Crucially, place a thin block of wood against the wall to act as a fulcrum. Rest the back of the pry bar on this block, not directly on the drywall. This distributes the pressure and prevents the pry bar from punching a hole in your wall. Gently lever the board away from the wall and work your way down its length, creating a small, even gap as you go.
Step 3: Dealing with Stubborn Fasteners (Nails and Glue)
As you pry, you’ll feel resistance points—these are the nails. Focus your prying efforts near these points. As the board comes away, the nail heads will often pull through the front of the board, or the entire nail will pull out of the wall stud. If a nail is particularly stubborn, try to pry the board out just enough to slip a nail puller or the claw of your hammer behind it.
If you suspect the board is held on with construction adhesive, the job becomes tougher. If gentle prying isn’t working, you may need a heat gun. Apply heat in a sweeping motion along a section of the board to soften the adhesive, then try prying again. Be cautious with heat guns as they can scorch the wood and pose a fire risk if held in one spot for too long.
Step 4: Making the Final Cuts (If Necessary)
In some cases, a stair skirt is “captured” by other pieces of trim at the top or bottom, like baseboards. If you can’t cleanly pry the end away, an oscillating multi-tool is your best friend. Use a wood-cutting blade to make a clean, precise vertical cut through the skirt board near the obstruction, allowing you to remove it in a manageable section.
Once all fasteners are loose, the board should come away from the wall. Pull it away carefully, being mindful of any remaining nails that could scratch the wall or floor. If a long nail stays in the wall, it’s often easier to pull it straight out with pliers or a hammer claw.
After the Removal: Cleanup and Wall Repair
With the skirt board gone, you’re left with the aftermath. This typically includes nail holes, leftover nails stuck in the wall, and possibly some gouges or torn drywall paper. This is all perfectly normal and easily fixable. A clean repair job is what separates a DIY project from a professional one.
Taking the time to properly patch and sand the wall will create a flawless canvas for whatever comes next, whether that’s a new skirt board or simply a clean, painted wall. Similar care is needed when you need to figure out how to fill gap between tile and wood floor, as proper preparation ensures a lasting finish.
Pulling Leftover Nails and Prepping the Wall
First, deal with any nails left behind in the wall studs. Use a nail puller or the claw of your hammer to remove them. If a nail head breaks off, you can either use pliers to twist it out or use a nail set to punch it slightly below the surface of the drywall.
Next, use your putty knife to scrape away any remaining ridges of old caulk or loose drywall paper. Your goal is to have a smooth, solid surface to work with. A quick wipe-down with a damp cloth will remove any dust and prepare the area for patching.
Patching and Priming for a Flawless Finish
For small nail holes and minor gouges, use a lightweight spackling compound. Apply it with a flexible putty knife, pressing it into the hole and then smoothing the surface flat. For larger holes or areas where the drywall paper has torn, you may need to use a drywall joint compound, sometimes applied in two thin coats.
After the compound is completely dry, sand it smooth with fine-grit sandpaper. Feather the edges of the patch so it blends seamlessly with the surrounding wall. Once you’re satisfied, it’s essential to prime the patched areas. Primer seals the porous compound, ensuring that your final coat of paint has a uniform sheen and doesn’t look blotchy.
Common Problems and Pro Tips
Even with careful preparation, you can run into frustrating issues. Here are some common problems and how to solve them like a professional.
What if the skirt board cracks or splinters? This usually happens when you apply too much pressure in one spot. If it starts to crack, stop prying in that area and move a few feet down the board to loosen it there before coming back. Work slowly and let the fasteners release gradually.
What if the treads and risers were installed over the skirt? This is a more advanced scenario. In this case, you may not be able to remove the skirt without first removing the stair treads, which is a much larger job. An alternative is to use an oscillating multi-tool to carefully cut the skirt board flush with the top of the treads and below the nosing, removing it in pieces. This requires a very steady hand.
How do I avoid damaging my stair treads? When prying, always be mindful of where your tools are. It’s easy to accidentally dent the edge of a wooden tread with your hammer or pry bar. If you’re working close to the stairs, use a rag or a piece of cardboard to protect the wood surface.
Frequently Asked Questions (FAQ)
Can I reuse the stair skirt board after removing it?
It depends on the condition and your removal process. If you were extremely careful and the board is made of high-quality wood with minimal damage, you can certainly sand, patch, and repaint it. However, if the board is made of MDF, or if it cracked or splintered significantly during removal, it’s usually better to replace it with a new one.
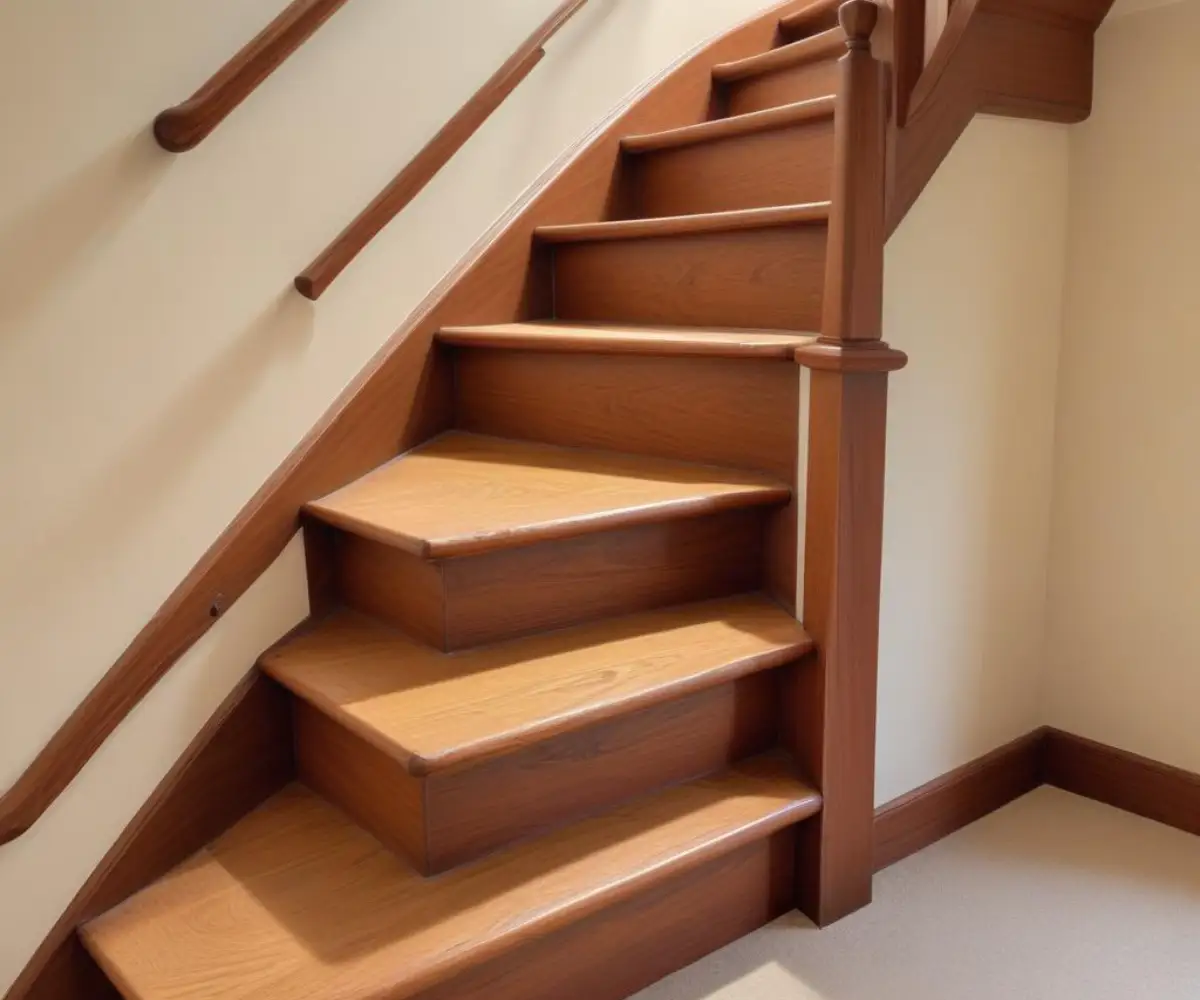
What is the difference between a skirt board and a stringer?
This is a common point of confusion. The stringer is the structural sawtooth-shaped frame that actually supports the stair treads and risers. A skirt board is a decorative piece of trim that is installed against the wall, either covering the stringer or simply running alongside the treads and risers to give a finished look and protect the wall.
Do I have to put a skirt board back on?
Functionally, no. A skirt board is primarily aesthetic. Many modern and minimalist designs opt for a “skirtless” look where the stair treads and risers run directly into a clean, painted drywall surface. However, keep in mind that the wall along the stairs is a high-traffic area, and a skirt board does an excellent job of protecting the drywall from scuffs, vacuum cleaner bumps, and dirt.
Ultimately, removing a stair skirt board is a project that falls squarely in the “tough but doable” category for a dedicated DIYer. The keys to success are not strength or speed, but preparation, patience, and using the right tools for the job. By carefully breaking the paint seal and using a wood block to protect your wall during prying, you can avoid most of the common pitfalls. Take your time, and you’ll be rewarded with a clean, professional result that opens up new possibilities for your staircase renovation. Tackling home improvement projects like this, or even something as simple as finding the right top of door draft stopper, can bring a great sense of accomplishment.