How to Remove a Cast Iron Fireplace Insert: A Brutal Guide
That old, black cast iron fireplace insert has been staring at you for years. It might be inefficient, outdated, or simply not your style. You’ve decided it’s time for it to go, but one question remains: how do you remove a cast iron fireplace insert without destroying your living room?
This task seems daunting, largely because these inserts are incredibly heavy and often wedged tightly into the masonry. Many homeowners fear damaging their chimney, hearth, or their own backs in the process. This guide will provide a clear, step-by-step solution to safely and successfully remove that heavy metal beast.
You'll Learn About
Why Removing Your Fireplace Insert is a Good Idea
There are many reasons to tackle this project. Older inserts are often inefficient, losing more heat up the chimney than they radiate into the room. A removal can be the first step toward a modern, more efficient heating source or a complete fireplace redesign.
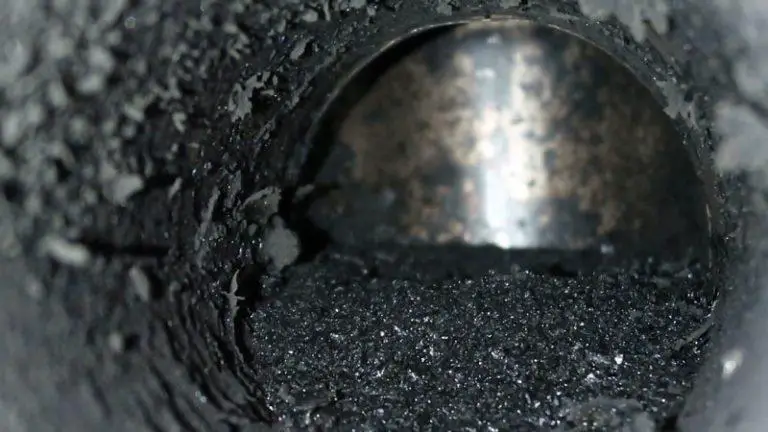
Furthermore, years of use can lead to unseen problems. Understanding what causes creosote to build up in a chimney is crucial, as its accumulation behind an old insert can pose a significant fire hazard. Removing the insert allows for a thorough inspection and cleaning.
Before You Begin: Safety and Preparation
Safety is not optional. Cast iron inserts can weigh upwards of 250 pounds or more, so attempting this alone is a recipe for injury. Always have at least one strong helper.
First, thoroughly clean the insert and the surrounding area. Remove all ash, soot, and debris. Lay down heavy-duty drop cloths or old blankets to protect your floor and hearth from scratches and dirt.
Gathering Your Tools and Materials
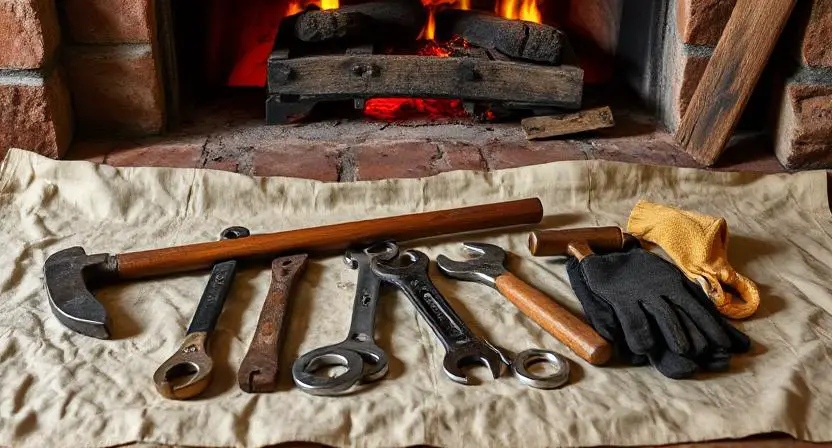
Having the right tools is essential for a smooth removal process. You don’t want to be halfway through the job only to realize you’re missing a crucial piece of equipment. Prepare your toolkit in advance to avoid delays and frustration.
Most of the required tools are common in a well-stocked DIY garage. Proper protective gear is just as important as the tools themselves, so don’t skip on gloves and eye protection. Here is a breakdown of what you’ll need.
| Tool/Material | Purpose | Estimated Cost (if purchasing) |
|---|---|---|
| Safety Goggles & Gloves | Protect eyes from debris and hands from sharp edges. | $10 – $20 |
| Drop Cloths/Blankets | Protect flooring and hearth. | $15 – $30 |
| Screwdriver Set | To remove trim, panels, and mounting screws. | $15 – $25 |
| Wrench Set | For loosening bolts and gas line fittings (if applicable). | $20 – $40 |
| Crowbar or Pry Bar | To gently loosen the insert from the fireplace opening. | $15 – $30 |
| Shop Vacuum | For cleaning up soot, dust, and debris. | $50 – $100 |
| Appliance Dolly or Hand Truck | To safely move the heavy insert. | $40 – $80 (or rental) |
Step-by-Step Guide to Removing the Insert
With your area prepared and tools at hand, you can begin the removal process. Work slowly and methodically. Do not rush this process, as haste can lead to damage or injury.
Step 1: Disconnect All Utilities
This is the most critical first step for safety. If you have an electric insert, unplug it. For a gas insert, you must turn off the gas supply at the shutoff valve before disconnecting the gas line. If you are not 100% confident in handling gas lines, call a licensed professional.
Some inserts also have blowers with electrical wiring. Ensure any power source is completely disconnected before proceeding. This is as critical as addressing Electrolux refrigerator temperature problems by checking the power supply first.
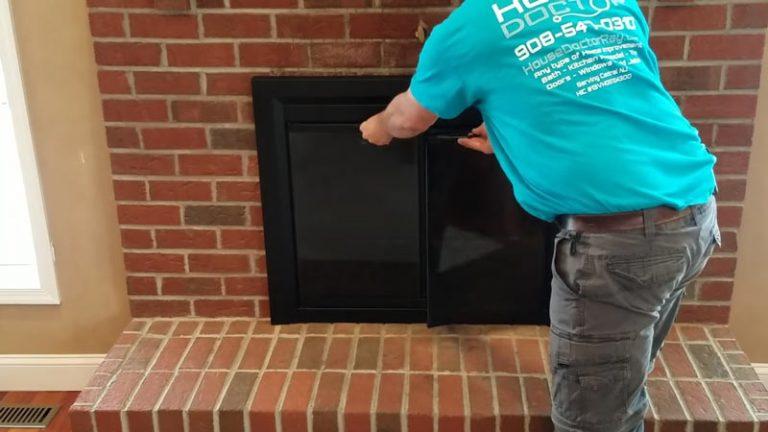
Step 2: Remove the Surround and Trim
Most inserts have a decorative trim or surround that covers the gap between the unit and the fireplace opening. These are typically held in place by screws, clips, or brackets. Carefully inspect the perimeter to find and remove these fasteners.
Sometimes, the trim may be sealed with caulk, which you can cut with a utility knife. Gently pry the surround away from the wall. This will expose the main body of the insert and its mounting points.
Step 3: Detach the Flue and Mounting Brackets
Look inside and around the insert for any bolts or screws securing it to the fireplace structure. These are often found along the sides or top of the unit. Remove them with a screwdriver or wrench.
Next, you’ll need to disconnect the flue pipe that extends up into the chimney. This connection is usually secured with clamps or screws. Reaching it can be awkward, so a good flashlight is helpful here.
Step 4: The Moment of Truth – Prying it Loose
With all connections severed, the insert is now held in place only by its own weight and friction. Use a crowbar to gently pry around the edges of the insert, working it loose. Use a piece of plywood to protect your masonry from the crowbar.
The goal is to break the seal and create a small gap. Work from side to side, gradually wiggling the unit forward. This step requires patience and force in equal measure.
Step 5: Sliding the Insert Out
Once the insert is loose enough, it’s time to pull it out. This is where your helper is essential. Position yourselves on either side of the unit. Using teamwork, slide the insert forward and out of the fireplace opening onto your protected hearth.
Be prepared for the immense weight. Lift with your legs, not your back. Once it’s clear of the opening, carefully maneuver it onto an appliance dolly to transport it out of your home.
After the Removal: What’s Next?
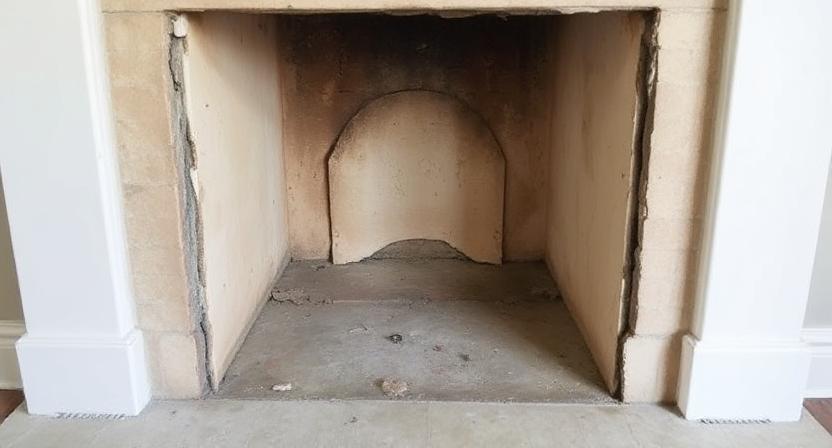
Congratulations, the beast is out! Now you are left with an open fireplace cavity. The first thing you should do is give the entire area a thorough cleaning with a shop vacuum to remove decades of accumulated soot and debris.
This is the perfect time to have your chimney professionally inspected and swept. An open chimney can be a major source of energy loss. Consider temporary sealing solutions like a chimney balloon or a more permanent closure if you don’t plan to install a new appliance soon.
Disposing of the Old Insert
You can’t just leave a 300-pound chunk of iron on the curb. Cast iron is a valuable scrap metal, so contact local recycling centers or scrap metal dealers. Some may even pay you for it and offer pickup services.
Alternatively, if the insert is a desirable antique model and still in good condition, you might be able to sell it online. Just be clear that the buyer is responsible for transport. Much like figuring out how many 12 volt batteries to run an air conditioner, getting rid of an insert requires a bit of logistical planning.
DIY vs. Hiring a Professional
Removing a cast iron fireplace insert is a challenging but manageable DIY project for those with moderate skills and a strong helper. It can save you a significant amount of money, as professional removal can cost anywhere from $250 to over $1,000.
However, if you’re dealing with a gas insert, have concerns about the structural integrity of your chimney, or simply don’t have the physical strength to manage the weight, hiring a professional is the safest bet. Their experience ensures the job is done quickly, safely, and without damage to your home.