How to Remove a Bathtub Without Damaging Tiles?
You love your bathroom tiles, but the bathtub has seen better days. It’s cracked, stained, or simply outdated. This presents a common homeowner dilemma: how to remove a bathtub without damaging the beautiful tiles that surround it. It’s a project that seems daunting, fraught with the risk of cracked tiles and expensive repairs.
Many homeowners face this exact challenge. The fear of a sledgehammer slipping or prying too hard and hearing that dreaded cracking sound is enough to make anyone hesitate. But with careful planning and the right technique, you can successfully replace your tub while keeping your tile work perfectly intact.
You'll Learn About
Why Preserving Your Tile is a Smart Move
Replacing a bathtub is a significant upgrade, but having to retile the entire surround multiplies the cost, time, and complexity of the project. Preserving your existing tile isn’t just about saving money on new materials and labor. It’s about maintaining the cohesive design of your bathroom, especially if you have vintage or hard-to-match tiles.
The core of the problem lies in how bathtubs are installed. Most tubs have a tiling flange, a lip that goes up against the wall studs. The backer board and tiles are then installed over this flange, creating a waterproof seal. To remove the tub, you must somehow detach it from the studs without destroying the overlapping tiles, which is where precision becomes paramount.
Understanding Your Bathtub’s Installation
Before you pick up a single tool, you need to understand what you’re up against. There are several types of bathtubs, and their installation methods vary. The most common is the alcove tub, fitted snugly between three walls. These are typically secured to wall studs via a nailing flange.
Some tubs might be set in a mortar bed for stability, making them harder to “slide out.” Others, particularly older cast iron models, are incredibly heavy and present their own logistical challenges. Identifying your tub’s material (fiberglass, acrylic, steel, or cast iron) will inform the tools and techniques you’ll need.
Your Step-by-Step Guide to a Damage-Free Tub Removal
Removing a bathtub without damaging the surrounding tile requires patience and precision, not brute force. Follow these detailed steps for a successful extraction that leaves your tile work pristine and ready for your new tub.
Step 1: Preparation is Everything – Protect Your Space
Before the demolition begins, your first priority is to protect your bathroom from damage and yourself from injury. Start by shutting off the water supply to the bathtub. You can usually find shutoff valves in an access panel behind the tub or you may need to turn off the main water supply to the house.
Lay down heavy-duty drop cloths or old blankets to protect your bathroom floor. For extra protection against falling debris, you can place a thick piece of plywood inside the tub itself. Always wear safety glasses, heavy-duty gloves, and a dust mask to protect yourself from dust and sharp debris.
Step 2: Disconnecting the Plumbing Fixtures
With the area prepped, it’s time to disconnect the plumbing. This involves removing the faucet handles, spout, and the drain and overflow assembly. Most faucet handles have a small set screw, sometimes hidden under a decorative cap, that you can loosen with a screwdriver or Allen wrench.
The tub spout may screw off or have a set screw on its underside. The overflow plate is typically held on by one or two visible screws. Removing this plate will often detach the entire overflow and drain linkage, which you can then pull out through the opening.
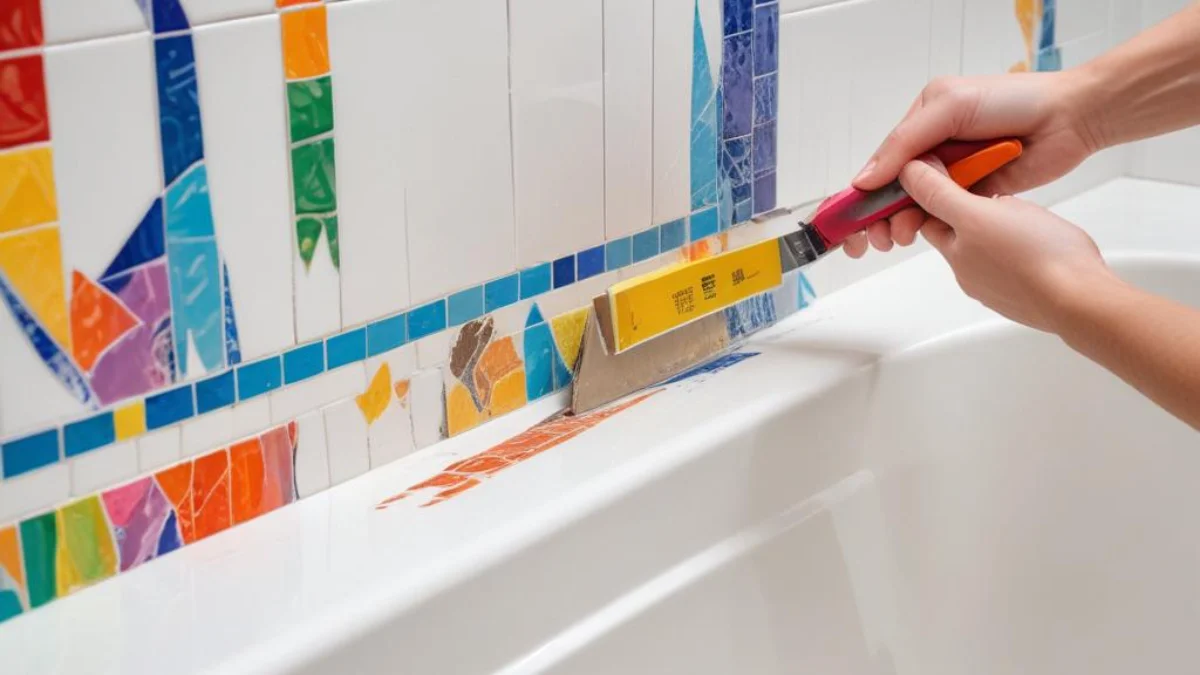
Step 3: The Crucial Cut – Removing the Caulk and Grout
This is the most critical stage for protecting your tiles. The seal between the bathtub and the tile must be completely severed. Using a sharp utility knife, carefully score the caulk line where the tub meets the tile. You may need to make several passes to cut all the way through the old caulk.
If the joint was grouted instead of caulked, you’ll need to use a grout removal tool. An oscillating multi-tool with a grout removal blade can be very effective, but requires a steady hand to avoid scratching the tub or chipping the tile. Work slowly and methodically to remove all grout along the tub’s edge.
Step 4: Exposing the Tub Flange
Here’s where the real challenge begins. The tub’s flange is nailed or screwed to the wall studs, hidden behind your tile and backer board. To get the tub out, you have to access these fasteners. You have two primary options, depending on your tile installation.
Option A: Removing the Bottom Row of Tiles. This is often the most direct approach. Using a grout saw or oscillating tool, carefully remove the grout from around the bottom row of tiles—the ones directly above the tub. With the grout gone, you can gently pry the tiles off the wall, exposing the backer board underneath.
Option B: Cutting the Wall Above the Tile. If removing tiles seems too risky, an alternative is to cut a section of drywall or plaster from about 6 to 8 inches above the tile line. This allows you to remove a section of the wall and backer board, granting access to the tub flange from above. This method requires more extensive wall repair later but can be safer for the tile.
Step 5: Detaching the Tub from the Studs
Once you’ve exposed the tub’s flange by either removing the first row of tile or cutting the wall above, you will see the nails or screws securing it to the studs. Use a pry bar and hammer or a reciprocating saw with a metal-cutting blade to cut through these fasteners.
Work your way around all accessible sides of the tub, ensuring every single fastener is cut. The tub should now be free from the walls. Use your utility knife one last time to cut any caulk between the base of the tub and the floor.
The Final Heave: Lifting the Tub Out
With all connections severed, the tub is ready to be removed. This is almost always a two-person job. Fiberglass and acrylic tubs are relatively lightweight, but steel and especially cast iron tubs are extremely heavy. Do not attempt to lift a cast iron tub without sufficient help.
Lift one end of the tub slightly and pull it away from the back wall. You may need to rock it back and forth to break it free from any remaining sealant or a mortar bed. Once it’s clear of the wall studs, you and your helper can lift it up and carefully maneuver it out of the bathroom.
What If the Tub is Stuck?
Sometimes, a tub refuses to budge. This is often because it’s set in a thick mortar bed. In this case, you may need to use more force, prying it up from the floor with pry bars. Be patient and apply steady pressure to avoid sudden movements that could damage the surrounding area.
If you’re dealing with an exceptionally stubborn or heavy cast iron tub and tile preservation is paramount, you might consider breaking the tub into smaller pieces with a sledgehammer as a last resort. Before doing this, cover the tub and surrounding tiles completely with heavy blankets to contain the shards and absorb the impact.
Tools and Materials Checklist
Having the right tools is non-negotiable for this project. A poorly equipped attempt is far more likely to result in damaged tiles. Here’s a table outlining what you’ll need.
| Tool Category | Specific Items | Purpose |
|---|---|---|
| Safety Gear | Safety Glasses, Heavy-Duty Gloves, Dust Mask | Personal protection from debris and dust. |
| Protection | Drop Cloths, Plywood, Painter’s Tape | Protecting floors, walls, and fixtures from damage. |
| Plumbing Tools | Adjustable Wrench, Pliers, Screwdriver Set, Tub Drain Wrench | Disconnecting faucets, spouts, and drain assemblies. |
| Cutting Tools | Utility Knife, Grout Saw or Oscillating Multi-Tool, Reciprocating Saw | Cutting caulk, removing grout, and detaching the tub flange. |
| Prying & Lifting | Pry Bar, Hammer, Stud Finder | Locating studs and prying the tub away from the walls. |
Common Mistakes to Avoid
Even with a solid plan, things can go wrong. Being aware of common pitfalls can save you from a costly headache. One major error is not thoroughly cutting the caulk and grout seal, which can cause tiles to pull away with the tub.
Another mistake is underestimating the weight of the tub, leading to injury or damage when trying to move it. Always have a helper. Finally, working too quickly can lead to slips with tools that can easily chip or crack a tile. Patience is your most valuable tool in this process. If you encounter issues like a dip in the tub’s surface before removal, it might be a sign of underlying floor problems that need addressing, and you might find it helpful to learn how to fix a dip in a bathtub.
After the Tub is Out: Inspection and Prep
Once the old tub is gone, take the opportunity to inspect the subfloor and wall studs for any signs of water damage or mold. Make any necessary repairs before proceeding with the new installation. This is also the time to address any other lingering bathroom issues, like a strange odor. If you’ve recently had your tub reglazed and notice a smell, it’s a good idea to research how to get rid of smell from reglazing tub.
Clean the area thoroughly, scraping away any residual adhesive or sealant. This ensures a clean slate for your new bathtub. Proper preparation is key to a successful installation and preventing future problems. If you’re planning to install new trim, understanding the right adhesive is crucial; consider looking into how to glue trim to bathtub for a professional finish.
Conclusion: A New Tub Without the Tiling Nightmare
Removing a bathtub without damaging the tiles is a challenging but achievable DIY project. The keys to success are thorough preparation, patience, and the right tools. By carefully disconnecting the plumbing, meticulously cutting the surrounding seals, and methodically detaching the tub from its moorings, you can save your tile and pave the way for a beautiful new bathtub.
Remember to prioritize safety at every step and don’t hesitate to ask for help, especially when it’s time to lift the old tub out. With this guide, you’re now equipped with the knowledge to tackle this project confidently, transforming your bathroom while preserving the tile you love.