Load a Snowblower Into a Truck Without Breaking Your Back!
That heavy, awkward snowblower sitting in your garage presents a serious challenge. You need to transport it, but the sheer weight and bulk make the idea of lifting it into your truck bed daunting. It’s a common problem that can lead to severe back injuries or costly damage to your machine and vehicle if not handled correctly.
Attempting to muscle a 250-pound piece of equipment is a gamble. One wrong move, a loss of grip, or an unbalanced lift can have disastrous consequences. This guide provides a definitive, step-by-step blueprint for loading your snowblower safely and efficiently, eliminating the guesswork and the risk.
You'll Learn About
Why Proper Loading Technique is Non-Negotiable
Underestimating the difficulty of loading a snowblower is a frequent and costly mistake. The risks extend beyond simple muscle strain. Improper lifting is a leading cause of herniated discs and other debilitating back injuries that can have long-term effects on your quality of life.
Beyond personal injury, there is significant risk to your equipment. Dropping the machine can bend the auger, crack the housing, or damage the engine. Likewise, your truck can easily suffer dents on the tailgate, scratches in the bed, or even a shattered rear window. Taking a few extra minutes to use the right method is an investment in your health and your property.
Pre-Loading Checklist: Your 5-Minute Safety First Plan
Before you move the snowblower an inch, a brief preparation routine is essential. This quick check minimizes risks like fuel spills and ensures you have everything you need on hand, preventing dangerous improvisations later.
First, check the fuel tank. If it’s nearly full, consider siphoning some gasoline out to reduce weight and prevent spills, especially since the machine will be tilted. Next, clear a wide path from the snowblower’s storage spot to your truck, removing any tripping hazards like tools, cords, or uneven patches of ice. Finally, gather your equipment—ramps, straps, and gloves—so everything is within arm’s reach.
Drain or Stabilize the Fuel
A crucial, often overlooked step is managing the fuel. Never transport a snowblower with a full gas tank. The angle of ascent up a ramp can cause gasoline to leak from the cap’s vent hole, creating a dangerous fire hazard and a messy cleanup. It’s best to run the machine until the tank is nearly empty before loading.
If you cannot drain the fuel, ensure the fuel cap is screwed on as tightly as possible. Additionally, check the oil level. Tipping a snowblower excessively can cause oil to seep into the carburetor or cylinder, leading to starting problems and smoke when you next use it.
Choosing Your Method: The Best Ways to Load a Snowblower
There isn’t a single “best” way to load a snowblower; the right method depends on your physical ability, the equipment you have, and the size of your machine. The safest and most recommended approach involves using ramps. However, with proper technique and a helper, a manual lift is also possible.
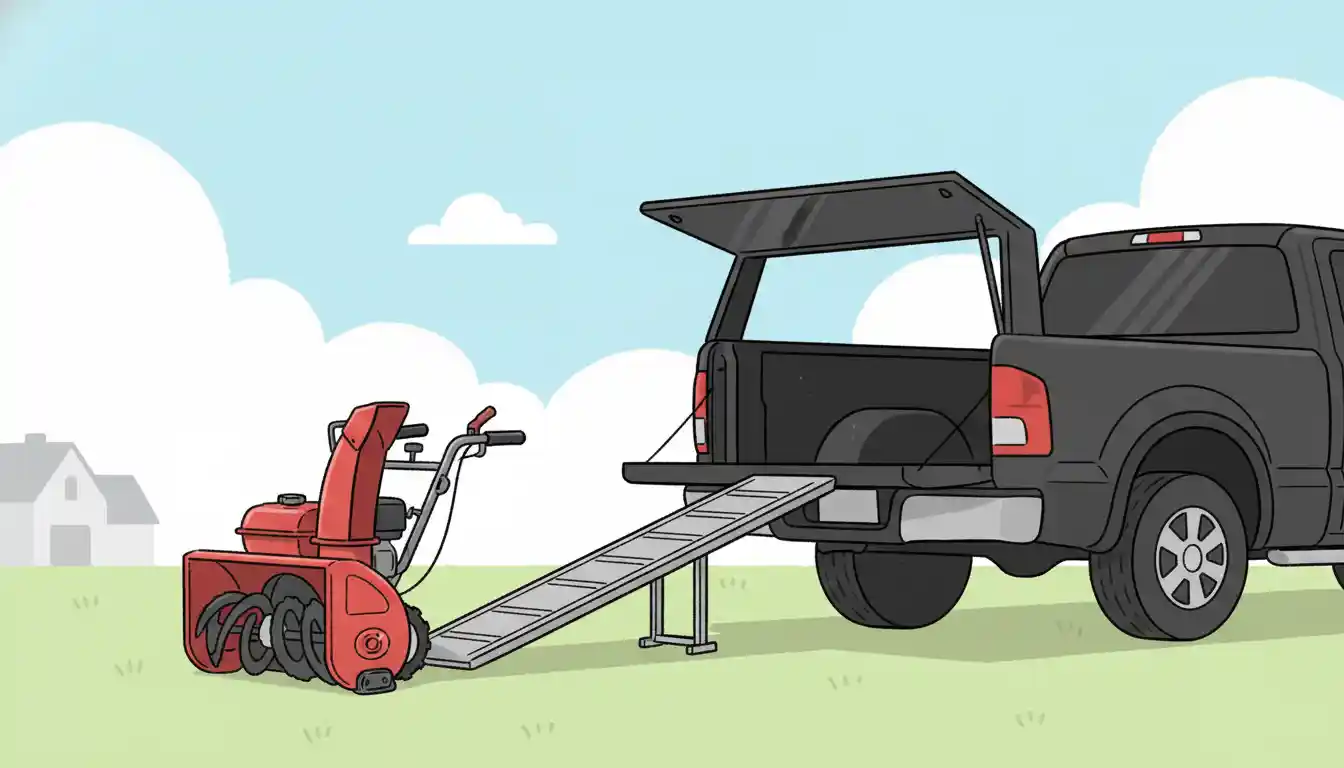
The Ramp Method: The Gold Standard for Safety
Using a set of sturdy loading ramps is by far the safest and most efficient method for one person to load a snowblower. It turns a risky lifting task into a controlled rolling motion. The investment in a good pair of ramps pays for itself by preventing just one potential injury or repair bill.
The process is straightforward. First, lower your truck’s tailgate and place the ramps, ensuring the connecting plates or fingers are resting securely on the edge. Crucially, you must secure the ramps to the truck using the provided safety straps. This prevents the ramps from kicking out from under the weight of the machine—a common cause of catastrophic failure. Wrap the straps around a secure part of your truck’s frame or hitch and tighten them so there is no slack.
Once the ramps are secure, align the snowblower. If you have a self-propelled model, start the engine and use the drive lever at the slowest speed to power it up the ramp while you walk behind it. If it is a push model, you will need to push it up carefully, maintaining steady forward momentum.
When choosing ramps, consider their design and capacity. Arched ramps are often better than straight ones, as they provide more clearance for the snowblower’s housing as it transitions from the ramp to the truck bed.
| Ramp Type | Pros | Cons | Best For |
|---|---|---|---|
| Folding Aluminum Ramps | Lightweight, easy to store, good traction. | Can be narrow, requires two separate ramps to be aligned. | Most homeowners with standard two-stage snowblowers. |
| Tri-Fold Ramps | Provides a wide, single loading surface, very stable. | Can be heavy and bulky to maneuver and store. | Larger, heavier snowblowers or for users wanting maximum stability. |
| Steel Ramps | Very strong, durable, often less expensive. | Heavy, susceptible to rust if not cared for. | Heavy-duty applications and budget-conscious buyers. |
| DIY Wooden Ramps | Inexpensive to build. | Heavy, can be slippery when wet, risk of breaking if not built correctly. | Emergency use or for those with strong DIY skills and proper materials. |
The Two-Person Lift: Brute Force with a Strategy
If you don’t have ramps, a two-person lift is your next best option, but it requires coordination and proper lifting technique. Do not attempt this method alone with a two-stage snowblower. Single-stage models may be light enough for one strong person, but it’s always safer to have help.
Designate one person to be the leader to call out commands. One person will grab the handlebars, while the other gets a firm grip on the front of the machine, typically around the auger housing or a sturdy frame component. Bend at the knees and keep your back straight. On the leader’s count, lift simultaneously and walk the machine to the tailgate. Rest the wheels on the edge of the tailgate first, then readjust your grips and slide it the rest of the way in.
The “No-Ramp” Power-Assisted Method
For self-propelled models, a lesser-known but effective technique can be used if you find yourself without ramps or a helper. This method requires careful control. Back the snowblower up to the tailgate so the handlebars are pointing away from the truck.
Tilt the snowblower back so the auger housing lifts off the ground, balancing the machine on its wheels. Engage the drive lever at the slowest speed and carefully let the tires “climb” the face of the tailgate. Once the wheels are on the truck bed, you can push the handlebars down to level the machine and roll it forward.
Once It’s In: How to Secure Your Snowblower for Transport
Getting the snowblower into the truck is only half the job. Proper securing is essential to prevent it from sliding and becoming a dangerous projectile during a sudden stop. Damage during transit is more common than people think.
Push the snowblower all the way to the front of the truck bed, with the heavy engine block pressed against the cab wall. This is the most stable position. Use at least two heavy-duty ratchet straps or cam buckle straps to lock it in place. Secure one strap around the engine or frame and another over the handlebars, attaching them to the anchor points in your truck bed. Tighten them until the snowblower’s suspension slightly compresses and the machine is completely immobile. After securing the machine, some find it helpful to perform related maintenance checks, perhaps considering if any treatments are needed for the auger housing, a topic explored in our article on spraying Pam on a snowblower.
Common Mistakes to Avoid: The Don’ts of Snowblower Loading
Many loading accidents are caused by a few common, preventable errors. Being aware of these pitfalls is the first step to avoiding them. The biggest mistake is overconfidence and trying to lift too much weight alone.
Another frequent error is using inadequate materials as ramps. Never use simple wooden planks like 2x6s. They can easily snap under the weight or become incredibly slippery when wet. Also, always remember to use the safety straps that come with your ramps; failing to do so can lead to the ramps slipping off the tailgate at the worst possible moment.
Unloading: The Process in Reverse (With a Twist)
Unloading can be just as hazardous as loading, as gravity is now working against you. The process is essentially the reverse of loading, but requires even more control. With ramps, it’s often safest to back the snowblower down while standing in the truck bed, using the drive clutch as a brake.
For a two-person lift, communication is again key. Slide the machine to the edge of the tailgate, get into your proper lifting positions, and lower it down in a coordinated effort. Rushing the unloading process is a recipe for losing control of the machine.
Frequently Asked Questions (FAQ)
Can you transport a snowblower lying on its side?
No, you should never transport a gasoline-powered snowblower on its side. Doing so can cause fuel to leak from the gas cap and oil to flood the carburetor and cylinder. This creates a fire hazard and will almost certainly cause engine problems.
What is the minimum recommended length for loading ramps?
The length you need depends on the height of your truck’s tailgate. For a standard pickup truck, ramps that are at least 7 feet long are recommended to create a safe, manageable incline. Shorter ramps will create a steeper angle, making loading more difficult and dangerous.
Is it better to push or pull a snowblower up a ramp?
For self-propelled models, it is safest to use the engine’s power and walk behind the machine, pushing gently to guide it. For non-powered models, you must push from behind. Never attempt to pull a snowblower up a ramp from the front while walking backward; this puts you in a very vulnerable position if the machine starts to roll back.