How to Hang Power Tools on Pegboard & Avoid a Costly Crash
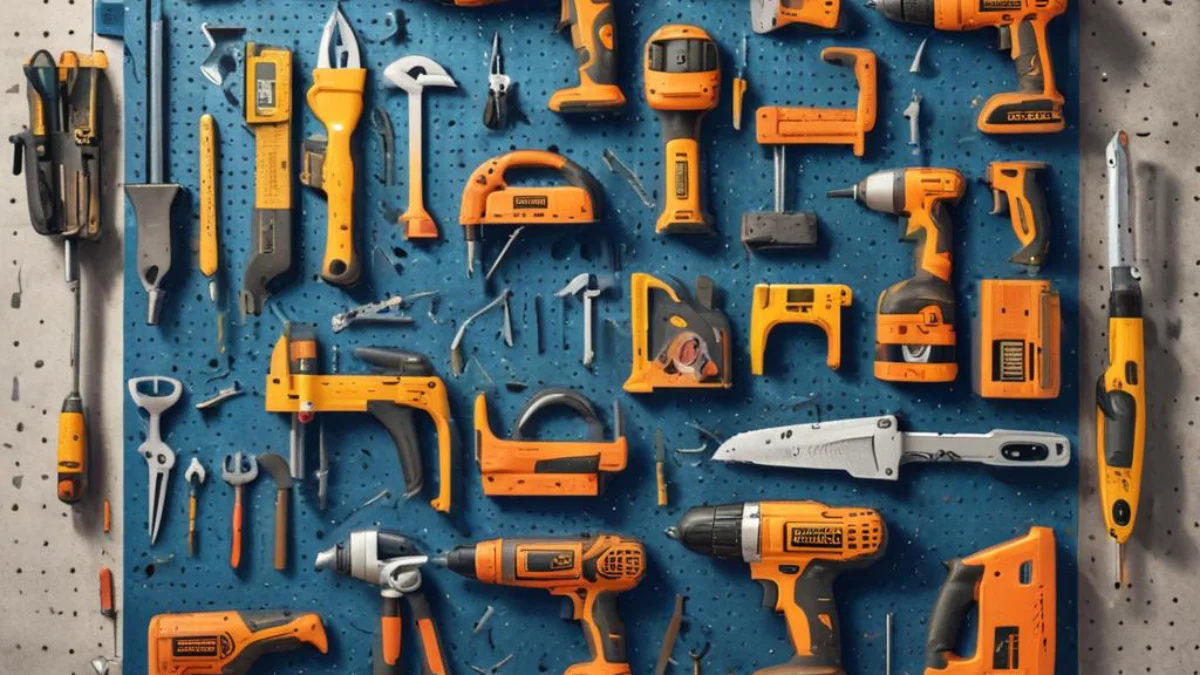
You have the tools. You bought the pegboard. You envisioned a pristine, organized workshop where every drill, saw, and sander had its perfect place, ready to grab at a moment’s notice. The reality, however, is often a source of constant anxiety.
Every time you hang your heavy cordless drill, you have a nagging fear. Will that flimsy-looking hook finally give way? Is today the day your expensive circular saw crashes to the concrete floor? This is the core problem for countless DIYers and professionals: a fundamental lack of trust in their pegboard system to securely hold their most valuable power tools.
This guide tackles that problem head-on. We will move beyond simple hooks and explore a comprehensive system for hanging your power tools with absolute confidence. It is time to transform your pegboard from a source of worry into the rock-solid organizational backbone of your workshop.
You'll Learn About
Why Your Power Tools Are a Pegboard Accident Waiting to Happen
The issue of falling tools isn’t just bad luck; it is a failure of the system. Understanding the root causes is the first step toward building a secure and reliable storage solution. Most failures can be traced back to one of three critical mistakes.
The Wrong Pegboard Material: Not All Boards Are Created Equal
The most common pegboard found in big-box stores is made of thin hardboard or pressboard. While this material is perfectly adequate for screwdrivers, wrenches, and other lightweight hand tools, it was never designed to handle the concentrated weight of a power tool.
This standard pegboard can sag, warp, and even tear under the stress of a 5-10 lb drill over time. The holes can elongate and fray, causing hooks to become loose and unstable. Relying on this material for your heavy equipment is the primary reason for catastrophic failures.
Using Flimsy, Inadequate Hooks
The second point of failure is often the hooks themselves. The small, single-peg J-hooks and L-hooks that come in most variety packs are simply not up to the task. They are typically made of thin-gauge metal and are prone to bending or slipping out of the board.
Hanging a cordless drill by its trigger guard on one of these hooks is a recipe for disaster. The weight is not properly distributed, and the hook can easily be knocked loose. Using the wrong hook is as dangerous as using the wrong board.
Improper Pegboard Installation: The Forgotten Foundation
You can have the strongest pegboard and the toughest hooks, but if the board isn’t securely mounted to the wall, the entire system is compromised. Many people make the mistake of screwing the pegboard directly into drywall.
Drywall alone cannot support the combined weight of the board and a full arsenal of power tools. Furthermore, mounting the board flush against the wall doesn’t leave the necessary clearance for the hooks to be properly inserted and secured. A solid foundation is non-negotiable.
The Ultimate Solution: Building a Failsafe Power Tool Pegboard
Now that we have identified the problems, let’s build the solution. A secure system is based on three pillars: the right material, the right hardware, and the right installation technique. Get these three things right, and your tools will stay exactly where you put them.
Step 1: Choose a Pegboard Built for Heavy Lifting
Forget the standard brown pressboard. To hang power tools, you need to upgrade to a material designed for significant weight loads. You have a few excellent options.
Metal Pegboard: This is the top-tier choice for strength and durability. Typically made from steel, metal pegboards have a very high weight capacity and will not warp or fray like hardboard. The holes are clean and will not wear out over time, ensuring your hooks stay snug.
Plastic Pegboard: High-density polymer or plastic pegboard systems are another fantastic option. They are incredibly strong, rust-proof, and often come in interlocking panels, allowing you to easily customize the size of your storage area. They often use proprietary, extra-secure hooks.
Thick Wood Pegboard: If you prefer a more traditional look, you can opt for 1/4-inch or even 1/2-inch thick plywood or hardwood pegboard. This is significantly stronger than standard hardboard and provides a very secure base, especially when properly mounted.
Step 2: Select the Best Hooks, Hangers, and Holders
With a sturdy board selected, your focus now shifts to the hardware that will actually hold the tools. Do not use standard single-peg hooks for anything heavier than a small flashlight. You need specialized hardware designed for the weight and awkward shapes of power tools.
Investing in the right holders is the most critical part of this process. It is the difference between a temporary fix and a permanent, secure solution. There are many excellent commercial options, as well as effective DIY solutions for uniquely shaped tools.

To help you decide, we have broken down the most effective options. Each type has its specific use case, and a great setup will likely use a combination of these to hold different tools.
Step 3: Master the Art of a Rock-Solid Installation
Your heavy-duty system needs a secure anchor. This means mounting it directly to the wall studs. First, use a stud finder to locate the studs in your desired wall space and mark them clearly.
Next, create a gap between the wall and the pegboard. This space is essential for allowing the back of the hooks to properly seat. The best way to do this is by creating a simple frame using 1×2 or 1×3 furring strips. Screw these strips horizontally into the wall studs, then mount your pegboard directly to the strips. This ensures the entire load is transferred to the solid frame of your house. Proper installation is crucial for safety, much like when you need to hang a heavy decorative mirror without worry.
A Guide to the Best Pegboard Hardware for Power Tools
Choosing the right hardware can be overwhelming. This table breaks down the most common and effective options to help you select the perfect holder for each of your power tools.
| Hook/Holder Type | Best For | Pros | Cons |
|---|---|---|---|
| Heavy-Duty Double-Arm Hooks | Circular Saws, Sanders, Angle Grinders | Very strong and stable; Distributes weight across two pegs; Versatile for various tools. | Can be bulky; May not be a perfect fit for all tool shapes. |
| Tool-Specific Cradles/Holders | Cordless Drills, Impact Drivers | Designed for a perfect, secure fit; Often includes space for bits or batteries; Looks clean. | Only fits the specific tool it was designed for; Can be more expensive. |
| Pegboard Shelves & Trays | Battery Chargers, Multi-tools, Glue Guns | Great for items that cannot be hung easily; Keeps accessories with their tools. | Takes up more pegboard real estate; Limited weight capacity per shelf. |
| Spring Clips / Grippers | Smaller tools, Flashlights, Awkward items | Holds items securely by tension; Adjustable to different diameters. | Not suitable for very heavy power tools; Can lose tension over time. |
| DIY Plywood Holders | Routers, Jigsaws, Any odd-shaped tool | Completely customizable for a perfect fit; Very strong and cost-effective. | Requires time and basic woodworking skills to create. |
How to Hang Your Most Common Power Tools: A Practical Guide
With your pegboard installed and your hardware selected, it is time for the satisfying part: getting your tools on the wall. Here is how to approach hanging some of the most common power tools for maximum security and accessibility.
Hanging Cordless Drills & Impact Drivers
These are often the most-used tools in any collection. The best solution is a dedicated drill holder or cradle. These metal or plastic brackets are perfectly shaped to hold the drill securely, and many include slots for storing your most-used drill bits right alongside it.
If you have multiple drills, consider a multi-tool rack. This is a wider bracket designed to hold two, three, or even four drills side-by-side. This creates a highly efficient “drilling station” on your pegboard.
Mounting Circular Saws & Angle Grinders
These tools are heavy and awkwardly shaped, making them a challenge. The most secure method is a set of heavy-duty, long double-arm hooks. You can place two hooks spaced apart to cradle the body of the saw or grinder.
For ultimate security, a DIY plywood holder is an excellent weekend project. You can trace the tool’s shape onto a piece of plywood and create a custom-fit holster that attaches to the pegboard. This ensures zero wiggle room and absolute peace of mind.
Organizing Sanders & Jigsaws
Palm sanders, orbital sanders, and jigsaws often sit nicely on a small pegboard shelf. A small metal or plastic shelf provides a stable base and keeps them from falling. This also gives you a place to store extra sandpaper or blades.
Alternatively, you can use a pair of long, straight pegboard hooks. Position the hooks so they support the tool’s base plate or body securely. Always test the balance before walking away to ensure it will not tip forward.
Pro Tips for a Truly Professional Pegboard Setup
Once your tools are securely hung, a few extra touches can elevate your organization from good to great. These tips improve efficiency and maintain the system over the long term.
Use Hook Locks or Retainers
One of the biggest frustrations with pegboards is hooks pulling out when you grab a tool. Solve this forever by using pegboard hook locks. These small plastic or metal clips slide over the hook and lock it firmly to the board, ensuring it stays put no matter how quickly you grab the tool.
Create a “Shadow Board”
For the ultimate in organization, trace an outline of each tool on the pegboard behind where it hangs. This “shadow” instantly shows you where each tool belongs and, more importantly, which ones are missing. It creates a clean, professional look and makes cleanup a breeze.
Establish Functional Zones
Group your tools on the pegboard by their function. Create a zone for drilling and driving, another for cutting tools, and a third for finishing and sanding tools. This logical layout makes finding the right tool for the job intuitive and fast.
Build a Dedicated Charging Station
Mount a power strip directly onto or just below your pegboard. Then, use pegboard shelves and brackets to hold your battery chargers. This creates a centralized charging station, ensuring you always have a fresh battery ready to go. Having reliable power exactly where you need it is a workshop game-changer, solving problems before they start. It’s much like troubleshooting your home systems; you never want to find yourself with no power going to a critical device.
Your Workshop, Transformed and Secure
By moving past the limitations of basic pegboard setups and embracing a system-based approach, you can finally achieve the organized workshop you have always wanted. It begins with choosing the right foundation—a strong metal or thick wood pegboard—and securing it properly to your wall studs.
From there, selecting task-specific, heavy-duty hooks and holders for each power tool ensures that everything stays in its place. You will no longer have to worry about the financial loss or safety hazard of a falling tool. You will have created a space that is not only organized but also efficient, safe, and professional. With a workshop this organized, you’ll feel empowered to take on even more ambitious projects, from indoor decor to complex outdoor tasks like figuring out the logistics of a challenging installation.

