Grow Garlic Vine From Seed: Your Ultimate Guide to Abundant Blooms
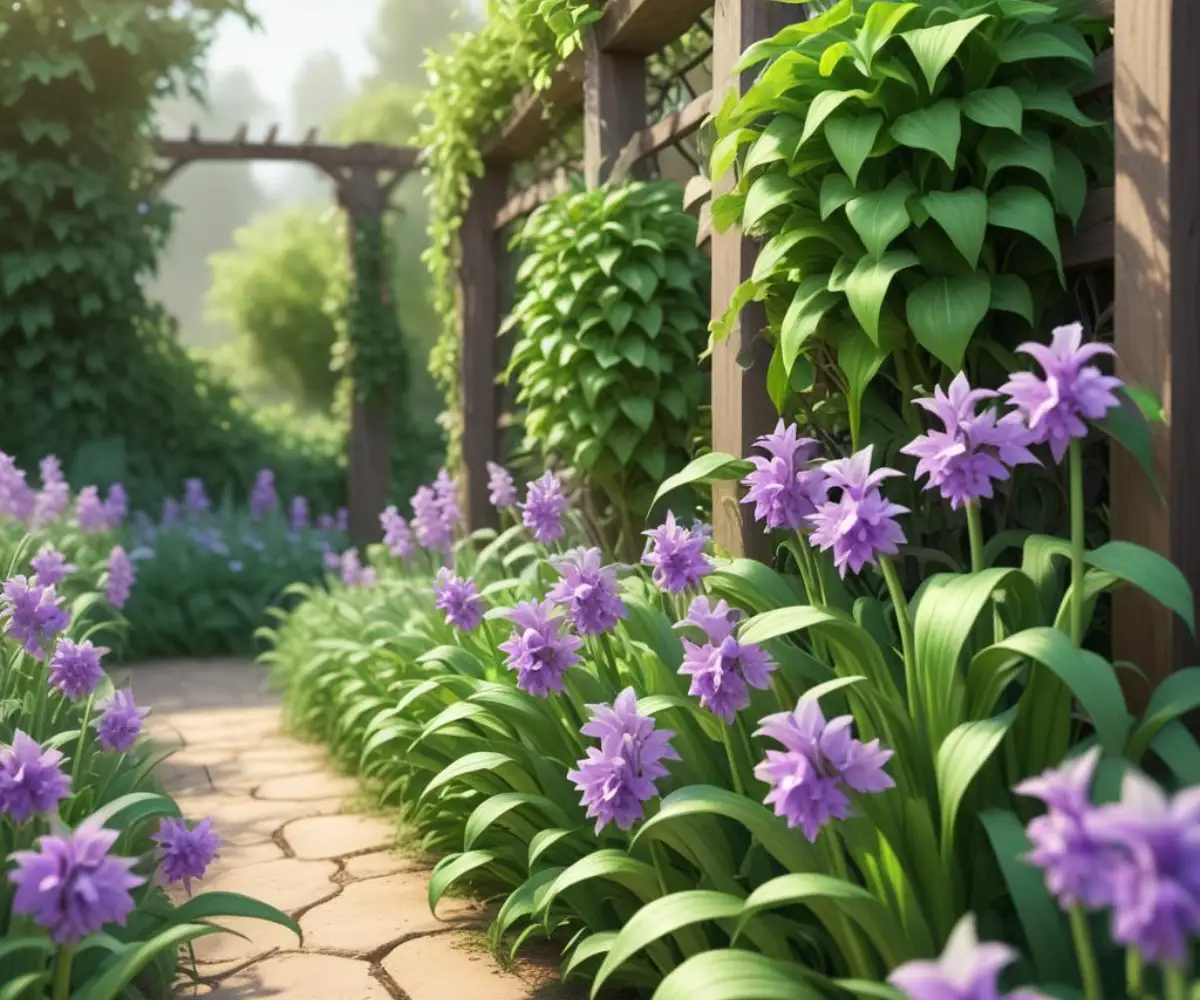
The allure of the garlic vine (Mansoa alliacea) is undeniable. Its cascading clusters of trumpet-shaped flowers, which magically shift from a vibrant purple to a delicate lavender and finally a soft white, can transform any garden trellis into a masterpiece. But for many gardeners, the dream of cultivating this tropical beauty from a simple seed quickly turns into a frustrating puzzle of failed attempts and unsprouted potential.
While propagating garlic vine from cuttings is a common and reliable method, the challenge and deep satisfaction of nurturing it from seed is a unique journey. The problem is a lack of detailed guidance, leading to common mistakes that doom seeds before they even have a chance to sprout. This guide confronts those challenges head-on, providing an expert, step-by-step blueprint to finally achieve success.
You'll Learn About
Why Do So Many Gardeners Fail with Garlic Vine Seeds?
Success begins with understanding the core reasons for failure. Growing garlic vine from seed isn’t like scattering common annuals; it requires precision and a grasp of the plant’s specific needs. The primary obstacles are often invisible, occurring long before a single green shoot has the chance to appear.
The Hidden Challenge of Seed Viability and Dormancy
Unlike many commercial seeds, garlic vine seeds have a relatively short period of viability. Sourcing fresh seeds is paramount. Seeds harvested from unripe pods or those that have been stored improperly for too long will likely never germinate, no matter how perfect the conditions. This is the first and most crucial hurdle that many aspiring growers don’t even know exists.
Furthermore, garlic vine seeds possess a natural dormancy that must be broken. In their native environment, this ensures they only sprout when conditions are ideal. Without the right preparation to signal that it’s time to grow, the seed will simply remain dormant in the soil, waiting for a trigger that never comes.
Incorrect Environmental Conditions
Germination is a delicate process entirely dependent on the environment. The most common errors include planting seeds too deep, providing inconsistent moisture, or failing to maintain the necessary warmth. Overwatering is particularly destructive, as it can lead to fungal diseases like “damping-off” that rot the seed or kill a seedling just as it emerges. This tropical vine demands warmth and humidity, conditions often lacking in a typical home garden setting without specific intervention.
Your Step-by-Step Blueprint for Seed Germination Success
By systematically addressing each potential point of failure, you can dramatically increase your chances of success. This process transforms seed starting from a game of chance into a reliable horticultural method. Follow these steps precisely for the best results.
Step 1: Sourcing and Preparing Viable Seeds
This initial stage is the foundation of your entire endeavor. Starting with high-quality, viable seeds is non-negotiable. If you are harvesting your own, wait for the long, woody seed pods on an established vine to turn brown and become completely dry. The pod will begin to split open on its own, revealing the papery, winged seeds inside. This is the optimal time for harvest.
Before planting, perform a simple viability test. Place the seeds in a bowl of lukewarm water. Viable, healthy seeds will typically sink after a few hours, while non-viable seeds will continue to float. Discard the floaters. To overcome dormancy, gently scarify the outer seed coat by lightly nicking it with a file or rubbing it with sandpaper, then soak the seeds in water for 12 to 24 hours. This process allows water to penetrate the seed coat, signaling the embryo to begin germination.
Step 2: Creating the Ideal Germination Station
Your seeds need a controlled, nurturing environment to sprout. Use a sterile seed-starting mix, which is finer and holds moisture more evenly than regular potting soil. A good DIY mix consists of equal parts peat moss (or coco coir), perlite, and vermiculite. Moisten the mix until it is damp but not waterlogged—it should feel like a wrung-out sponge.
Plant the prepared seeds about 1/4 to 1/2 inch deep in seed trays or small pots with drainage holes. Cover the containers with a clear plastic dome or plastic wrap to create a mini-greenhouse effect, which maintains high humidity. Place the tray in a warm location, ideally on a seedling heat mat set to maintain a consistent soil temperature between 75-85°F (24-29°C). Warmth is a critical trigger for germination.
Step 3: Nurturing Your Emerging Seedlings
Patience is key; germination can take anywhere from a few weeks to over a month. As soon as you see the first green sprouts, remove the plastic cover to ensure good air circulation and prevent fungal growth. Move the seedlings to a location where they will receive at least 6-8 hours of bright, indirect sunlight daily. A south-facing window or under full-spectrum grow lights is ideal.
Watering at this stage is critical. Allow the soil surface to dry slightly between waterings to prevent root rot. It is often best to water from the bottom by placing the seed tray in a shallow pan of water for 30 minutes, allowing the soil to absorb moisture without disturbing the delicate seedlings. Once the seedlings have developed their second set of leaves (their “true leaves”), begin feeding them with a half-strength, balanced liquid fertilizer every two weeks.
From Fragile Seedling to Thriving Vine: Essential Care Tips
Successfully germinating the seed is only half the battle. Your new garlic vine seedlings are delicate and require attentive care as they mature. The goal is to build a strong root system and gradually acclimate them to outdoor conditions for a seamless transition into the garden.
Hardening Off and Transplanting
Once your seedlings are several inches tall and have multiple sets of leaves, they need to be “hardened off.” This is the process of slowly introducing them to the outdoor environment. Start by placing them in a sheltered, shady spot for an hour on the first day, gradually increasing their exposure to sun and wind over the course of 7-10 days. This prevents transplant shock.
Choose a permanent location that receives full sun for the best flower production. Garlic vines require a sturdy support structure like a trellis, arbor, or strong fence to climb. The soil should be well-draining and enriched with compost. Dig a hole twice as wide as the seedling’s pot, gently place the plant in the hole, backfill with soil, and water thoroughly.
Long-Term Care for Spectacular Blooms
Garlic vines are relatively low-maintenance once established. Water deeply during dry spells, allowing the soil to dry out between waterings. Fertilize with a balanced, slow-release fertilizer in the spring to encourage vigorous growth. After the main flowering cycles in spring and fall, a light pruning will help maintain the vine’s shape and encourage more blooms. A thriving garlic vine can enhance your home’s curb appeal, framing architectural features beautifully. This focus on exterior quality is just as important as choosing the right windows, which can dramatically alter your home’s appearance and efficiency. Considering an upgrade like Pella vs. Champion windows involves weighing similar long-term aesthetic and functional benefits.
Be patient; a garlic vine grown from seed may take two to three years to produce its first flowers. This extended timeline is a little-known fact that can discourage impatient gardeners, but the reward of seeing those first blooms on a plant you’ve nurtured from the very beginning is immeasurable. Proper environmental control is key. Just as you manage humidity for delicate seedlings to prevent fungal issues, maintaining moisture balance throughout your property with innovations like a dripless air conditioner contributes to an overall healthier living and growing environment.
Troubleshooting Common Garlic Vine Growing Problems
Even with the best care, you may encounter issues. This table provides quick solutions to common problems that can arise from the seedling stage to maturity.
| Problem | Potential Cause(s) | Solution |
|---|---|---|
| Seeds fail to germinate | Old/non-viable seeds, soil too cold, inconsistent moisture, planted too deep | Use fresh seeds, perform a viability test, use a heat mat, maintain consistent moisture with a plastic dome, and plant no deeper than 1/2 inch. |
| Seedlings collapse at the base | Damping-off disease (fungal infection) from overwatering and poor air circulation | Increase air circulation immediately after sprouting, water from the bottom, and ensure soil is not waterlogged. |
| Yellowing leaves on seedlings or mature plants | Overwatering, poor drainage, or nutrient deficiency | Check soil moisture before watering, improve drainage in pots or garden beds, and apply a balanced fertilizer. |
| Leggy, weak seedling growth | Insufficient light | Move seedlings to a brighter location or supplement with a grow light for at least 6-8 hours a day. |
| Mature vine not flowering | Too young (if grown from seed), not enough sunlight, improper pruning | Be patient (2-3 years for seeded plants), ensure at least 6 hours of direct sun, and prune only lightly after flowering season. |
| Pest infestations (aphids, whiteflies) | Stressed plant, lack of beneficial insects | Spray with insecticidal soap or neem oil. Encourage beneficial insects like ladybugs in your garden. |
Growing garlic vine from seed is a testament to a gardener’s skill and patience. By understanding the specific needs of the seed and providing a meticulously controlled environment, you can overcome the common points of failure and embark on the rewarding journey of watching a tiny seed transform into a magnificent, flowering vine that will be the envy of your neighborhood for years to come.