How to Get Foam Insulation Out of Hair? Without a Panic Haircut
You’re in the middle of a DIY project, feeling accomplished, when a stray drip of expanding foam insulation lands directly in your hair. Panic sets in. Before you reach for the scissors, take a deep breath. Getting foam insulation out of your hair is tricky, but it’s not impossible.
This comprehensive guide will walk you through the safest and most effective methods to remove that stubborn, sticky mess without sacrificing your locks. We’ve researched the best techniques to help you tackle this frustrating situation head-on.
You'll Learn About
The Sticky Situation: Why Is Foam Insulation So Hard to Remove?
Spray foam insulation is a polyurethane product created from the reaction of isocyanates and polyol resin. When it leaves the can, it’s a liquid that rapidly expands and hardens, sticking to nearly everything it touches. This powerful adhesive quality makes it great for insulation but a nightmare for accidental contact.
The primary challenge is that once the foam cures, it becomes a rigid, permanent solid. Most solvents that can dissolve the uncured liquid form are ineffective on the hardened foam. This is why immediate action is so crucial to your success.
Uncured vs. Cured Foam: The Critical Difference
Your approach to removal depends entirely on whether the foam is still wet or has already hardened. Uncured foam is still in its sticky, liquid state. You have a small window of opportunity to act before it cures and becomes much more difficult to remove.
Cured foam has completely hardened and expanded. At this stage, chemical solvents are largely useless, and you’ll need to rely on mechanical and oil-based methods to break it down and comb it out.
Immediate Action: How to Remove Wet Foam Insulation from Hair
If you’ve just gotten the foam in your hair and it’s still wet, time is of the essence. Do not use water! Water can actually speed up the curing process of polyurethane foam, making the problem worse.
Instead, your best weapon is acetone. Most nail polish removers contain acetone and can be a lifesaver in this scenario. Immediately grab a bottle and get to work before the foam has a chance to harden.
Step-by-Step Guide for Uncured Foam:
- Act Fast: The moment you notice the foam, stop what you are doing. The quicker you address it, the easier it will be to remove.
- Grab Acetone: Find an acetone-based nail polish remover. Pure acetone from a hardware store is even better, but be cautious as it’s very strong.
- Apply Carefully: Soak a cotton ball or a clean rag in the acetone. Gently dab and wipe the wet foam, trying to lift it away from the hair strands. Avoid rubbing it in further.
- Work Quickly: Continue applying acetone until the foam dissolves. You’ll notice it breaking down into a more manageable liquid that you can wipe away.
- Wash Your Hair: Once you’ve removed the foam, wash your hair thoroughly with a clarifying shampoo to remove any acetone residue. Follow up with a deep conditioner, as acetone can be very drying.
It’s important to work in a well-ventilated area, as acetone fumes can be strong. Also, try to avoid prolonged contact with your scalp to prevent irritation.
The Hard Truth: Tackling Cured Foam Insulation in Hair
What if you didn’t notice the foam until it was already hard? Don’t despair. While more challenging, it’s still possible to remove cured foam insulation. This process requires patience and a gentle touch.
For hardened foam, you’ll be relying on oils and mechanical removal rather than solvents. The goal is to lubricate the hair and soften the foam’s grip so you can carefully comb it out. Aggressive pulling or scraping will only lead to hair breakage.
The Oil-Based Method for Hardened Foam
Oils are your best friend when dealing with cured spray foam. They work by lubricating the hair shaft and gradually softening the hardened foam, making it easier to break apart and remove. This method is much safer for your hair and scalp than attempting to use harsh chemicals.
You can use a variety of oils, many of which you may already have in your home. Olive oil, coconut oil, baby oil, or even vegetable oil can be effective. The key is to be generous with the application and give it plenty of time to work.
Step-by-Step Removal Process:
- Saturate the Area: Apply a generous amount of your chosen oil directly to the hardened foam and the affected hair. Don’t be shy; you want the area to be completely saturated.
- Let It Soak: This is the most critical step. Cover the oily section of your hair with a shower cap or plastic wrap to trap heat and prevent a mess. Let the oil soak for at least an hour; several hours is even better.
- Gently Massage: After soaking, gently massage the area with your fingertips. You should start to feel the foam breaking down and crumbling.
- Comb It Out: Using a fine-tooth comb, carefully begin to comb through the affected hair. Start at the ends and slowly work your way up to the foam. Gently pick apart the foam as it loosens.
- Reapply if Needed: If the foam is still stubborn, reapply more oil and let it sit for another hour before trying to comb it out again. Patience is key to avoiding hair damage.
- Shampoo Thoroughly: Once all the foam is removed, you’ll need to wash your hair several times to get all the oil out. Use a good clarifying shampoo and follow with a moisturizing conditioner.
Comparing Removal Methods: What’s Right for You?
Understanding your options is crucial for a successful outcome. The method you choose will depend on the state of the foam and the products you have available. Rushing the process or using the wrong technique can cause unnecessary damage to your hair.
Whether you’re dealing with a fresh spill or a hardened chunk, having a clear plan will make the situation less stressful. Remember to prioritize the health of your hair and scalp throughout the process.
| Method | Best For | Pros | Cons |
|---|---|---|---|
| Acetone / Nail Polish Remover | Uncured (Wet) Foam | Fast and effective at dissolving wet foam. | Ineffective on cured foam; can be very drying to hair and skin; strong fumes. |
| Oils (Coconut, Olive, etc.) | Cured (Hardened) Foam | Safe for hair and scalp; moisturizes hair; readily available. | Requires a long soaking time; can be messy; requires multiple shampoos to remove. |
| Mechanical Removal (Combing) | Cured (Hardened) Foam | Effective when combined with oil; avoids harsh chemicals. | Can cause hair breakage if not done gently; very time-consuming. |
| Cutting the Hair | Last Resort | Guaranteed removal of the foam. | Results in hair loss; should be avoided if possible. |
Preventative Measures: Avoiding a Hairy Situation in the Future
The best way to deal with foam insulation in your hair is to prevent it from happening in the first place. DIY projects can be unpredictable, but taking a few simple precautions can save you a lot of trouble. Proper preparation is essential for a smooth and safe project.
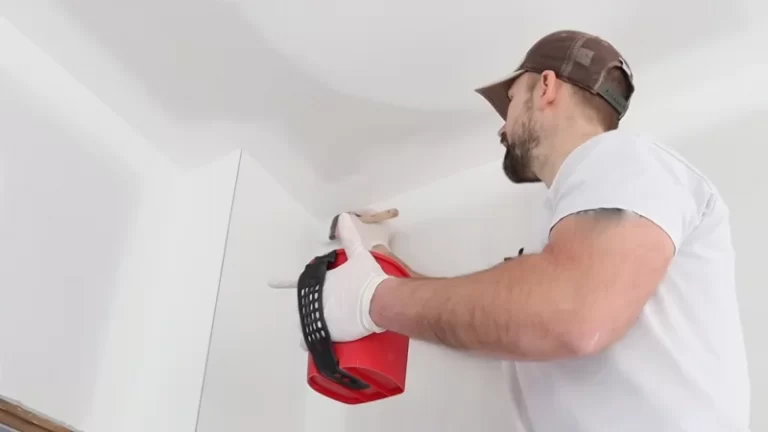
Whenever you are working with expanding foam, always wear protective gear. This includes gloves, safety glasses, and most importantly for this topic, a hat or head covering. Tying back long hair is also a crucial step to keep it out of the way.
Working in a well-lit and organized space can also reduce accidents. If you are working on a project like figuring out how to insulate skylights for winter, ensure your workspace is clear and you have a stable footing to avoid slips that could lead to accidental contact with the foam.
What Not to Do: Common Mistakes to Avoid
In a moment of panic, it’s easy to make the situation worse. Do not use harsh industrial solvents not meant for skin or hair contact. These can cause chemical burns and significant damage. Also, avoid yanking or pulling at the foam, as this will lead to hair breakage.
Another common mistake is applying water to wet foam, which accelerates curing. And finally, resist the immediate urge to cut the foam out. With patience, the oil-based methods are often successful, preserving your hair. Sometimes other home maintenance issues, such as trying to figure out why your air conditioner drain make noise in sink, can be distracting, but always prioritize safety when using strong chemical products.
Understanding Product Labels and Safety
Always read the manufacturer’s instructions and safety warnings on the spray foam canister before you begin your project. These labels provide crucial information on handling, cleanup, and potential hazards. The chemicals in spray foam can be irritants to the skin, eyes, and respiratory system.
Being aware of the product’s properties can help you work more safely and effectively. It also prepares you for proper cleanup and disposal, which is important for any home project, including learning how to dispose air conditioner massachusetts properly.
Conclusion: Patience and the Right Technique Are Your Best Tools
Getting foam insulation in your hair is a frustrating and alarming experience, but it doesn’t have to end in a disaster. By quickly assessing whether the foam is wet or dry and using the appropriate removal method, you can resolve the issue without resorting to a haircut.
For wet foam, act fast with acetone. For cured foam, be patient and let oil do the hard work. By following these steps and prioritizing safety, you can successfully remove the stubborn adhesive and get back to your DIY projects with your hair intact.