How to Get Drywall into Basement: Your Ultimate Guide to Avoid Disaster!
You’ve done the planning and bought the materials for your dream basement renovation. Then, reality hits. A towering stack of 4×8 drywall sheets sits on your driveway, and the only way to get it to its destination is down a narrow, unforgiving flight of stairs. This is the moment many DIY dreams face their toughest challenge.
Getting heavy, awkward, and surprisingly fragile drywall sheets into a basement can feel like an impossible puzzle. It’s a task filled with risks of damaged walls, chipped drywall corners, and strained backs. But with the right strategy and preparation, you can conquer this renovation hurdle like a pro.
You'll Learn About
Why Is Getting Drywall into a Basement So Hard?
Before jumping into solutions, understanding the core challenges helps you plan effectively. Transporting drywall isn’t like moving furniture; its unique properties make it a logistical nightmare in tight spaces. The sheer size, weight, and fragility of the panels are the primary obstacles.
Common issues include navigating tight stairwells, sharp turns, and low ceilings. A standard 4×8 sheet of 1/2-inch drywall weighs over 50 pounds, making it a difficult load for even two people. The brittle gypsum core and paper facing mean the corners and edges are incredibly easy to damage, turning a perfect sheet into a piece that requires frustrating repair work.
The Unseen Obstacles: Turning Radius and Clearance
Most people measure the width of their stairs and assume if the drywall is narrower, it will fit. The real problem is often the turning radius. If your stairs have a landing with a 90-degree or 180-degree turn, the length of the drywall sheet becomes the critical dimension. This lack of clearance is where most DIYers get stuck.
Similarly, low-hanging pipes, ducts, or light fixtures on the ceiling of the stairwell can easily snag and break a sheet of drywall. These obstacles turn a simple carry into a complex, angled maneuver that requires strength, coordination, and a great deal of patience. Without a solid plan, you risk damaging your home and wasting expensive materials.
Before You Begin: Planning and Preparation are Key
Success lies in the preparation. Rushing this stage is a recipe for failure. A few hours of careful planning will save you hours of struggle and frustration. Start by clearing the path and assembling the right gear.
Before you even think about moving the first sheet, you need to measure your path, choose the right materials for the job, and gather a toolkit designed for the task. And most importantly, you need to accept that this is not a one-person job. A reliable helper is the most valuable tool you can have.
Measure Everything… Twice!
Do not skip this step. Grab a tape measure and get detailed measurements of the entire path the drywall will travel. This includes the width of every doorway, the width of the staircase (between railings or walls), the ceiling height over the stairs, and the dimensions of any landings.
Pay special attention to the tightest corners. Simulate carrying a large object through the space to identify potential pinch points. This simple act can help you decide if you need to use smaller sheets or a different method entirely. Proper preparation is essential for any major home project, just as it is when dealing with potential issues like the dangers of exposed garage ceiling insulation in other areas of your home.
Choosing the Right Drywall Size
While large 4×12 sheets mean fewer seams to tape and mud, they are often impossible to get into a basement. Standard 4×8 sheets are more common for DIY projects but can still present a challenge. If your measurements show that a 4×8 sheet won’t make a turn, don’t force it.
Consider using smaller sheets if necessary. While it means more finishing work later, it’s far better than having a stack of unusable drywall. For basement projects, moisture-resistant drywall (often called “green board” or “purple board”) is highly recommended to prevent mold and mildew growth in a damp environment.
| Drywall Size (Feet) | Typical Thickness (Inches) | Best Use Case for Basements | Transport Difficulty |
|---|---|---|---|
| 4 x 8 | 1/2″ or 5/8″ | Standard for most walls and ceilings with 16″ on-center studs. | Moderate; difficult on tight turns. |
| 4 x 10 | 1/2″ or 5/8″ | Reduces horizontal seams on 10-foot walls. | High; very difficult for most staircases. |
| 4 x 12 | 1/2″ or 5/8″ | Ideal for long, uninterrupted walls to minimize finishing work. | Very High; usually requires professional delivery or window access. |
| 2 x 2 | 1/2″ | Repair patches or extremely tight access areas. | Low; easy to carry but creates many seams. |
Assembling Your Toolkit
Having the right tools makes the job safer and easier. A drywall panel carrier is an inexpensive tool that provides a handle to grip the bottom of the sheet, drastically improving control. You should also have sturdy work gloves, safety glasses, and a utility knife on hand.
Other useful items include a tape measure, a drywall T-square for any necessary cuts, and possibly a dolly or cart if you have a straight, flat path from the delivery spot to the basement stairs. Protect your finished floors and walls with cardboard or moving blankets.
Recruit a Helper (or Two)
This is not a solo mission. Attempting to move full sheets of drywall alone is dangerous and almost guarantees you will damage the material. You need at least one other person who can help lift, guide, and spot obstacles.
Coordinate with your helper before you lift the first sheet. Decide who will walk backward, who will lead, and how you will communicate. A simple plan like “stop,” “up,” “down,” and “watch the corner” can prevent a lot of accidents.
The Best Methods for Getting Drywall into the Basement
Once you are prepared, it’s time to choose your method. Depending on the layout of your home, one of these strategies should provide a viable path forward. In some cases, a combination of methods might be necessary.
Method 1: The Straight Shot Down the Stairs
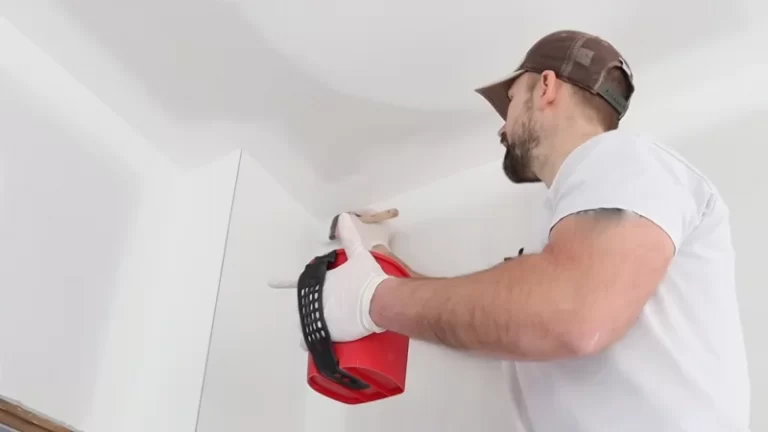
This is the most straightforward method, but it only works if you have a straight staircase with adequate clearance on all sides. Even with a straight shot, technique is crucial. The goal is to keep the drywall sheet as vertical as possible to navigate the space.
Have two people carry the sheet on its long edge. The person at the bottom should walk backward down the stairs, while the person at the top guides the sheet and controls the angle. Communicate constantly about footing, clearance, and when to pause. Go slowly and deliberately, focusing on protecting the corners of the drywall from hitting the walls or stairs.
Method 2: The Window of Opportunity
If your basement has a large enough window, such as an egress window or a slider, this can be the easiest method of all. It completely bypasses the treacherous staircase. You can feed the sheets directly into the basement from the outside.
You may need to remove the window sash to create a large enough opening. Place a sturdy plank or ladder leading up to the window from the outside to make it easier to slide the sheets. Have one person outside feeding the drywall through the opening and another person inside to receive and stack it safely. This method is a game-changer if your home’s layout allows for it.
Method 3: The “Cut-and-Carry” Technique
When all other options fail due to extremely tight turns or narrow passages, cutting the drywall is your last resort. While it creates more seams to finish later, it’s a practical solution to an otherwise impossible problem. You can cut the sheets in a way that minimizes the extra work.
One popular technique is to cut the sheets in half, turning a 4×8 sheet into two manageable 4×4 pieces. Another method involves scoring the back paper of the drywall sheet, carefully folding it like a book to get it through the tight space, and then unfolding it in the basement. This preserves one clean, finished side and can work well for walls, though it is not recommended for ceilings.
Professional Solutions: When to Call for Help
Sometimes, the best DIY solution is knowing when to hire a professional. If moving dozens of sheets seems too daunting, or if access is particularly difficult, calling in experts can save you time, effort, and potential damage. Before installing the new walls, it’s also a good time to ensure the wall cavities are free of pests, as dealing with mice in walls but not in the house is much harder after the fact.
Many building supply companies offer basement delivery for an additional fee. Their experienced crews can often move an entire project’s worth of drywall into your basement in under an hour. For extremely difficult access, they may even use a boom truck with a conveyor to feed sheets through a window. The extra cost is often well worth the saved labor and lack of risk.
Safety First: How to Avoid Injury and Damage
Moving drywall is physically demanding work. It’s crucial to prioritize safety for yourself and your home to avoid turning a renovation project into a trip to the emergency room or a costly home repair claim. Careful preparation can prevent most common issues.
Protecting Your Home
Your walls, floors, and railings are all at risk. Before you start, cover finished floors with cardboard or heavy-duty tarps. Pad sharp corners on walls and railings with old blankets or bubble wrap secured with painter’s tape. If you need to remove a handrail to gain a few precious inches of clearance, do so carefully and be sure to reinstall it securely afterward.
Also, plan your route around existing fixtures. Understanding how to handle these can be part of the prep work, similar to tasks like learning about fireplace gas valve cover plate removal if you’re working around a hearth. A little foresight goes a long way.
Protecting Yourself
Personal safety is paramount. Always lift with your legs, not your back, to avoid serious injury. Wear steel-toed boots to protect your feet in case a sheet is dropped, and always wear sturdy gloves to protect your hands from cuts and improve your grip. Safety glasses can protect your eyes from dust and debris.
Take frequent breaks to avoid fatigue, as this is when most accidents happen. Stay hydrated and don’t try to carry more than you and your partner can comfortably handle. It’s better to make more trips than to risk an injury by trying to move too many sheets at once.
After the Move: Storing Your Drywall Properly
Once the drywall is finally in the basement, your job isn’t quite done. Improper storage can ruin the sheets before you even get a chance to install them. Drywall is susceptible to warping and moisture damage if not stored correctly.
The best way to store drywall is to lay it flat on a level surface. Use several pieces of scrap wood (2x4s) as bearers on the floor to keep the bottom sheet off the concrete and allow for air circulation. Never lean the sheets against a wall for an extended period, as this will cause them to bow and warp. Keep the drywall away from any potential sources of moisture until you are ready to hang it.
Frequently Asked Questions (FAQs)
Can one person move drywall into a basement?
It is strongly discouraged. A standard 4×8 sheet of 1/2-inch drywall weighs over 50 pounds and is extremely awkward to handle alone. The risk of personal injury and material damage is very high. Always work with at least one helper.
Is it better to use smaller drywall sheets for a basement?
If access is tight, using smaller sheets is a practical solution. While it results in more seams to finish, it can make the transportation phase significantly easier and safer. The most common size is 4×8, but if you can only fit 4×6 or smaller, that is a perfectly acceptable compromise.
How much does it cost to have drywall delivered to the basement?
Prices vary by supplier and location, but you can expect to pay an additional fee per sheet or a flat rate for basement delivery. This service can range from $50 to a few hundred dollars, depending on the size of the order and the difficulty of the access. It’s best to call local suppliers for a direct quote.
Conclusion: A Manageable Task with the Right Approach
Getting drywall into a basement is often the first major physical challenge of a finishing project, but it doesn’t have to be a disaster. By approaching the task with careful planning, the right tools, and a focus on safety, you can move your materials into place without damaging your home or yourself.
Measure your path, choose the right size of drywall for your access, and never hesitate to recruit help or even hire professionals for the job. With the drywall safely in your basement, you’ll be one giant step closer to realizing the vision for your new living space.